To choose the right tie-dye technique, consider your design vision, fabric type, and desired effect. If you want bold, defined patterns, spiral or bullseye folds work well; for vibrant, marbled looks, try scrunching. Stripes and ombre effects need precise folding and gradual dye blending. Natural fibers like cotton absorb dye best, and fiber-reactive dyes give lasting color. Matching these elements guarantees your vision shines, and exploring more techniques will help you perfect your craft.
Key Takeaways
- Identify your desired pattern style, such as spirals for bold designs or crumple for vibrant, marbled effects.
- Consider fabric type and dye compatibility, choosing natural fibers and fiber-reactive dyes for bright, lasting colors.
- Match folding and binding methods to your skill level and the complexity of the intended design.
- Plan color placement carefully to control contrasts, gradients, or blended effects according to your vision.
- Factor in dye application and setting times to ensure optimal color intensity and pattern clarity.
Understanding Basic Tie-Dye Techniques
Before you plunge into complex patterns, it helps to master basic tie-dye techniques. You’ll want to start with simple folds, twists, and binds using rubber bands to create distinct sections on your fabric. These methods control where the dye lands, shaping your design’s foundation.
Basic techniques like accordion folds, crumpling, and stripes are great starting points. You’ll apply dye in specific areas to achieve bold contrasts or smooth gradients. Understanding how fabric manipulation affects dye absorption will give you more control over your results.
As you practice, you’ll notice how tension in the fabric and dye application change the final look. Mastering these basics guarantees you can confidently experiment later, making your tie-dye vision clearer and easier to achieve.
Exploring Spiral and Bullseye Patterns
Once you’ve got the hang of basic folds and binds, you can start experimenting with more dynamic designs like spirals and bullseyes.
For a spiral, pinch the fabric’s center and twist it tightly into a flat spiral shape, then secure with rubber bands radiating outward like pizza slices. Apply different colors to each section for a bold, swirling effect.
Bullseye patterns require you to pinch the fabric where you want the center, then pull it upward into a cone shape. Wrap rubber bands at intervals along the cone’s length, creating rings. Dye each section separately to achieve concentric circles.
Both patterns offer visually striking results and let you play with color placement easily. These techniques add a creative spin beyond basics, perfect if you want your project to stand out.
Mastering Crumple and Scrunch Dyeing
Although crumple and scrunch dyeing might seem random, you can control the outcome by how you gather and compress the fabric.
When you scrunch fabric tightly, you create dense clusters that absorb more dye, resulting in vibrant, textured patterns. For softer, more blended effects, loosen your grip to allow colors to flow and mix. Remember to evenly apply dye across the scrunched fabric to avoid overly concentrated spots.
Use multiple colors for a dynamic look or stick to one for subtlety. Be mindful of fabric thickness; thinner fabrics show more intricate details, while thicker ones create bolder textures.
Once dyed, let the fabric sit longer to deepen colors. Mastering this technique means balancing your grip and dye application to achieve the organic, marbled effects crumple and scrunch dyeing is known for.
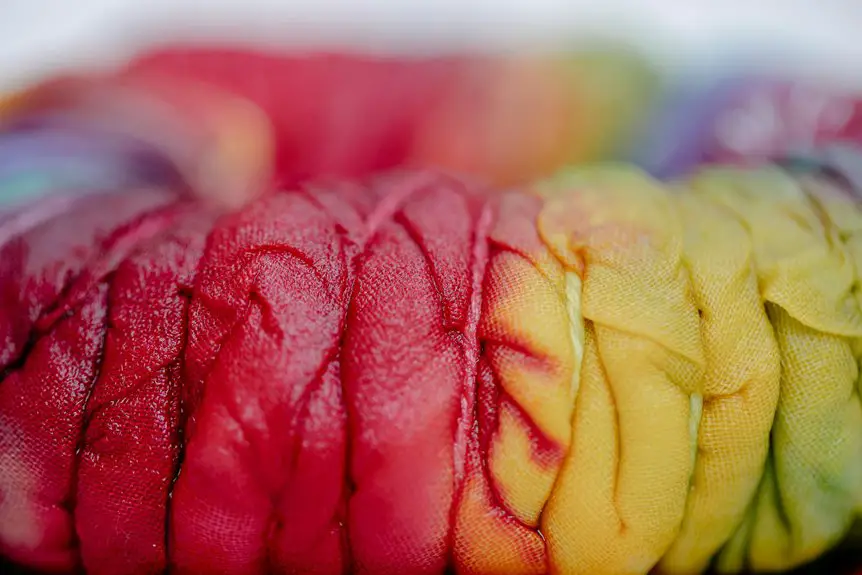
Creating Stripes and Ombre Effects
To create bold stripes, you’ll need to fold your fabric carefully and apply dye in controlled sections.
Achieving a smooth ombre effect requires blending colors gradually while prepping your fabric to absorb dye evenly.
With the right techniques and preparation, you can make stunning striped and ombre designs every time.
Stripe Pattern Techniques
Three popular stripe pattern techniques can help you create striking tie-dye designs with bold stripes or smooth ombre effects.
First, try the accordion fold—fold your fabric back and forth in narrow pleats, then bind tightly with rubber bands at intervals. This method produces crisp, evenly spaced stripes.
Next, the spiral stripe technique involves twisting the fabric into a tight spiral and securing it with bands placed radiating from the center; it creates a dynamic striped swirl.
Finally, the clamp stripe technique uses a flat clamp or ruler to press the fabric, then applies dye along the edges, resulting in clean, parallel stripes.
Each technique offers unique stripe styles, so experiment to see which one fits your vision best.
Ombre Color Blending
Anyone looking to create smooth shifts between colors will find ombre color blending an essential technique. You’ll start by applying dye gradually, moving from the darkest shade to the lightest, allowing colors to fade seamlessly into one another.
To get crisp stripes or subtle ombre effects, work in sections, carefully overlapping colors where you want them to blend. Using spray bottles or squeeze bottles helps control the dye application, giving you precision.
Remember to keep your fabric taut or flat to avoid unwanted pooling that can disrupt the gradient. Ombre works best when you think about how colors will mix and change, so plan your palette accordingly.
This technique brings a sophisticated, flowing look to your tie-dye projects that’s both eye-catching and stylish.
Fabric Preparation Tips
Proper fabric preparation lays the foundation for striking stripes and smooth ombre effects in your tie-dye projects.
Start by choosing natural fibers like cotton, which absorb dye evenly. Wash your fabric to remove sizing or chemicals that might block dye absorption.
For stripes, fold your fabric accordion-style and secure it tightly with rubber bands at regular intervals—this controls where dye colors develop.
To achieve ombre effects, dampen your fabric evenly before dyeing; the moisture helps colors blend gradually. Use a spray bottle to apply dye lightly at the edges, allowing it to fade naturally toward the center.
Working With Shibori and Resist Methods
If you want to create intricate patterns beyond simple folds and twists, working with Shibori and resist methods will open up a world of possibilities.
These techniques rely on binding, stitching, or clamping fabric to resist dye in specific areas, producing unique textures and shapes.
Binding, stitching, or clamping fabric blocks dye, creating distinctive textures and patterns with unique visual appeal.
To get started, focus on these key points:
- Experiment with folding, twisting, or stitching to create varied resist patterns—each method offers a distinct effect.
- Use clamps, rubber bands, or string tightly to control where the dye penetrates, ensuring sharp contrasts.
- Practice patience; some Shibori techniques require precise folding and multiple dye baths for the best results.
Choosing the Right Fabric for Your Design
Fabric choice shapes how your tie-dye design will turn out, affecting color absorption, texture, and durability. Natural fibers like cotton, rayon, and silk absorb dye more vividly, giving you bright, lasting colors.
Cotton’s versatility makes it a popular pick for beginners and pros alike, while silk adds a luxurious sheen and softer feel. Avoid synthetic fabrics such as polyester unless you use special dyes, since they resist color and won’t achieve the classic tie-dye look.
Consider your project’s purpose too—t-shirts need durable fabrics, while scarves can benefit from softer, flowy materials. By matching fabric type to your design goals, you set yourself up for success.
Choose wisely, and your tie-dye vision will shine exactly how you imagine it.
Selecting Dye Types and Colors
Because your choice of dye directly influences the vibrancy and longevity of your tie-dye project, selecting the right type and color is essential.
You want dyes that match your fabric and desired effect. Here’s what to take into account:
- Fiber-reactive dyes: Perfect for natural fibers like cotton, these dyes bond chemically, offering bright, lasting colors.
- All-purpose dyes: Versatile but less vibrant and durable, they work on mixed fabrics but may fade faster.
- Color selection: Choose colors that complement each other and your design style.
Tips for Achieving Vibrant and Long-Lasting Results
Choosing the right dye sets the foundation, but how you apply it makes all the difference in achieving vibrant, long-lasting results.
First, prep your fabric by washing it without fabric softener to remove residues that block dye absorption. Use fiber-reactive dyes for bright, durable colors, and mix them with soda ash to fix colors better.
Prep fabric by washing without softener; use fiber-reactive dyes combined with soda ash for vibrant, lasting colors.
Apply dye evenly and avoid oversaturating areas to prevent muddy blends. After dyeing, wrap your fabric in plastic and let it sit for 6 to 24 hours to allow the dye to bond fully.
Rinse with cold water until it runs clear, then wash separately in warm water with mild detergent. Finally, air-dry your piece away from direct sunlight to preserve color intensity longer.
Frequently Asked Questions
Can Tie-Dye Be Done on Non-Fabric Items Like Ceramics or Wood?
You can’t tie-dye ceramics or wood the same way you do fabric, but you can create similar colorful patterns using special paint or dyes designed for those surfaces. Just make sure to seal your work afterward!
How Do I Safely Dispose of Leftover Dye Materials?
You should never pour leftover dye down the drain. Instead, mix it with cat litter or sawdust to solidify, then dispose of it in the trash. Always check local guidelines for hazardous waste disposal to stay safe.
What Are the Best Storage Methods for Tie-Dye Finished Products?
Imagine you’ve just finished a vibrant shirt; you’ll want to store it in a cool, dry place away from direct sunlight to prevent fading. Using breathable cotton bags helps keep your tie-dye fresh and vibrant longer.
Can Tie-Dye Techniques Be Combined With Other Fabric Art Methods?
You can definitely combine tie-dye with other fabric art methods like embroidery, fabric painting, or applique. Mixing techniques lets you create unique, textured designs that bring your creative vision to life with vibrant, personalized flair.
How Do Environmental Factors Affect the Tie-Dye Process and Results?
Did you know 70% humidity boosts dye absorption? When you tie-dye, environmental factors like temperature and humidity affect color vibrancy and drying time, so you’ll get the best results by working in stable, moderate conditions.