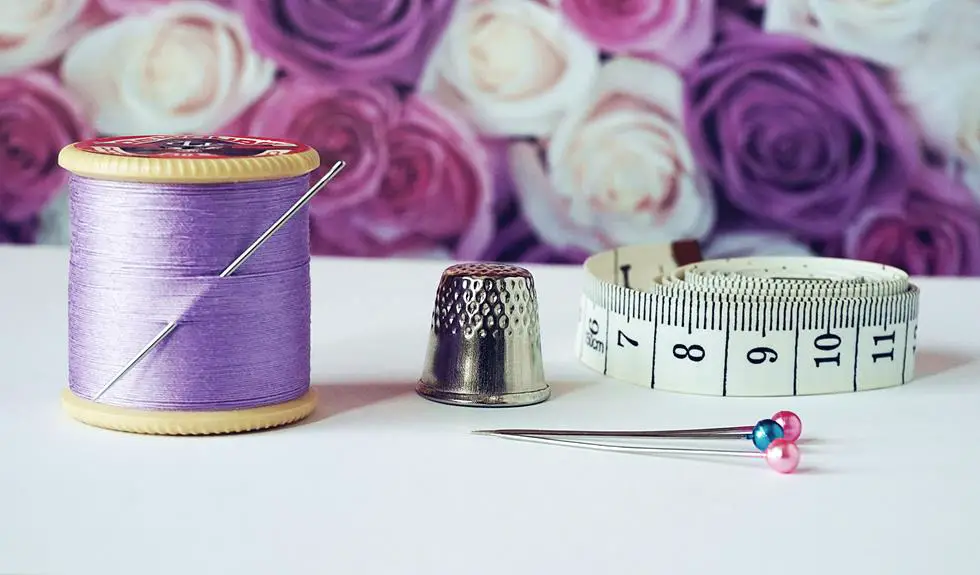
When you're working with fabric, pin marks can be a frustrating detail that disrupts your project's overall look. To avoid them, you might want to consider using finer pins or exploring alternative fasteners like fabric clips. It's also essential to pin strategically, placing pins at regular intervals and testing on scrap fabric first. But that's just the beginning; there are other techniques you might find helpful. Curious about how pressing and careful storage can enhance your fabric handling?
Table of Contents
Key Takeaways
- Choose delicate fabric pins with fine tips to minimize marks and opt for shorter pins for easier handling.
- Use alternative fasteners like fabric clips or basting adhesive to secure layers without creating pinholes.
- Pin fabric edges rather than closer to seam lines to reduce the visibility of pin marks.
- Test pin types and placements on scrap fabric to determine the least damaging options for your main project.
Choose the Right Pins
When selecting pins, opt for those specifically designed for delicate fabrics to minimize the risk of leaving marks. These pins usually feature finer, sharper tips that can easily glide through the fibers without causing damage. Using standard pins can create larger holes that may be visible after you remove them, especially on lightweight or sheer materials.
It's also essential to consider the pin's length and thickness. Shorter pins can be easier to manage and less likely to leave a lasting impression, while thinner pins are less invasive. You might want to try silk pins, which are designed for this very purpose. They're fine and smooth, making them ideal for basting seams on delicate fabrics.
When you pin your fabric, place the pins as close to the seam line as possible. This way, you're reducing the visible pin marks and making it easier to sew without having to remove them frequently. Always remember to pin carefully, avoiding excessive force that might stretch or distort the fabric.
Choosing the right pins will help you achieve a polished finish without unsightly pin marks, letting your project shine.
Use Alternative Fasteners
If you're worried about pin marks, consider using alternative fasteners like fabric clips or basting adhesive, which can hold your fabric together without the risk of leaving holes.
Fabric clips are perfect for thick or layered materials, as they grip securely without damaging the fabric. They're easy to use and allow for quick adjustments, making them a great choice for any project.
Basting adhesive is another option. You can spray or apply it to the fabric edges to temporarily hold them in place. This method works well for delicate fabrics where you want to avoid any potential damage. Just be sure to follow the manufacturer's instructions for application and removal.
For quilting or large sewing projects, you might also consider using long arm clips. These are designed to hold multiple layers together securely, preventing any shifting during sewing.
Lastly, think about using temporary fabric glue. It creates a bond strong enough for sewing but washes out easily, leaving no trace behind.
Pin Strategically
When you pin your fabric, choosing the right pins can make all the difference.
Pinning at the edges helps minimize potential marks, while using fabric weights instead of pins can keep your material secure without the risk of damage.
Choose the Right Pins
Selecting the right pins can make a significant difference in preventing pin marks on your fabric. When you choose pins that suit your project, you minimize the risk of damaging your material.
Here are some tips to keep in mind when selecting your pins:
- Use Fine Pins: Opt for thinner pins that create smaller holes, especially on delicate fabrics.
- Consider Pin Length: Longer pins are useful for holding multiple layers together, but they can leave bigger marks. Shorter pins work well for lighter materials.
- Choose Specialty Pins: Look for pins designed for specific fabrics, like silk or knit pins, which help reduce the risk of snagging or marking.
Pin at Fabric Edges
Pinning at the edges of your fabric helps to minimize the risk of pin marks and keeps your material securely in place during sewing. By focusing your pins along the edges, you reduce the chances of leaving visible holes in the main body of your fabric. This technique is especially useful for delicate materials that are prone to pin marks.
When you pin, make sure to distribute your pins evenly along the edge, placing them about every 4 to 6 inches. This spacing provides adequate support while minimizing the number of holes created. As you work, avoid pinning too close to the seam allowance, as this can lead to unintentional pin marks when you remove the pins after sewing.
If you're working with multiple layers, pin each layer at the edges before moving inward. This helps maintain alignment and allows you to sew more confidently without shifting.
Always remember to remove pins just before the presser foot reaches them to prevent any accidents. By pinning strategically at the edges, you'll enhance your sewing experience and keep your fabric looking pristine.
Use Fabric Weights Instead
Using fabric weights instead of pins can effectively secure your material without leaving unsightly marks. These weights are a fantastic alternative, especially for delicate fabrics that easily show pinholes. Not only do they keep your fabric in place, but they also allow for smoother cutting and sewing.
Here are a few benefits of using fabric weights:
- No Pin Marks: You won't have to worry about tiny holes ruining your fabric's appearance.
- Speedier Setup: Weights save you time by eliminating the need to pin and unpin your fabric repeatedly.
- Versatile Use: They can be used on various fabric types, from lightweight silks to heavier cottons.
To use fabric weights effectively, simply place them along the edges or across your fabric, ensuring it remains taut. This method not only protects your fabric but also enhances your sewing experience, making it smoother and more enjoyable.
You'll find that fabric weights are a game-changer in your sewing toolkit!
Test on Scrap Fabric
Before you start pinning your main fabric, it's smart to test on scrap fabric first.
Choose a similar material to see how different pins affect it and where the best pin placement lies.
This way, you can avoid unwanted marks on your final piece.
Choose Suitable Fabric
Choosing the right fabric can significantly reduce the chances of leaving pin marks, so always test your pins on a scrap piece first. Some fabrics are more prone to damage than others, and knowing how to identify suitable material can save you from frustration in the long run.
Here are some fabric characteristics to consider:
- Tight Weave: Fabrics with a tight weave, like cotton or denim, are less likely to show pin marks.
- Weight: Heavier fabrics tend to hold their shape better and are less susceptible to pin impressions.
- Texture: Smooth fabrics like silk may show pin marks more than textured ones, such as linen.
Use Different Pins
Try different types of pins to see which ones leave the least marks on your fabric. Each type has unique characteristics that can affect how they interact with various materials. For instance, silk pins have a fine point, making them less likely to leave noticeable holes compared to standard dressmaker pins. Meanwhile, glass head pins can be great for heat-sensitive fabrics since they won't melt when pressed with an iron.
Before you start pinning your actual project, test each pin on a scrap piece of the fabric you're planning to use. This step is crucial, as it helps you gauge how each pin behaves. Pay close attention to the size of the pin and the thickness of the fabric. You might find that some pins slip through easily without damaging the fibers, while others might create unsightly marks.
Don't forget to consider the length of the pins, too. Longer pins can hold thicker layers but might leave deeper impressions. By experimenting with different pins, you'll discover which ones work best for your specific fabric and project, ensuring a smoother sewing experience with minimal damage.
Test Pin Placement
Testing pin placement on scrap fabric helps you find the best technique to minimize marks while ensuring accurate alignment for your project. By experimenting on a similar fabric, you can gauge how different pin placements affect the material. This practice allows you to refine your method before working on your main piece.
Consider these tips when testing pin placement:
- Use similar fabric: Choose a scrap that closely resembles your project fabric in weight and texture.
- Vary the density: Try using fewer or more pins to see how it impacts the fabric's integrity.
- Mark your spots: Use tailor's chalk or fabric markers to note where you've pinned for easy reference.
Press and Steam Techniques
When pressing or steaming fabric, always keep the iron or steamer moving to prevent pin marks from forming. If you let the heat linger in one spot too long, you risk leaving impressions that can be hard to remove. Instead, glide the iron or steamer smoothly over the fabric, maintaining a consistent motion. This technique helps distribute heat evenly and reduces the chances of damaging fibers.
For delicate fabrics, lower the heat setting and keep the steamer a safe distance away. This prevents direct contact that could create unwanted marks. If you're working with a thick or heavy fabric, consider using a pressing cloth. This extra layer not only protects the fabric but also helps absorb excess moisture.
When you steam, aim for a slight distance between the steamer and the fabric. This allows the steam to penetrate without causing the fabric to flatten. Remember to focus on seams or areas where you've pinned, as these spots are more prone to pin marks.
Careful Handling and Storage
Careful handling and proper storage of fabric are essential to prevent pin marks and maintain its quality over time. When you're working with fabric, every little action counts. Here are some tips to keep your fabric looking pristine:
- Use fabric weights instead of pins: They hold your fabric in place without creating holes.
- Store fabric flat or rolled: Avoid folding fabric to prevent creases and pressure points that can lead to pin marks.
- Keep fabric away from sharp objects: Ensure your storage area is free from anything that could snag or puncture the fabric.
Frequently Asked Questions
Can Fabric Type Influence Pin Mark Visibility?
Yes, fabric type can definitely influence pin mark visibility. Softer fabrics tend to show marks more easily, while stiffer materials often hide them better. You'll want to choose your fabric wisely to minimize any noticeable pin impressions.
What Are the Best Pin Types for Delicate Fabrics?
For delicate fabrics, use fine, sharp pins like silk pins or glass head pins. They minimize damage and reduce visibility on your fabric, ensuring your projects maintain their beauty while you sew with confidence.
Is It Safe to Use Pins on Vintage Fabrics?
Using pins on vintage fabrics can be risky. They're often delicate and susceptible to damage. You should test a small area first, and consider alternatives like fabric clips to preserve your vintage treasures.
How Can I Remove Existing Pin Marks From Fabric?
To remove existing pin marks from fabric, gently steam the area, or use a damp cloth to dab and lift the marks. You can also try lightly pressing with an iron on a low setting.
Are There Specific Pins Recommended for Heavy Fabrics?
For heavy fabrics, you'll want to use thicker, larger pins, like quilting or upholstery pins. They provide better support and hold fabric layers firmly without bending, ensuring your project stays secure while you work.
- How Does Ring Spun Cotton Affect Garment Fit and Shape Retention? - August 13, 2024
- What Are the Challenges in Producing Ring Spun Cotton? - August 13, 2024
- Is Ring Spun Cotton Suitable for Plus-Size Clothing? - August 13, 2024


