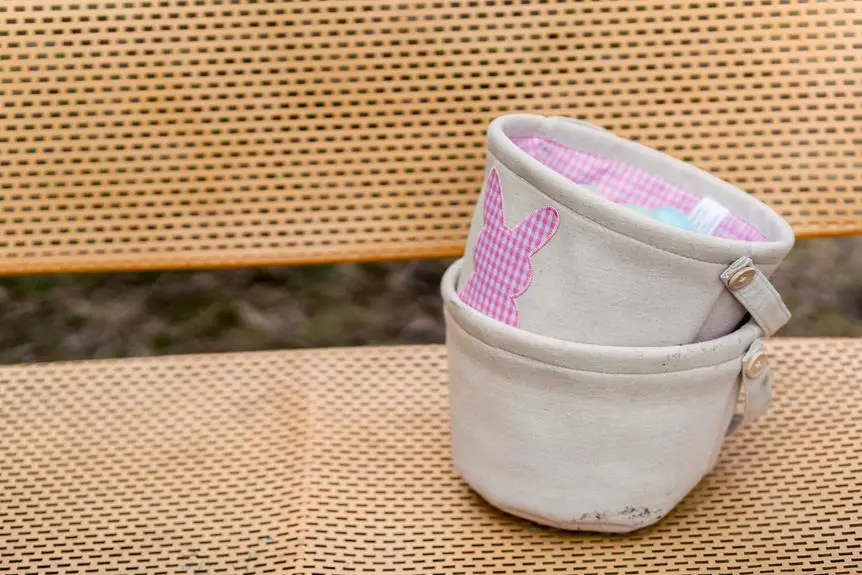
When you're ready to tackle applique work, applying starch can significantly enhance your results. You'll want to choose the right type of starch that complements your fabric's weight and the level of stiffness you desire. Once you've laid your fabric flat and prepared your tools, it's essential to apply the starch correctly to ensure even distribution. But there's more to this process than simply spraying and ironing—understanding how to achieve the right texture can make all the difference in your finished piece. Curious about the best techniques to ensure optimal results?
Key Takeaways
- Choose the appropriate type of starch based on fabric weight and desired stiffness, opting for spray starch for lightweight fabrics and liquid starch for heavier ones.
- Ensure fabric is clean and pressed before starch application to promote smooth adherence and effective stiffening.
- Apply starch evenly by holding the spray can or bottle 6-8 inches away from the fabric, using light strokes to avoid soaking.
- Use a pressing cloth while ironing to activate the starch without scorching the fabric, moving the iron in circular motions for best results.
Understanding Starch Types
To choose the right starch for your applique work, it's essential to understand the different types available.
You'll typically encounter three main categories: liquid starch, spray starch, and powdered starch. Each type has its unique benefits that can enhance your project.
Liquid starch is versatile and easy to use. You can dilute it with water for a lighter application or use it full-strength for added stiffness. It works well for larger pieces or when you need more control over the fabric's rigidity.
Spray starch is convenient and quick to apply. You can easily control the amount you use, making it ideal for smaller projects or delicate fabrics. Just remember to spray from a distance to avoid over-saturation.
Powdered starch requires mixing with water, but it offers a customizable solution. You can adjust the thickness by adding more or less starch, tailoring it to your specific needs.
Before you start, consider the fabric type and desired finish. Experiment with different starches to see which one suits your style best—your choice can significantly impact the final look of your applique work.
Preparing Your Fabric
Preparing your fabric involves washing, drying, and pressing it to ensure a clean, smooth surface for your applique work.
Start by selecting high-quality fabric that's appropriate for your project. Wash it in cold water with a mild detergent to remove any sizing or dirt that could interfere with your applique. Once it's clean, dry the fabric either in the dryer on low heat or air dry it, depending on the material.
After your fabric is dry, it's time to press it. Lay the fabric on an ironing board and use a hot iron to smooth out any wrinkles. Make sure to iron both sides for the best results. If you notice any stubborn creases, dampen the fabric slightly with water before pressing. This will help the fibers relax and flatten out more easily.
Once your fabric is clean, dry, and pressed, you're ready to move on to the next steps in your applique process. Properly prepared fabric not only enhances the appearance of your work but also helps ensure that the starch you apply adheres correctly, giving you crisp, defined edges for your applique pieces.
Choosing the Right Tools
Selecting the right tools is crucial for achieving precise and professional-looking results in your applique work.
Start with a high-quality pair of fabric scissors. They'll give you clean cuts, which are essential for neat edges on your appliques. A rotary cutter can also be beneficial for straight lines, so consider having one on hand.
Next, invest in a reliable ruler and cutting mat. A clear acrylic ruler helps you measure accurately and can guide your cuts effectively.
When it comes to applying starch, a spray bottle is a must. Choose one with an adjustable nozzle to control the spray volume for even distribution.
You'll also want to have a pressing cloth to protect your fabric while you iron. This prevents scorching and helps maintain the integrity of your applique.
Finally, don't forget pins or fabric clips to hold your pieces in place as you work. These tools will help you secure your fabric and ensure precision in your application.
With the right tools at your disposal, you're well on your way to creating beautiful and polished applique projects.
Applying Starch Techniques
With your tools ready, applying starch effectively can elevate your applique work by giving your fabric a crisp finish and better structure.
Start by laying your fabric flat on a clean, dry surface. Shake your starch can or spray bottle well to ensure an even application. Hold the can about 6 to 8 inches away from the fabric, and spray in light, even strokes. You want to avoid soaking the fabric, so a light mist is ideal.
Once you've covered the area, use a pressing cloth to gently press the fabric, activating the starch without direct heat. If you're working with intricate shapes, consider using a small brush to apply starch directly to the edges of your applique pieces. This method allows for more control and prevents overspray on surrounding areas.
As you work, keep an eye on your fabric's stiffness. You can always add more starch, but it's harder to remove excess. After applying, let your fabric rest for a few moments, allowing the starch to penetrate.
This technique not only stabilizes your fabric but also enhances the overall appearance of your applique work, making your projects stand out beautifully.
Drying and Setting
After applying starch, allow your fabric to air dry completely to ensure that the starch sets properly and provides the desired stiffness. This step is crucial, as any moisture left in the fabric can lead to a limp finish, undermining your hard work.
Place your fabric on a flat, clean surface, avoiding direct sunlight, which can cause uneven drying or fading of colors.
Once the fabric is dry to the touch, you can take a moment to inspect it. If you notice any areas that feel less stiff than others, consider lightly reapplying starch to those spots. After making any adjustments, let it dry again.
Once your fabric is fully dry and the starch has set, you'll be ready to move on to the next stage of your applique project. Be patient during this drying process; rushing through it might compromise the crispness you're aiming for.
Tips for Best Results
To achieve the best results in your applique work, it's crucial to choose the right starch for your fabric.
You'll also want to master the application techniques to ensure even coverage and support.
Let's explore these key points to elevate your project.
Choose the Right Starch
Choosing the right starch can make a significant difference in the quality and durability of your applique work. When selecting starch, consider the fabric type and the desired stiffness. A spray starch is often ideal for lightweight fabrics, as it provides a light hold without adding bulk. If you're working with heavier materials, a liquid starch might give you the firmness you need.
Look for a product that's washable and doesn't leave a residue. Some starches can cause discoloration or stiffness after washing, so read labels carefully. You might also want to test a small fabric swatch before committing to a full project.
Consider the finish you want, too. If you prefer a crisp finish, opt for a high-starch content product. For a softer, more flexible feel, choose a low-starch option. You can even try homemade starch solutions, which can be tailored to your needs.
Application Techniques Explained
Once you've selected the right starch, mastering the application techniques can greatly enhance the effectiveness of your applique work.
Start by ensuring your fabric is clean and pressed; this creates a smooth surface for the starch to adhere to. Lightly spray the starch onto the fabric, holding the can about 6-8 inches away. This distance helps you achieve an even application without oversaturating the fabric.
Next, use a pressing cloth to prevent direct contact between the iron and the starch. Gently press the iron onto the fabric, moving it in a circular motion to avoid scorching. Make sure to let the starch cool and set, as this will help the fabric maintain its shape and crispness.
If you're working with intricate shapes, consider using a brush to apply the starch precisely. This method allows for better control and helps avoid excess buildup.
Lastly, always test your technique on a scrap piece of fabric first. This ensures you get the hang of it without risking your main project.
With these tips, you'll achieve sharp, beautifully defined edges in your applique work.
Frequently Asked Questions
Can I Use Homemade Starch for Applique Work?
Yes, you can use homemade starch for applique work! Just make sure it's well-mixed and free of lumps. Test it on a scrap fabric first to ensure it meets your needs and doesn't cause issues.
How Do I Clean Tools After Using Starch?
After using starch, you should rinse your tools with warm water immediately. For stubborn residues, use mild soap and a soft cloth. Make sure to dry everything thoroughly to prevent any buildup or damage.
Is Starch Safe for All Fabric Types?
Starch isn't safe for all fabric types. It can damage delicate materials like silk or lace. Always test a small area first, and choose a starch designed for the specific fabric you're using for best results.
Can I Reuse Leftover Starch Solution?
Yes, you can reuse leftover starch solution as long as it's stored properly. Just make sure it's clean and free of contaminants. Shake it well before use to ensure even application on your fabric.
What Happens if I Apply Too Much Starch?
If you apply too much starch, your fabric may become stiff and crunchy, making it difficult to manipulate. It could also lead to potential residue build-up, affecting the overall appearance and feel of your project.