To add a plastic snap closure to your fabric case, first choose the right snap size based on your fabric’s thickness. Mark precise placement spots and reinforce delicate areas if needed. Use a snap setter and hammer to attach parts, aligning male and female components carefully so they click securely. Test the snap several times to verify durability and adjust if needed. Proper installation improves function and style—keep following to discover tips on troubleshooting and fabric reinforcement.
Key Takeaways
- Choose snap size and color based on fabric thickness and case design for secure and aesthetic fastening.
- Mark exact snap placement on fabric and reinforce thin areas with interfacing or patches before installation.
- Use a snap setter and hammer to attach snap components, aligning male and female parts directly opposite each other.
- Test snap closure by snapping and unsnapping multiple times to ensure durability and proper alignment.
- Troubleshoot issues by checking alignment, trimming excess fabric, and reinforcing with extra fabric layers if needed.
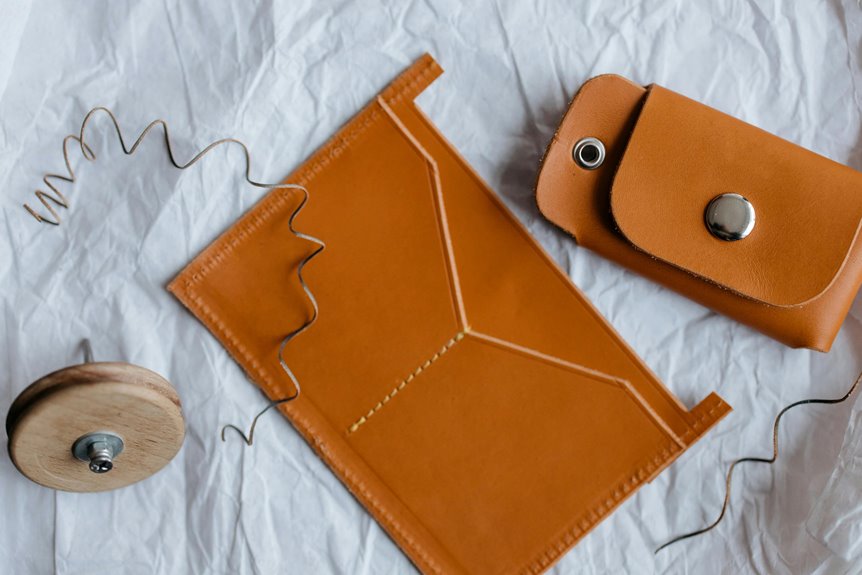
Choosing the Right Plastic Snap Closures
How do you pick the right plastic snap closures for your fabric case? Start by considering the fabric’s thickness and weight.
Lightweight fabrics need smaller snaps to avoid damage, while heavier fabrics require sturdier, larger snaps for secure fastening.
Next, think about the snap’s size and style—choose a design that complements your case’s look and purpose.
Color matters too; select a snap color that blends or contrasts nicely with your fabric.
Also, check the snap’s strength rating, especially if your case will hold heavier items.
Finally, verify the snaps are easy to use but hold firmly.
Tools Needed for Installing Snap Closures
You’ll need a few key tools to install plastic snap closures properly, including a snap setter and a hammer.
Preparing your fabric with supplies like scissors and marking tools guarantees precise placement.
Plus, having the right accessories on hand will make the installation smooth and secure.
Essential Snap Closure Tools
Installing plastic snap closures requires a few essential tools that make the process straightforward and secure.
First, you’ll need a snap setter or snap pliers designed specifically for plastic snaps; these help you apply even pressure to fasten the snaps without damaging them. A small hammer can work if you don’t have pliers, but be careful to strike gently.
You’ll also want a hole punch or awl to create precise holes in your fabric where the snap components will insert. Tweezers or small pliers are handy for positioning tiny snap parts accurately.
Finally, a flat, sturdy surface is vital to support your work during installation. Having these tools ready guarantees you’ll attach your snap closures cleanly and efficiently.
Fabric Preparation Supplies
Preparing your fabric properly guarantees a secure and neat snap closure installation. Before attaching snaps, gather essential fabric preparation supplies. You’ll need sharp fabric scissors to trim edges cleanly, preventing fraying that could weaken the snap’s hold.
Use a fabric marker or tailor’s chalk to mark exact snap placement; accuracy here assures alignment. A ruler or measuring tape helps maintain even spacing, especially if you’re adding multiple snaps.
To reinforce the snap area, grab lightweight interfacing or fabric stabilizer, which you’ll cut and iron onto the fabric’s wrong side. This backing prevents stretching and adds durability.
Finally, a pressing cloth protects your fabric when applying fusible interfacing. Having these supplies ready sets you up for a smooth snap installation process.
Installation Accessories Explained
Successful snap closure installation depends on having the right tools at hand. You’ll need a snap setter or pliers designed specifically for plastic snaps to apply even pressure without damaging the pieces.
A small hammer helps if your snap setter requires tapping, but be gentle to avoid cracking the snaps. A fabric marker or chalk lets you mark precise placement points.
Additionally, a hole punch or awl is essential for creating clean holes where the snaps will insert. Keep a ruler or measuring tape nearby to guarantee accuracy.
Having these accessories ready will streamline your work, making the installation smoother and more professional-looking. By using the correct tools, you’ll avoid common mistakes and guarantee your fabric case snaps on securely every time.
Preparing Your Fabric Case for Snaps
Start by marking the exact spots where you want the snaps to go on your fabric case.
Once marked, press the fabric flat on a clean, hard surface to guarantee stability during snap installation. If your fabric is thin or delicate, reinforce these areas with a small piece of interfacing or fabric patch on the inside to prevent tearing.
Press fabric flat on a hard surface; reinforce thin areas with interfacing to avoid tearing during snap installation.
Make sure the fabric layers align properly and are smooth without wrinkles. Trim any excess threads around the marked areas to keep them clean.
Double-check your markings to verify they’re symmetrical and positioned correctly.
Marking Snap Placement on Fabric
Before you install the snaps, carefully mark their exact placement on your fabric to confirm alignment and functionality.
Begin by folding the fabric case as it will be when closed, then decide where the snap should sit for a secure fit. Use a fabric pencil or tailor’s chalk to make small, precise marks on both sides where the snap pieces will attach.
Double-check that these marks line up perfectly when the case is folded. Avoid bulky or permanent markers that might bleed or show through.
If you’re working with thick fabric, consider making a tiny hole with a pin to help guide snap placement.
Accurate marking now saves frustration later and assures your snaps function smoothly.
Aligning Snap Components Correctly
Proper alignment of snap components guarantees your fabric case closes securely and looks neat.
Start by laying your fabric flat and double-checking the marks you made for the snap placement. Align the female and male parts directly opposite each other on both layers of fabric. Make certain the snap rings face outward, so they’ll interlock properly when pressed together.
Hold the pieces firmly in place to prevent shifting as you prepare to attach them. If your fabric is thick or has a lining, confirm both layers are aligned evenly to avoid puckering.
Taking the time to position each component precisely now saves you from frustrating misalignments later. This careful setup assures your snap closure functions smoothly and enhances your case’s overall appearance.
Attaching the Male Part of the Snap
Press the male part of the snap firmly onto the marked spot on your fabric. Make certain the prongs or posts on the back of the snap align with the holes you previously made.
Hold the snap steady, then place the snap setting tool or anvil over the prongs. Using a hammer or press, apply even, controlled force to secure the snap without damaging the fabric.
Check that the prongs have bent outward and gripped the fabric tightly. Avoid excessive force that could tear the material. Once attached, gently tug the snap to confirm it’s firmly fixed.
Properly fastening the male part guarantees the snap will function smoothly and stay in place through regular use. Now, you’re ready to move on to securing the female part of the snap.
Securing the Female Part of the Snap
To secure the female part of the snap, start by aligning it precisely with the marked spot on your fabric, ensuring the prongs fit into the pre-punched holes. Press the snap firmly so the prongs pierce through the fabric without shifting. Then, place the snap cap on the backside, making sure it sits flush. Use a snap-setting tool or pliers to crimp the prongs down evenly, locking the snap securely in place. Take your time here; a secure snap means your case will hold up to daily use.
| Feeling | Reason |
|---|---|
| Confidence | Snap is firmly attached, no worries |
| Satisfaction | Perfect alignment feels rewarding |
| Anticipation | Ready to see your case come alive |
Testing the Snap Closure Functionality
Now that the snap is in place, check its alignment to make sure both parts meet perfectly.
Give the closure several snaps and unsnaps to test its durability. If it holds securely without loosening, you’re all set.
Snap Alignment Check
Before securing the snaps permanently, you’ll want to test their alignment carefully to ascertain the closure functions smoothly.
Start by pressing the snap parts together gently to see if they click into place without resistance or gaps. Make sure the male and female components line up perfectly; misalignment can cause difficulty snapping or damage the fabric.
Check from multiple angles to confirm they sit flush and hold firmly when closed. If they don’t align, adjust their positions slightly by loosening and repositioning the snaps until they fit seamlessly.
This step guarantees your fabric case will open and close effortlessly, providing a neat, professional finish. Taking the time for this snap alignment check prevents frustration and maintains your project’s quality.
Closure Durability Test
Put your snap closure through its paces by performing a durability test that guarantees it will hold up under regular use.
Start by snapping and unsnapping the closure at least 50 times, applying consistent pressure each time. Pay attention to any loosening or misalignment that may develop.
Next, gently tug the fabric around the snap to verify it’s securely anchored and won’t pull free. If the snap feels loose or doesn’t click firmly, consider reinforcing the stitching or repositioning the snap.
Finally, test the closure under realistic conditions—store items inside the case and close it to check for a snug fit.
This straightforward test confirms your snap closure’s reliability, guaranteeing your fabric case stays securely fastened throughout daily use.
Troubleshooting Common Installation Issues
Installation issues with plastic snap closures can be frustrating, but most problems have simple solutions you can tackle quickly.
If the snap feels too tight or won’t close properly, check that the pieces are aligned exactly. Misalignment often causes difficulty snapping shut.
If the snap spins or feels loose, make sure you’ve pressed the prongs firmly through the fabric and bent them securely on the backside.
Sometimes, the fabric layer is too thick, preventing a proper snap. In that case, try trimming excess fabric or using fewer layers.
If the snap doesn’t hold at all, verify you’re using compatible snap parts designed to fit together.
Taking a moment to confirm alignment and fitting usually resolves most common installation issues.
Reinforcing Fabric Around Snap Areas
If you’ve guaranteed your snaps are aligned and secure but still notice wear or difficulty snapping over time, reinforcing the fabric around the snap areas can help. You can add a small patch of interfacing or an extra fabric layer behind the snap location to distribute stress evenly. This reduces fabric stretching and tearing. Use a sturdy material like canvas or denim for reinforcement.
| Reinforcement Type | Material Suggestion | Benefits |
|---|---|---|
| Fusible Interfacing | Medium-weight | Easy to apply; adds stability |
| Fabric Patch | Canvas or denim | Durable; absorbs snap pressure |
| Double Fabric Layer | Same fabric | Seamless look; extra strength |
| Adhesive Backing | Heat-activated glue | Quick; holds patch firmly |
Reinforcing extends snap life and keeps your case functional longer.
Care Tips for Snap-Closed Fabric Cases
Though snap closures are designed for durability, caring for your fabric case properly guarantees they stay functional and look great over time.
Always avoid forcing the snaps open or closed, as excessive pressure can weaken them.
Excessive force on snaps can weaken their hold—handle them gently to ensure lasting durability.
When cleaning, spot-treat the fabric with a mild detergent and a soft cloth, steering clear of harsh chemicals that might degrade the plastic snaps.
If machine washing is necessary, turn the case inside out and use a gentle cycle, then air dry completely to prevent moisture buildup around the snaps.
Regularly inspect the snaps for signs of wear or loosening, and tighten or replace them promptly if needed.
Frequently Asked Questions
Can Plastic Snap Closures Be Used on Leather or Only Fabric?
You’d think plastic snap closures are as picky as a cat, but you can definitely use them on leather too! Just make sure your leather isn’t too thick, or the snaps won’t close properly.
Are Plastic Snap Closures Safe for Children’s Products?
You can use plastic snap closures for children’s products, but make sure they meet safety standards. Choose non-toxic, durable snaps and securely attach them to prevent choking hazards or accidental detachment during use.
How Durable Are Plastic Snap Closures Compared to Metal Ones?
Plastic snap closures provide plenty of practical performance, but metal ones typically triumph in toughness and tenacity. You’ll find plastic snaps perfect for light use, while metal snaps endure more demanding, daily durability.
Where Can I Buy Bulk Plastic Snap Closures Online?
You can buy bulk plastic snap closures online from retailers like Amazon, Etsy, and specialized craft stores such as SnapSource or Wawak. They offer various sizes, colors, and quantities to fit your project needs perfectly.
Can Snap Closures Be Removed and Reused on Another Project?
Like peeling a sticker off a notebook, snap closures can sometimes be removed without damage. You can reuse them if you’re careful, but they might lose grip or get damaged, so handle them gently to save them.