I've always been fascinated by how everyday materials are made, especially luxurious ones like velvet. It starts with choosing the right fibers—silk, cotton, or synthetic. Then, it's all about the weaving process where things get interesting. Weavers have to carefully layer threads, maintaining perfect tension to create that plush, dense pile we all love. But, here's the kicker: the true magic happens in the cutting phase, where the fabric is split right down the middle. Each step is essential, and missing any detail can change the entire feel of the fabric. Have you ever wondered what specific techniques make velvet stand out from other materials?
Key Takeaways
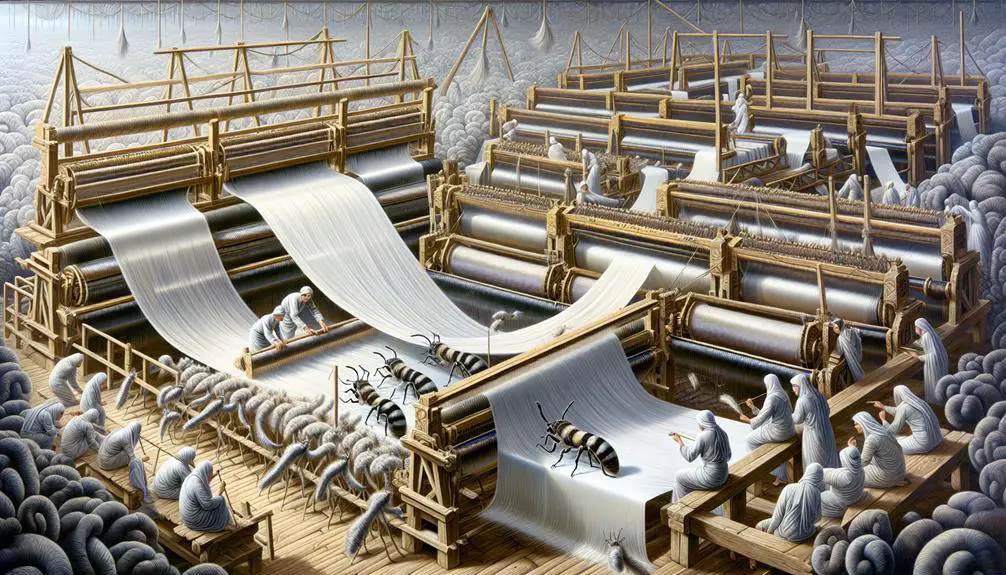
- Velvet is made by weaving two thicknesses of fabric simultaneously, using materials such as silk, cotton, or synthetic fibers.
- The loom plays a crucial role, requiring precise control to maintain thread tension and fabric quality.
- After weaving, the fabric layers are cut apart to create the soft, dense pile characteristic of velvet.
- Cutting tools like precision shears or electric machines are used to trim the pile for a luxurious texture.
- Final steps include chemical treatments and heat setting to enhance the fabric's feel and durability.
The Origin of Velvet
Although velvet is now synonymous with luxury, it actually originated as a fabric for the wealthy during the Eastern Han Dynasty in China. The historical significance of velvet is deeply rooted in its geographic origins. The production began over 2000 years ago, which underscores its long-standing value and prestige in various cultures. Initially, this opulent material was exclusive to the nobility and the affluent, highlighting its status as a symbol of power and wealth.
As I explore further, it's fascinating to see how velvet spread across the globe. From China, the knowledge and techniques for creating velvet traveled along the Silk Road, reaching the Middle East and later Europe. Each region adapted its own unique methods and styles, enriching the fabric's versatility and appeal. This journey from East to West not only expanded its availability but also enhanced its reputation as a sought-after commodity in medieval trade.
Understanding velvet's early beginnings sheds light on its enduring appeal. It's not just about the opulence; it's about appreciating a craft that has been perfected over millennia. Knowing its roots helps us understand why velvet remains a luxury fabric, revered for its rich texture and history.
Primary Materials Used
Velvet's luxurious feel comes from its primary materials, traditionally silk, but also cotton or synthetic fibers. Now, let's explore what each material brings to the table and why it matters for those of us keen on both quality and sustainability.
Silk is the star of the show for traditional velvet. It's all about that smooth, rich texture and deep color absorption. However, silk isn't the most essential choice. It requires a lot of resources and energy to produce. That's where cotton and synthetic alternatives come into play. Cotton velvet offers a slightly heavier feel but maintains that classic softness. It's more sustainable than silk, using less water and energy during production.
Then, there are synthetic fibers. These are man-made, like polyester or nylon, often used in velvet production today. They're not only cost-effective but also offer versatility in textures and colors. Synthetic alternatives are vital for reducing our dependency on natural resources, aligning with material sustainability goals.
Here's a quick rundown of each material's features:
| Material | Sustainability | Feel |
|---|---|---|
| Silk | Low | Very smooth |
| Cotton | Medium | Soft |
| Synthetic | High | Variable |
Understanding these options helps us make informed choices about the velvet we choose, balancing luxury with eco-consciousness.
Understanding Velvet Weaving
Now, let's look at how velvet is actually made, focusing on the weaving process. Weaving velvet involves creating layers of threads that interlace to form a dense, soft fabric. The key to understanding this is grasping the weaving patterns and thread tension.
Weaving patterns are essential because they determine the fabric's texture and appearance. In velvet, the pattern must allow for loops or piles to stand up from the base fabric, which gives velvet its characteristic feel and look. Adjusting the pattern can change the pile's height and density, affecting the fabric's overall softness and sheen.
Thread tension is another critical factor. It must be controlled meticulously. If the tension is too tight, the threads can break or create a fabric that's too stiff, losing the plushness velvet is known for. On the other hand, if the tension is too loose, the fabric won't hold its shape well, and the pile mightn't stand up as it should.
Getting these elements right is a delicate balance. It requires skill and precision, as even minor variations can greatly alter the fabric's quality and appearance. Mastering this balance is what sets apart high-quality velvet from lower grades.
The Role of the Loom
In weaving velvet, the loom plays an essential role in shaping the fabric's texture and quality. It's not just about throwing threads together; it's more about precise control and adjustments. As a weaver, I've learned that keeping the loom in top shape is vital. That's where loom maintenance comes in. Regular checks and tweaks guarantee that every part functions smoothly, preventing any hiccups that might affect the fabric's feel.
Thread tensioning is another critical aspect. If the tension's off, even slightly, it can lead to uneven textures or weak spots in the velvet. I spend a good chunk of my time adjusting the tension to get it just right. It's a bit like tuning an instrument – every thread must sing in harmony for the velvet to turn out perfect.
Understanding how to manage these elements isn't just technical; it's an art. You've got to feel the loom's rhythm and respond accordingly. That's why mastery in velvet weaving isn't just about practice. It's about connecting with the machine, sensing its needs, and responding effectively. Every piece of velvet I produce is a confirmation of this careful, attentive process.
Creating the Pile
Now, let's talk about how we create the pile in velvet.
First, I choose the base fabric that will support the additional fibers.
Next, I attach these fibers and finally, I cut the loops to form the soft, luxurious texture we all love in velvet.
Selecting the Base Fabric
Selecting the appropriate base fabric is essential for creating a high-quality velvet pile. You've got to look at fabric durability and weave patterns. This isn't just about picking something that feels nice. It's about choosing a material that can handle the intricacies of velvet production.
Let's talk durability first. The base needs to withstand multiple manufacturing steps without losing its integrity. That means no tearing or fraying. As for weave patterns, they're vital too. The tighter the weave, the better the base will support the delicate pile fibers that give velvet its iconic texture.
Attaching the Fibers
After choosing the right base fabric, we attach the fibers to create the plush pile that makes velvet so luxurious. The fiber sources vary, including silk, cotton, or synthetic options, each contributing unique textures and qualities. Bonding methods are key here; we don't just lay the fibers on top.
We use two techniques primarily. One involves interweaving extra sets of warp threads through the base. These extra threads are then raised to form the pile, guaranteeing they're thoroughly integrated. The other method uses adhesive bonding, where fibers are directly glued onto the base, standing upright. This method is quicker but demands precise control of the adhesive application to maintain the fiber's upright position and ensure even distribution.
Cutting the Loops
Once the fibers are attached, we cut the loops to form the plush velvet pile. This stage is essential. I confirm the blade is sharp to maintain loop durability. The fabric tension needs to be just right—too loose, and the cuts won't be clean; too tight, and we risk damaging the material.
I adjust the tension carefully, checking frequently as I go. Each cut has to be precise to guarantee that velvety feel. It's a delicate balance, but I've learned to sense when it's perfect. The result? A soft, luxurious fabric that looks as good as it feels. Mastering this technique really makes the difference in high-quality velvet.
Cutting the Velvet Pile
Now, let's discuss how we actually cut the velvet pile to finish off the fabric.
We'll explore the various techniques used, the tools that get the job done, and the common challenges faced during this phase.
It's essential to get this step right to guarantee the velvet's luxurious feel.
Techniques for Pile Cutting
Several techniques exist for cutting the velvet pile, each vital for achieving the fabric's luxurious texture. Blade sharpening is essential here. A sharper blade guarantees clean cuts, preventing frayed edges which can ruin the pile's appearance.
I also pay close attention to thread tension. If it's too tight, the threads might snap during cutting; too loose, and the pile won't stand up uniformly, making an uneven cut more likely.
Each technique I use aims to master these elements. By balancing sharpness and tension, I can enhance the velvet's feel and look. This precise control is what separates good velvet from great. It's all about meticulous attention to detail, ensuring each piece of fabric meets high standards.
Tools for Velvet Shearing
To accurately shear velvet, I rely on a few specialized tools designed specifically for this task. The right equipment not only boosts my shearing efficiency but also guarantees the fabric's integrity. Here's what I use:
- Precision Shears: These are essential for clean cuts. They're sharp, durable, and require regular blade maintenance to keep them in top condition.
- Electric Shearing Machine: For larger projects, this tool saves time and energy. Its power helps maintain consistent quality throughout the shearing process.
- Fine-toothed Comb: Before cutting, I use this to detangle and align the fibers, which assures an even trim.
Each tool plays a pivotal role in achieving that perfect velvet texture we all love.
Challenges in Pile Trimming
Cutting the velvet pile presents unique challenges, particularly in maintaining the fabric's plush texture. It's all about balancing trimming precision with the need to maintain pile durability. If I trim too aggressively, I risk shearing off too much, which can lead to a less luxurious feel. On the other hand, if I'm too gentle, the pile mightn't be even.
Achieving this balance isn't just about using the right tools; it's about the technique. I've got to be steady and precise. Each pass of the blade has to be carefully calculated to avoid damaging the integrity of the velvet. It's a skill that takes patience and practice to perfect. But when done right, the results are truly rewarding.
Dyeing and Coloring
Once the fabric is woven, I usually dye it to add vibrant colors and enhance its aesthetic appeal. This process is important not just for looks but also for guaranteeing the color stability of velvet. Let's explore how I select the right dyes and techniques to get the job done effectively.
Coloring velvet is an art form, and choosing the right pigment sources is essential. I prefer natural dyes for their richness, but synthetic ones can offer consistency and a wider range of colors. Here's what you need to know:
- Pigment Selection: I choose pigments based on the desired shade and their ability to bind well with velvet fibers. This ensures the color penetrates deeply and evenly.
- Application Technique: I often use a dye bath for immersion, making sure every fiber gets coated. It's a delicate balance to maintain the fabric's softness while achieving vivid hues.
- Testing for Color Fastness: This is vital. I always test dyed samples to make sure they don't bleed or fade quickly. It's all about long-lasting beauty without compromising the fabric's quality.
Mastering the dyeing process means understanding these elements to produce consistently stunning velvet that stands the test of time.
Finishing Processes
After dyeing, I focus on the finishing processes that guarantee the velvet's texture and durability are flawless. Now, let's delve into what that involves. First up is the vital chemical treatment. This step is pivotal because it influences how the fabric feels and how well it holds up over time. I use specific chemicals that guarantee the velvet stays soft yet resilient against wear and tear.
However, I'm also very mindful of the environmental impact of these chemicals. It's imperative to choose products that are as gentle on the planet as they're effective. I opt for eco-friendly options wherever possible, reducing harmful runoff and pollution.
Next, the velvet goes through a heat setting. This process locks in the texture, giving velvet that distinctive luxurious feel. I carefully control the temperature and timing to avoid damage, ensuring each piece comes out just right.
Finally, I perform a thorough brushing. This step fluffs up the fabric, enhancing its rich, plush appearance. Each stroke is deliberate, aimed at perfecting the pile without overdoing it.
Through these steps, I make sure the velvet not only looks and feels great but also lasts, all while keeping an eye on our environmental footprint.
Quality Control Measures
To guarantee each batch of velvet meets our high standards, I rigorously inspect every piece for consistency and quality. This isn't just about looking over the fabric; it involves a detailed series of inspection protocols designed to catch any and all defects before the velvet leaves the factory.
Here's how I make sure every inch is perfect:
- Visual Inspection: I start by visually examining the fabric for any obvious issues like discoloration, uneven pile, or tears.
- Touch Test: Next, I run my hands along the fabric to feel for inconsistencies in texture. This tactile inspection helps identify any areas that mightn't meet our texture standards.
- Measurement Verification: Finally, I measure the dimensions and pile height to verify everything matches our specified criteria.
Defect management is critical in this process. If I spot any defects, I don't just note them down; I analyze the cause and see if it's a one-off or a sign of a bigger issue in production. This approach not only helps in maintaining quality but also aids in refining our manufacturing processes over time. Ensuring premium velvet isn't easy, but it's what sets our products apart.
Uses and Variations
Now that we've covered how velvet is made, let's talk about what it's used for and the different types you might come across.
Velvet isn't just for fancy clothes; it's also popular in home decor like curtains and upholstery.
We'll also look at the most popular types of velvet and what makes each one unique.
Velvet Fabric Applications
Velvet's luxurious texture makes it a popular choice for everything from fashion to home decor. It's not just about looking good; it's about making a statement. Whether it's the sheen of velvet fashion turning heads on the runway or the plush comfort of velvet upholstery inviting you to sink in and relax, velvet's versatility shines in various applications.
Here's a quick look at where you might spot velvet:
- Velvet Fashion: Elegant gowns, trendy jackets, and chic accessories.
- Velvet Upholstery: Sofas, armchairs, and cushions that add a touch of sophistication to any room.
- Home Accessories: Luxurious curtains, plush bedding, and decorative pillows.
I'm always amazed at how velvet can transform a space or outfit with its rich texture and depth.
Popular Velvet Types
Exploring the different types of velvet, each variety has unique uses and characteristics that enhance its appeal in various applications. Crushed velvet, with its textured appearance, is a hit in fashion and home decor, reflecting current velvet trends with a playful yet luxurious vibe. For those who prioritize velvet durability, synthetic velvets, like polyester or microfiber, are go-tos. They resist wear and are easier to clean, making them ideal for upholstery.
Silk velvet remains the pinnacle of luxury, used primarily in high-end garments and lush draperies. Its smooth texture and subtle sheen are incomparable. Cotton velvet strikes a balance, offering a matte finish with moderate durability, popular in both clothing and soft furnishings. Each type serves a specific purpose, catering to varied aesthetic and functional demands.
Frequently Asked Questions
Can Velvet Fabric Be Recycled or Repurposed?
Yes, I can definitely recycle or repurpose velvet. I often use velvet upcycling and repurposing techniques to transform old velvet into new, stylish items. It's a creative way to reduce waste and stay fashionable!
Is Velvet Suitable for Outdoor Furniture Use?
I wouldn't recommend velvet for outdoor furniture due to its low weather resistance and high maintenance challenges. It's better suited for indoor use where it won't be exposed to the elements.
How Does Humidity Affect Velvet Storage?
Humidity can really mess with velvet storage, affecting color retention and increasing mold risk. I use dehumidifiers to keep things dry and preserve the fabric's vibrant look and feel.
Are There Vegan Alternatives to Silk Velvet?
Yes, there are vegan alternatives to silk velvet. Plant-based fibers like bamboo or synthetic options like polyester offer cruelty-free choices. They're great for both the environment and ethical fashion.
How Should Velvet Garments Be Stored?
I store my velvet clothes by hanging them up, not folding. This avoids creases. Use padded hangers and avoid crushing them with other items. It's key for maintaining their look without special cleaning techniques.