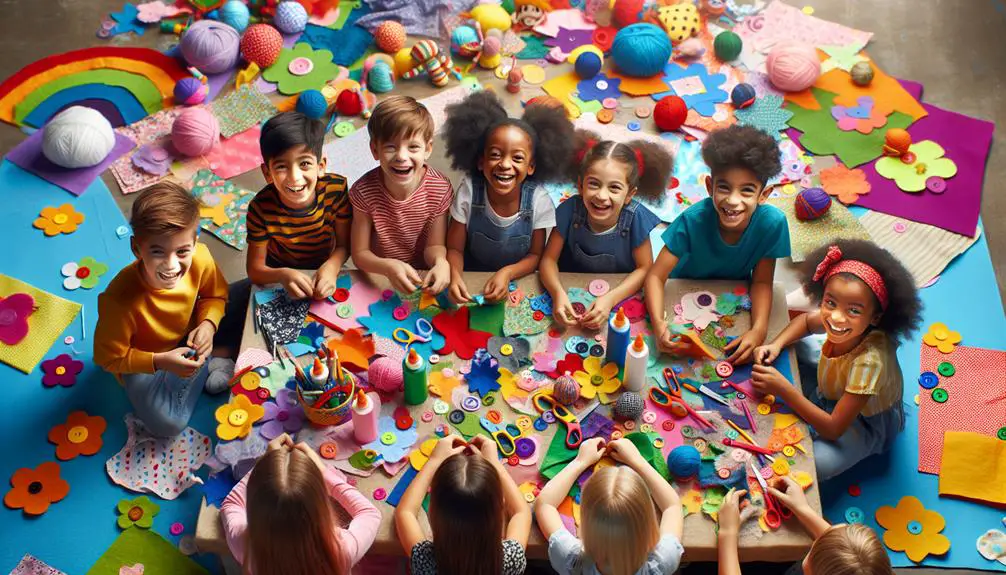
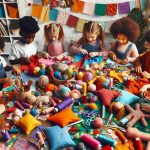
Imagine your child creating a colorful patchwork pillow, piecing together different fabric squares to craft a unique design. This simple sewing project not only keeps them entertained but also enhances their fine motor skills. Engaging in fabric crafts offers a range of activities, from DIY fabric bracelets to no-sew T-shirt bags, that cater to various skill levels and interests. Curious about how these activities can transform a rainy afternoon into a productive and fun-filled experience? Explore the possibilities and discover how each craft can make a lasting impression on your child's creativity and learning.
Table of Contents
Key Takeaways
- Create patchwork pillows using fabric scraps to teach basic sewing and design skills.
- Transform old t-shirts into no-sew bags, customizable with fabric paint or markers.
- Make felt finger puppets with simple materials to enhance fine motor skills and storytelling.
- Craft DIY fabric bracelets and headbands, perfect for personalized accessories and friendship gifts.
- Design fabric scrap bunting and fabric collages to explore creativity and texture.
Patchwork Pillows
Creating patchwork pillows is a fun and easy way for kids to explore their creativity with fabric scraps. By diving into this project, they can experience the joy of transforming leftover materials into something beautiful and functional. Patchwork quilts are a traditional form of this art, but crafting pillows offers a more manageable and quicker introduction to the craft.
Start by gathering a variety of fabric scraps. These can come from old clothes, leftover sewing projects, or even DIY fabric wall art. The key is to have a range of colors and patterns that will make the pillow visually appealing.
Teach your kids basic sewing techniques, such as how to thread a needle, make a knot, and sew a simple running stitch. These skills are fundamental for any fabric scrap projects they might tackle in the future.
Once the fabric pieces are ready, arrange them into a pleasing pattern. Encourage your kids to experiment with different layouts until they find one they love. Sew the patches together, making sure the seams are secure.
Fabric Bookmarks
Creating fabric bookmarks is a fun and easy project for kids.
You'll start by choosing the right fabric types, like felt or cotton, which are both durable and easy to work with.
Then, let your creativity shine by decorating the bookmarks with buttons, ribbons, or even fabric paint.
Choosing Fabric Types
When making fabric bookmarks, you'll need to choose a fabric that's both durable and easy to work with. Cotton and linen are excellent choices, as they offer a smooth surface for various techniques. For those who enjoy customization, cotton is ideal for fabric painting and fabric dyeing, allowing vibrant colors to pop.
Linen, on the other hand, has a natural texture perfect for more rustic designs. If you're interested in adding patterns, consider fabric printing. This method lets you create intricate designs effortlessly. Alternatively, look into fabric weaving to introduce unique textures and patterns directly into the material itself.
Woven fabrics like twill or denim can add a touch of sophistication to your bookmarks. Polyester blends can also be a good choice due to their durability and resistance to fraying. These fabrics handle wear and tear better, ensuring your bookmarks last longer. However, they mightn't absorb fabric dyeing as well as natural fibers, so keep that in mind if you plan to add color.
Decorating Bookmarks Creatively
To make your fabric bookmarks truly unique, explore various decorating techniques such as embroidery, fabric paint, and appliqué.
Embroidered bookmarks add a personal touch with elegant stitches and patterns. You can create intricate designs or even monogram initials for a personalized feel.
Painted bookmarks allow you to tap into your inner artist using fabric paints to craft colorful scenes, abstract designs, or even detailed characters.
Beaded bookmarks introduce texture and shine. Use beads to outline shapes, add accents, or create a completely beaded design. The added weight also helps the bookmark stay in place.
For a blend of tradition and creativity, try making origami bookmarks using fabric. These can be simple or complex, and the fabric gives them durability and a unique texture.
Imagine your bookmarks adorned with:
- Delicate embroidered flowers around the edges
- Vibrant painted landscapes or abstract art
- Shimmering beads forming intricate patterns
- Fabric origami bookmarks folded into clever shapes
- Appliqué designs featuring your favorite characters
Mastering these techniques will elevate your fabric bookmarks from simple to remarkable. Each method offers a unique way to express creativity, ensuring your bookmarks are as special as the books they mark.
No-Sew T-Shirt Bags
Transforming an old t-shirt into a stylish bag is a fun and easy project for kids. It's an excellent way to explore t-shirt crafts while making something practical and eco-friendly. You'll end up with fashionable reusable bags that are perfect for carrying books, toys, or groceries. Plus, it's a fantastic way to give your old shirts a new life.
Start with a clean t-shirt. Lay it flat and cut off the sleeves. Next, cut around the neckline to create the bag's opening. Decide how deep you want the bag to be and mark a line across the shirt at that point. Fringe the bottom by cutting slits from the hem to your marked line. Now, tie each pair of fringes together in tight knots. Make sure they're secure to guarantee your bag can carry weight without coming apart.
Incorporate your creativity by decorating the bag with fabric paint, patches, or markers. You're not just making a bag; you're customizing it to fit your style. This project teaches kids sustainability while honing their crafting skills. You'll find that these no-stitch t-shirt bags are both a rewarding and educational activity.
Felt Finger Puppets
After creating your eco-friendly t-shirt bags, spark your creativity further by crafting adorable felt finger puppets. These tiny characters open a world of puppet making and imaginative play, perfect for an engaging puppet show or storytelling fun.
Start by gathering your materials. You'll need felt sheets, scissors, glue, and markers. Begin by cutting out basic shapes for the body, head, and any accessories. Assemble the pieces using glue, and add details with markers or small fabric scraps.
Here's a visual guide to inspire your puppet designs:
- Animals: Think lions, rabbits, and elephants with colorful details.
- Characters: Create kings, queens, and knights for medieval tales.
- Monsters: Use bold colors and quirky shapes for friendly monsters.
- Fairy tale figures: Design princesses, dragons, and wizards.
- Everyday people: Craft teachers, firefighters, and chefs.
These crafts not only enhance fine motor skills but also provide endless opportunities for imaginative play. Encourage your child to create their own stories and bring their puppets to life. The joy of puppet making lies in the details and the stories they tell, making each puppet show a unique adventure.
DIY Fabric Bracelets
Creating DIY fabric bracelets is a fun and simple way to add a personal touch to your accessories. Start by gathering fabric scraps, beads, and elastic or thread. Choose vibrant fabrics that complement each other. Cut your fabric into strips, making sure they're long enough to wrap around your wrist comfortably.
For beaded bracelets, thread beads onto the fabric strips before tying them into a bracelet. Use a mix of colors and shapes to create a unique design.
If you're more into fabric necklaces, you can use longer strips and incorporate similar beading techniques for a coordinated look.
Friendship bracelets are perfect for sharing with friends. Braid or twist multiple fabric strips together, adding small charms or beads along the way. Secure the ends with a knot or a small clasp. These bracelets not only look great but also hold sentimental value.
For a different twist, try making woven headbands from your fabric scraps. Use the same braiding techniques and add beads or charms to match your bracelets.
Creating your own fabric accessories lets you experiment with various styles and techniques, ensuring you always have a personalized touch in your wardrobe.
Colorful Fabric Collages
Using the same vibrant fabric scraps from your DIY bracelets, you can make colorful fabric collages that spark creativity and imagination. This activity allows kids to explore textures, shapes, and colors while enhancing their artistic skills. To get started, gather your fabric scraps and some fabric glue or a hot glue gun.
Incorporating techniques like fabric painting and fabric dyeing can add more depth and uniqueness to your collages. Let kids use fabric paints to create patterns or add details to their scraps before gluing them down. Fabric dyeing can also introduce a variety of shades and hues that make the collage pop.
Enhance the complexity and beauty of your collages by experimenting with fabric weaving and fabric printing. Weaving strips of fabric can create interesting textures, while fabric printing allows you to add intricate designs and motifs.
Here are some aspects to ponder while crafting your fabric collages:
- Vividly dyed fabric swatches for a burst of color
- Elaborately painted fabric pieces for added detail
- Interlaced fabric strips to create texture
- Printed designs for a unique touch
- Layered fabric shapes to build depth
With these techniques and elements, your colorful fabric collages will become masterpieces that kids will be proud to display.
Fabric Scrap Bunting
Transform your leftover fabric scraps into a charming bunting that adds a festive touch to any space. Creating fabric garlands is a rewarding way to repurpose your textile remnants and craft a delightful decoration. Start by gathering your materials: a selection of colorful fabric scraps, scissors, a sewing machine or needle and thread, and some string or ribbon.
Begin by cutting your fabric scraps into uniform triangles or rectangles. If you prefer precision, use a template. Once you have your shapes, sew the top edges onto the string or ribbon, ensuring they're evenly spaced. This simple project can be completed in an afternoon and provides a beautiful textile banner you can hang anywhere.
| Steps | Description |
|---|---|
| 1. Gather Materials | Collect fabric scraps, scissors, sewing tools, and string. |
| 2. Cut Shapes | Cut fabric into triangles or rectangles. |
| 3. Sew to String | Attach fabric shapes to string using a sewing machine or hand stitch. |
| 4. Hang and Enjoy | Display your fabric garland in your desired space. |
Stuffed Fabric Animals
With a bit of fabric and some basic sewing skills, you can craft adorable stuffed animals that kids will love. It's a rewarding project that lets you transform simple materials into cherished keepsakes.
Start by selecting your favorite fabric animal patterns. These patterns will serve as your blueprint, guiding you through the creation process.
If you're new to sewing, consider using stuffed animal tutorials available online. These tutorials offer step-by-step instructions that make even the most intricate designs accessible.
Alternatively, fabric animal kits provide all the materials you need, simplifying your animal sewing projects significantly.
Here's what you'll need to get started:
- Fabric: Choose soft, durable fabric like cotton or fleece.
- Thread: Match the thread color to your fabric for a seamless look.
- Stuffing: Polyester fiberfill works best for a plush finish.
- Needles and Pins: Essential tools for hand sewing and pinning patterns.
- Scissors: Sharp fabric scissors ensure precise cuts.
Once you've assembled your materials, follow your chosen pattern carefully. Cut out the fabric pieces, sew them together, and stuff the animal to your desired firmness.
Your homemade stuffed animals will be a hit with kids, offering hours of creative play.
Personalized Fabric Coasters
Creating personalized fabric coasters is a fun and practical craft project that lets you add a unique touch to your home decor. Start by selecting quality fabric in your favorite colors or patterns. Cut the fabric into squares, ensuring they're all the same size.
Next, consider your coaster designs. You can use fabric paint for coaster painting, adding intricate patterns, geometric shapes, or even monograms. Let your creativity shine!
After your designs are dry, sew the fabric pieces together with a layer of batting in between for extra padding. This not only makes the coasters more functional but also gives them a professional finish. Remember to sew around the edges to secure everything in place.
Personalized fabric coasters make excellent coaster gift ideas. They're thoughtful, handmade, and can be tailored to match the recipient's taste. You can also use them as coaster party favors at your next gathering. Imagine the delight of your guests when they see their names or favorite motifs on their coasters!
Frequently Asked Questions
What Are Some Essential Tools for Fabric Crafts for Kids?
When starting on your crafting journey, you'll want to gather some trusty tools like fabric scissors and sewing needles. Don't forget fabric markers and embroidery hoops to bring your imaginative creations to life with finesse.
How Can You Safely Store Leftover Fabric Scraps?
You can safely store leftover fabric scraps by using creative storage solutions like clear bins or labeled jars. Recycling fabric scraps into smaller projects or organizing by color and size helps maintain a tidy, efficient workspace.
Are There Any Eco-Friendly Fabric Options for Kids' Crafts?
Absolutely, there are eco-friendly fabric options for kids' crafts. You can choose sustainable materials like organic cotton or bamboo. These alternatives reduce environmental impact and guarantee ethical sourcing fabrics, promoting a greener crafting experience.
How Do You Remove Fabric Glue From Surfaces?
Removing fabric glue from surfaces is like peeling off a stubborn sticker. Use alternative adhesives for future projects. For now, DIY fabric cleaners can help. Gently scrub the stain, ensuring you don't damage delicate surfaces.
What Are the Best Fabric Types for Beginners?
When choosing fabric types for beginners, consider Cotton vs. Fleece and Denim vs. Satin. You'll find cotton easier to work with and more forgiving than satin, while fleece offers flexibility compared to the sturdiness of denim.
- How Does Ring Spun Cotton Affect Garment Fit and Shape Retention? - August 13, 2024
- What Are the Challenges in Producing Ring Spun Cotton? - August 13, 2024
- Is Ring Spun Cotton Suitable for Plus-Size Clothing? - August 13, 2024

