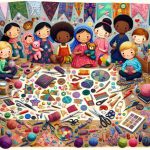
Creating fabric crafts with kids can be the most magical experience you've ever had, transforming simple materials into treasures. You'll find that projects like no-sew fabric flowers and patchwork pillows not only entertain but also teach valuable skills. Imagine the joy on a child's face when they make their own felt animal puppet or a colorful scrunchie. These activities are not just about fun; they're opportunities for learning and growth. Curious about how to make these fabric crafts both engaging and educational? Let's explore the possibilities together.
Table of Contents
Key Takeaways
- Create colorful fabric flowers and string them into garlands using fabric glue.
- Craft animal puppets from felt sheets and enhance them with googly eyes or buttons.
- Make patchwork pillows with fabric scraps and personalize them with fabric painting or embroidery.
- Design fabric bracelets and friendship cuffs using colorful fabric scraps.
- Craft handmade fabric banners and notebooks with personalized embellishments.
No-Sew Fabric Flowers
Creating no-sew fabric flowers is a fun and easy craft project that kids of all ages can enjoy. You'll love how this simple activity can transform scraps of fabric into beautiful, versatile decorations.
Start by selecting some colorful fabric pieces and cutting them into petal shapes. Layer these petals, securing them with a dab of fabric glue at the center, and voilà—you've got your first fabric flower!
Once you've mastered the basic flower, you can get creative with various projects. For instance, why not make a stunning fabric flower crown? Kids will adore wearing their handmade crowns at playdates or parties.
Or, you could create a lovely fabric flower wreath to hang on a door or wall, adding a personal touch to your home decor.
Another fantastic idea is to craft fabric flower headbands. These make wonderful gifts and are perfect for special occasions.
Finally, try stringing several flowers together to form a fabric flower garland. Drape it across a window or bed frame for an instant, charming decor upgrade.
With these projects, your crafting skills will blossom, and you'll have delightful decorations to show off.
Simple Patchwork Pillows
After crafting beautiful fabric flowers, why not use your leftover fabric scraps to make simple patchwork pillows that brighten up any room? Start by gathering your fabric pieces and laying them out in a pleasing pattern. Mastering quilting basics is essential here; align your fabric squares, ensuring the edges meet seamlessly. For a personalized touch, try fabric painting on a few squares before sewing them together. This adds a unique element to your patchwork design.
Next, employ some basic sewing tips: pin your squares together, sew with a consistent seam allowance, and press your seams flat to avoid bulk. Once your patchwork front is complete, cut a backing fabric to match its size. Pin and sew around the edges, leaving a small opening to turn your pillow right-side out. Stuff it with fiberfill and hand-stitch the opening closed.
To elevate your project, consider adding embroidery techniques. Simple stitches can outline shapes or add details to your fabric squares, giving your pillow a sophisticated look. By combining these methods, you'll create a beautiful and functional piece, showcasing your newfound skills in fabric crafts.
Felt Animal Puppets
With just a few felt sheets and some basic sewing supplies, you can craft adorable animal puppets that will delight kids of all ages. Begin by selecting your favorite animals—think lions, bears, or even unicorns.
Trace and cut out the shapes for the puppet bodies, ears, and other details from the felt sheets. Don't worry if your lines aren't perfect; felt is very forgiving.
Now, it's time for some puppet-making magic. Start by sewing the pieces together using a simple running stitch. If sewing isn't your forte, fabric glue works wonders too.
Add googly eyes, buttons, or stitched features to bring your felt creations to life. The key is to let your imagination run wild and have fun with the details.
Once your puppets are ready, the real joy begins: puppet play! Encourage kids to create stories and adventures with their new felt friends. Puppet play enhances creativity, language skills, and social interaction. Plus, it's an excellent way to keep kids entertained for hours.
Easy Fabric Bracelets
Once you've finished making animal puppets, why not try your hand at crafting some easy fabric bracelets that kids will love to wear and share?
These fabric bracelets aren't only fun to create but also provide an excellent opportunity for children to explore their creativity. Begin by gathering a variety of colorful fabric scraps, scissors, and some basic sewing supplies.
Start with simple friendship bracelets. Cut strips of fabric, about an inch wide and long enough to wrap around a wrist. Encourage kids to experiment with creative patterns, such as stripes, polka dots, or even tie-dye effects. Once the fabric strips are ready, sew or glue the ends together to form a loop. You can add extra flair by including beads, buttons, or small charms.
For a more sophisticated project, try making fabric cuffs. These can be crafted from sturdier fabric like denim or canvas. Cut a piece to fit around the wrist and decorate it with unique designs using fabric paint, embroidery, or iron-on patches. Attach Velcro strips or snaps for easy fastening.
With these easy fabric bracelet projects, kids won't only develop their crafting skills but also create wonderful keepsakes and gifts.
Colorful Scrunchies
Making colorful scrunchies is a fun and easy project your kids will love.
First, gather your materials, including fabric scraps, elastic, and a needle and thread.
Then, follow our step-by-step guide to create vibrant, custom hair accessories in no time.
Materials You'll Need
To create colorful scrunchies, you'll need fabric, elastic, scissors, and a needle with thread. The fabric is your blank canvas, so choose materials that inspire you. Cotton, satin, and velvet work well and offer different textures and finishes.
Before you cut your fabric, consider adding personal touches through fabric painting. This allows you to craft creative designs that make your scrunchies unique. Use fabric paint to add patterns, shapes, or even your name. For those who love vibrant colors, fabric dyeing is another fantastic option. You can dip-dye or tie-dye your fabric to produce bold and eye-catching hues.
Next, you'll need elastic. Choose a durable elastic band that provides enough stretch without losing its shape. You can find elastic in various widths, but a quarter-inch to half-inch wide band usually works best for scrunchies.
Make sure you have a good pair of fabric scissors. These are essential for cutting your fabric cleanly and evenly. Finally, you'll need a needle and thread for sewing. A strong, medium-sized needle and thread that matches or complements your fabric color will help you achieve a polished finish.
With these materials, you'll be all set to create stunning, personalized scrunchies.
Step-by-Step Guide
Now that you've gathered all your materials, let's create your colorful scrunchies step by step. This project is perfect for exploring fabric painting and creative sewing while using upcycled fabric projects. Follow these instructions and enjoy the process of transforming simple textile art into something beautiful and functional.
- Cut the Fabric: Begin by cutting a strip of fabric about 22 inches long and 4 inches wide. Feel free to use old clothes or leftover fabric—upcycling at its finest!
- Paint and Decorate: Use fabric paint to add creative designs to your fabric strip. This is your chance to let your imagination run wild. Allow the paint to dry completely before moving on.
- Sew the Edges: Fold the fabric in half lengthwise, with the painted side facing in. Sew along the edge, leaving a small gap at both ends.
- Turn and Insert Elastic: Turn the fabric right-side out through one of the gaps. Use a safety pin to thread a 7-inch piece of elastic through the fabric tube.
- Finish and Secure: Sew the ends of the elastic together, then stitch the fabric ends closed. Your colorful scrunchie is now ready to wear!
DIY Fabric Bookmarks
Creating DIY fabric bookmarks is a fun and easy project that lets kids personalize their reading accessories. First, gather some colorful fabric scraps, fabric paints, and a few basic sewing supplies. Encourage kids to use fabric painting to add vibrant designs to their bookmarks. They can experiment with patterns, shapes, or even their favorite book characters.
Once the paint is dry, it's time for some creative stitching. Show them how to sew around the edges to prevent fraying and add a decorative touch. They can use contrasting thread colors to make the stitches pop or try out different stitches like the blanket stitch or running stitch.
Next, incorporate innovative fabric decorations to make each bookmark unique. Think buttons, ribbons, and small fabric appliqués. These little details can turn a simple bookmark into a piece of art.
Finally, don't forget the tassel! A colorful tassel at the top of the bookmark adds a fun, finishing touch and makes it easier to find in a book.
DIY fabric bookmarks also make fantastic personalized gifts. Kids can create custom designs for friends and family, turning their handmade bookmarks into cherished keepsakes.
Fabric-Covered Notebooks
Transform ordinary notebooks into delightful and personalized keepsakes with fabric covers. It's a fun and easy project that adds a touch of creativity to your kid's school supplies. You'll need a notebook, fabric of your choice, scissors, glue, and a bit of time. Let your child pick out their favorite fabric patterns to make it uniquely theirs.
Here's a step-by-step guide:
- Measure and cut the fabric: Make sure it's slightly larger than the notebook's dimensions.
- Apply glue: Spread an even layer of glue on the notebook's covers.
- Adhere the fabric: Carefully place the fabric onto the glued surface, smoothing out wrinkles.
- Trim excess fabric: Cut away any fabric that extends beyond the notebook edges.
- Personalize: Add embellishments like buttons, ribbons, or stickers for extra flair.
This activity isn't just about covering notebooks. Encourage your child to create matching fabric covered pencil cases or even fabric wrapped photo frames to organize their study space with style.
This project fosters creativity, fine motor skills, and a sense of accomplishment. Plus, it's a fantastic way to use up fabric scraps from other crafts. So, gather your supplies and engage in this charming and practical craft!
Handmade Fabric Banners
After decorating your notebooks, let's channel that creative energy into making vibrant handmade fabric banners to add a splash of color to any room. Fabric wall hangings can be as simple or intricate as you desire. Start by selecting your favorite fabrics and cutting them into shapes like triangles, squares, or any design you prefer.
Next, consider adding creative embroidery to your fabric pieces. This step allows you to personalize your banners with names, inspirational quotes, or fun patterns. Use colorful threads to enhance the visual appeal. If you're new to embroidery, simple stitches like running stitch or backstitch are perfect to get started.
Creating custom fabric flags is another exciting option. You can design each flag with distinct colors and patterns, making them unique. Don't forget to add embellishments like sequins, buttons, or fabric paint for an extra touch of flair.
Fabric Scrap Collages
Plunge into the realm of fabric scrap collages by gathering a variety of colorful fabric remnants to spark your creativity. This engaging project combines the vibrant world of mixed media with the tactile pleasure of textile art, making it a fantastic activity for kids who love hands-on crafting.
Start by selecting a base like sturdy paper or canvas to build your collage upon.
Here's what you'll need:
- Fabric scraps: Choose a mix of textures, colors, and patterns to make your collage come alive.
- Glue or fabric adhesive: Ensure it's appropriate for fabric to keep everything securely in place.
- Scissors: Sharp enough to easily cut through different types of fabric.
- Markers and paint: Add extra details and enhance your design.
- Embellishments: Think buttons, sequins, or ribbons for an added touch of flair.
Encourage kids to sketch a simple design first, then cut the fabric into different shapes to fit their vision. Layer and arrange the fabric pieces, experimenting with overlapping and contrasting textures.
The final step is gluing everything down, letting the mix of materials create a unique, tactile masterpiece.
With fabric scrap collages, you're not just crafting; you're mastering the art of transforming textiles into stunning, mixed media artwork.
Frequently Asked Questions
What Types of Fabric Are Best for Kids' Crafts?
You should focus on fabric selection that's age appropriate, like felt and cotton. Consider fabric alternatives that are budget friendly, such as old t-shirts or sheets. These options guarantee safe, affordable, and enjoyable crafting experiences for kids.
How Do I Safely Store Leftover Fabric Scraps?
You don't want a fabric scrap avalanche, do you? For effective fabric scrap organization, use clear bins or ziplock bags. Recycling fabric scraps by color or size will keep your space tidy and your sanity intact.
Are Fabric Crafts Suitable for Very Young Children?
Yes, fabric crafts can be age-appropriate for very young children, but supervision is needed. They enhance creativity and motor skills. Always choose simple projects and safe materials to guarantee a fun and educational experience.
Can I Wash Fabric Crafts Made by Kids?
Imagine a sailor maintaining his sails; you must handle fabric crafts similarly. Washing instructions guarantee fabric craft durability. Use cold water and mild detergent to prevent fabric fading and color bleeding, preserving your child's creations beautifully.
What Basic Sewing Tools Are Essential for Beginners?
You'll need essential tools like a sewing machine, sharp scissors, various threads, and plenty of pins. These basics guarantee you're well-prepared to tackle any sewing project with confidence and achieve professional results.
- Does Chiffon Fabric Stink - July 15, 2025
- Does Chiffon Fabric Affect the Economy - July 15, 2025
- Does Cotton Fabric Have a Nap - July 15, 2025


