To test fabric shrinkage at home, start by cutting a fabric swatch and marking its dimensions. Wash the swatch in cold water with gentle detergent on a gentle cycle. After washing, dry it either by air drying flat or using a low-heat machine setting. Measure the dimensions before and after drying, then calculate shrinkage using the formula: Shrinkage Percentage = [(Original Length – Final Length) / Original Length] x 100. Keep going to see detailed steps!
Key Takeaways
- Cut a fabric swatch, mark its initial dimensions, and document the measurements for accurate tracking of shrinkage.
- Wash the fabric swatch in cold water using a gentle cycle and mild detergent to minimize shrinkage.
- Dry the fabric swatch by air drying flat or using a low-heat setting in the dryer to avoid excessive shrinkage.
- Measure the fabric swatch again after drying, ensuring it is flat and wrinkle-free before recording dimensions.
- Calculate the shrinkage percentage using the formula: [(Original Length – Final Length) / Original Length] x 100 for analysis.
Materials Needed for Testing Fabric Shrinkage
To test fabric shrinkage at home, you’ll need a few essential materials.
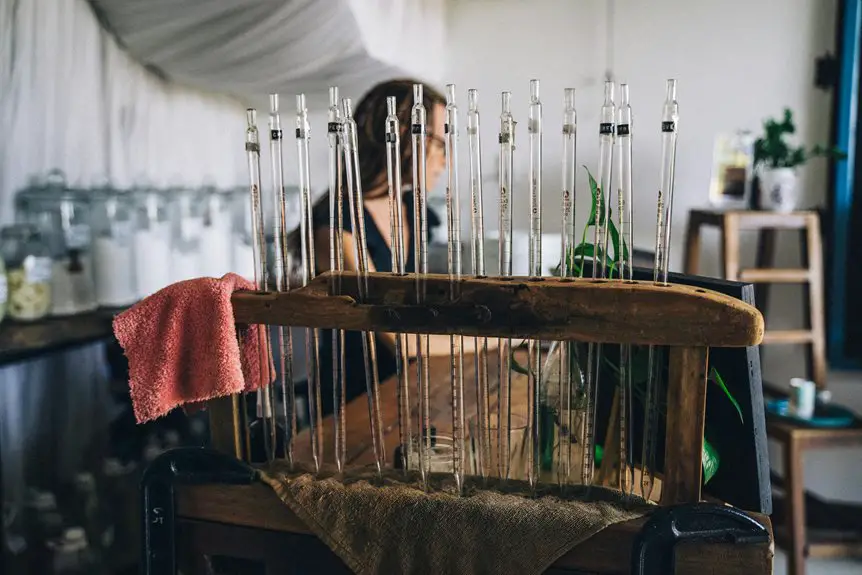
First, grab a measuring tape or ruler for precise measurements. You’ll also want a fabric swatch, ideally cut from the garment you’re testing.
Begin by gathering a measuring tape or ruler for accuracy, along with a fabric swatch from the garment you’re examining.
Make sure to have a permanent marker or fabric chalk handy to mark the initial size of your fabric.
Next, prepare hot water, as it’s vital for simulating laundry conditions. A washing machine or pot for boiling water is necessary too.
Finally, don’t forget a dryer or a flat surface for drying your fabric swatch.
With these materials, you’ll be ready to effectively test how much your fabric might shrink after washing and drying.
Preparing the Fabric Swatch
To prepare your fabric swatch, you’ll need to gather your materials from the checklist.
Once you have everything ready, it’s essential to mark the dimensions precisely for accurate testing.
This step guarantees you can effectively measure any shrinkage that occurs.
Required Materials Checklist
Preparing your fabric swatch requires just a few essential materials to confirm accurate results in the shrinkage test. Gather the following items before you start:
- Fabric: Choose a representative piece of the material you want to test.
- Measuring Tape: You’ll need this to measure the dimensions of your swatch precisely.
- Scissors: Use these to cut a clean, straight swatch from your fabric.
- Permanent Marker: This helps you mark any necessary measurement points or guidelines.
Having these materials on hand confirms you can efficiently prepare your swatch and conduct the test without interruptions.
Marking Dimensions Precisely
Once you have your fabric swatch cut, it’s essential to mark the dimensions accurately to guarantee reliable shrinkage results.
Start by laying your swatch flat on a clean, hard surface. Using a ruler, measure the length and width of the swatch, ensuring you’re measuring from the same starting point each time for consistency.
Use a fabric marker or tailor’s chalk to make precise marks at each corner. It’s a good idea to jot down these measurements on a piece of paper, noting the fabric type and any specific characteristics.
Double-check your markings before proceeding to the next step. This preparation helps you track changes accurately after washing, making your shrinkage test more effective and informative.
Marking the Dimensions
When you’re ready to mark the dimensions for your fabric shrinkage test, grab a measuring tape and a fabric marker.
You’ll want to verify your measurements are accurate, as this will determine how you assess shrinkage after washing. Start by measuring a square or rectangular section of the fabric.
Here’s what to focus on:
- Measure the length and width of the fabric piece.
- Mark the starting point with a small dot or line.
- Use the fabric marker to draw a clear line for each measurement.
- Double-check your measurements for accuracy before proceeding.
Once you’ve marked the dimensions, you’ll have a clear guide for evaluating any changes after washing.
Washing the Fabric
To wash the fabric, start by filling your washing machine with cold water, as this helps minimize shrinkage. Add a gentle detergent to protect the fibers. If you’re washing multiple fabrics, separate them by color and fabric type to prevent any bleeding or damage.
| Step | Action |
|---|---|
| 1. Prepare | Fill machine with cold water |
| 2. Detergent | Add gentle detergent |
| 3. Sorting | Separate by color/type |
| 4. Wash Cycle | Use a gentle cycle |
Once you’ve set the machine, let it run its cycle. After washing, inspect the fabric to confirm it hasn’t shrunk excessively before moving on to the next steps.
Drying the Fabric
Now that you’ve washed your fabric, it’s essential to take into account how you’ll dry it.
You can choose between air drying techniques or machine drying settings, each affecting shrinkage differently.
Don’t forget to allow for a fabric relaxation period to see how much it might change.
Air Drying Techniques
Air drying fabric is a simple yet effective method to minimize shrinkage. By following a few key techniques, you can guarantee your fabric retains its shape and size.
Here are some helpful tips:
- Use a flat surface: Lay your fabric flat on a clean, dry towel to maintain its original dimensions.
- Hang it up: If you choose to hang your fabric, use clips to avoid stretching and guarantee even drying.
- Avoid direct sunlight: Keep your fabric in a shaded area to prevent fading and potential damage.
- Air circulation: Make sure there’s good airflow around the fabric to speed up drying without heat.
With these techniques, you’ll effectively reduce the risk of shrinkage while keeping your fabric looking great.
Machine Dry Settings
When you opt for machine drying, selecting the right settings can make all the difference in preventing fabric shrinkage.
Start by checking the care label on your fabric; it often provides valuable guidance. If you’re drying delicate fibers, choose a low-heat setting or a gentle cycle. For more durable fabrics, a medium heat setting might work well, but avoid high heat, which can cause significant shrinkage.
Always consider the fabric type—cotton and wool are particularly prone to shrinking. It’s also wise to remove items while they’re still slightly damp to minimize heat exposure.
Finally, don’t overload the dryer; giving your fabric enough space helps it dry evenly and reduces the risk of unnecessary shrinkage.
Fabric Relaxation Period
Although it might seem tempting to rush the drying process, allowing a fabric relaxation period is essential for preserving its shape and size.
When you give the fabric time to relax, you help minimize shrinkage and distortion.
Here are some tips for an effective relaxation period:
- Lay flat: Place the fabric on a clean, dry surface to avoid stretching.
- Avoid direct sunlight: Keep it in a shaded area to prevent fading and damage.
- Pat dry: Use a towel to gently blot excess moisture before laying it flat.
- Time it right: Aim for at least 24 hours, ensuring the fabric is completely dry and relaxed.
Measuring Initial Dimensions
To accurately assess fabric shrinkage, you need to measure the initial dimensions of the material before any washing or drying occurs. Start by laying your fabric flat on a smooth surface, ensuring it’s wrinkle-free. Use a measuring tape or ruler to take precise measurements of both length and width. Record these dimensions in a notebook for easy reference.
Here’s a simple table to help you organize your measurements:
| Measurement Type | Initial Dimensions (inches) |
|---|---|
| Length | |
| Width | |
| Total Area | |
| Fabric Type |
Once you’ve documented these initial dimensions, you’re ready to move on to the next steps in the fabric shrinkage test.
Measuring Final Dimensions
After recording the initial dimensions, it’s time to measure the final dimensions of your fabric.
Lay the fabric flat on a clean surface, guaranteeing there are no wrinkles. Use a flexible measuring tape for accuracy, and measure the length and width of the fabric in the same way you did before.
Keep these tips in mind while measuring:
- Make sure the fabric is completely flat without any folds.
- Measure in inches or centimeters, whichever you’re comfortable with.
- Record each measurement immediately to avoid confusion.
- Double-check your measurements for accuracy.
Once you’ve gathered the final dimensions, you’ll be ready to move on to the next step in evaluating how much your fabric has shrunk.
Calculating Shrinkage Percentage
Calculating shrinkage percentage is a straightforward process that helps you understand how much your fabric has changed after washing.
Understanding fabric shrinkage is essential for maintaining the integrity of your materials after washing.
First, take the original measurement of your fabric before washing, and then measure it again after it’s dried. Use the formula:
Shrinkage Percentage = [(Original Length – Final Length) / Original Length] x 100.
For example, if your fabric originally measured 60 inches and shrank to 58 inches, you’d subtract 58 from 60, getting 2 inches.
Next, divide 2 by 60, which equals 0.0333. Multiply by 100 to find that your fabric shrank by 3.33%.
Analyzing the Results
Once you’ve calculated the shrinkage percentage, it’s essential to analyze the results to understand their implications for your fabric.
Consider the following factors:
- Fabric Type: Different materials behave uniquely; natural fibers often shrink more than synthetics.
- Usage: If you plan to wash the fabric frequently, higher shrinkage could lead to fit issues over time.
- Pre-treatment: Fabrics that are pre-shrunk may not shrink further, while untreated ones could lead to unexpected size changes.
- Care Instructions: Follow the manufacturer’s guidelines; your analysis will help you decide if special care is needed.
Tips for Accurate Testing
To achieve reliable results in your fabric shrinkage test, it is crucial to follow a few key steps. First, use a consistent washing method: always wash in the same temperature and drying conditions. Second, measure your fabric accurately before and after the test. Keep track of the shrinkage percentage using this formula:
[ text{Shrinkage} = frac{text{Original Length} – text{Final Length}}{text{Original Length}} times 100 ]
Here’s a simple table to help you organize your measurements:
| Measurement | Before (inches) | After (inches) |
|---|---|---|
| Fabric A | 30 | 28 |
| Fabric B | 40 | 39 |
| Fabric C | 35 | 34 |
| Fabric D | 50 | 48 |
Frequently Asked Questions
Can I Use Any Fabric for Shrinkage Testing?
You can use various fabrics for shrinkage testing, but it’s best to choose ones with different fiber compositions. This way, you’ll see how each type reacts, ensuring you understand shrinkage behavior across materials.
How Often Should I Test Fabric for Shrinkage?
Oh sure, test every fabric every week if you’ve got nothing better to do! In reality, once or twice a year’s usually enough, unless you’re hoarding a collection of particularly fickle fabrics.
What if My Fabric Shrinks Unevenly?
If your fabric shrinks unevenly, you should assess the cause. It might be due to washing methods or fabric types. You can try ironing or stretching it gently to restore some shape and balance.
Does Fabric Type Affect Shrinkage Results?
Did you know that cotton can shrink up to 20%? Yes, fabric type considerably affects shrinkage results. Natural fibers like cotton and wool often shrink more than synthetic materials, so consider this when choosing your fabrics.
Can I Reuse the Fabric Swatch After Testing?
You can often reuse the fabric swatch after testing, but it depends on the test’s intensity and the fabric’s condition. If it looks damaged or altered, it’s best to use a new swatch.