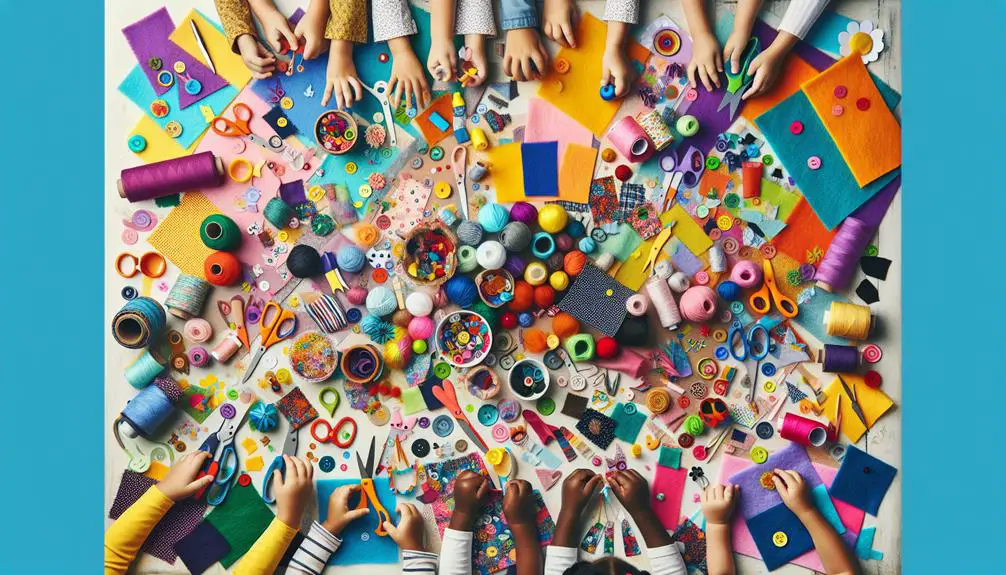
You might think fabric crafts are too challenging for kids, but with the right guidance, they can be both fun and manageable. Imagine your child creating colorful fabric collages or adorable felt animals, all while learning basic sewing techniques. No-sew projects like pillows and keychains provide an easy introduction to crafting, ensuring successful results that boost confidence. These activities don't just entertain; they also encourage imaginative play and artistic expression. Curious about how to get started and what materials you'll need? Let's explore the exciting world of fabric crafts designed specifically for young creators.
Table of Contents
Key Takeaways
- Fabric collages enhance artistic skills by using mixed media and fabric dyeing techniques.
- Felt animals teach cutting and sewing basics, decorated with markers and buttons.
- No-sew pillows offer simple, fun projects using glue or tape for assembly.
- DIY fabric bracelets repurpose leftover fabric into stylish, customizable accessories.
- Fabric flower pins develop fine motor skills and creativity with vibrant, layered petals.
Fabric Collages
Creating fabric collages is a fun and engaging way for kids to explore their creativity with colorful scraps of fabric. You can introduce them to various techniques like fabric painting and fabric dyeing to add unique textures and vibrant hues to their collages. By teaching these methods, you'll help them understand how to manipulate colors and patterns, giving their creations a professional touch.
Encourage the use of mixed media in their textile art projects. Mixing fabrics with other materials like buttons, beads, or even pieces of paper can add an exciting dimension to their work. This approach not only makes the collages more visually appealing but also helps kids develop a deeper appreciation for different textures and materials.
For a more advanced challenge, guide them in creating themed collages. You could focus on nature scenes, abstract designs, or even story-driven pieces. This will push their creative boundaries and enhance their artistic skills.
Felt Animals
Creating felt animals is a fun way to practice simple cutting techniques and easy sewing tips.
You can start by tracing animal shapes on felt and cutting them out.
Then, stitch the pieces together using basic sewing methods that are perfect for beginners.
Simple Cutting Techniques
Cutting felt into animal shapes is an easy and fun way for kids to practice their scissor skills. To start, you'll need some felt sheets in various colors, a pair of sharp scissors, and templates of your favorite animals.
Unlike paper alternatives, felt offers a more forgiving texture, allowing kids to achieve cleaner cuts and more detailed shapes.
Begin by tracing the animal templates onto the felt with a fabric marker or chalk. Encourage your kids to cut slowly and carefully along the lines, making sure they follow the contours of the shapes. This process helps them develop precision and control.
If you're new to hand sewing basics, consider using larger, simpler animal shapes initially. This will make it easier for kids to cut and will provide ample practice for their developing skills.
Once the animal shapes are cut out, they can be decorated with fabric markers, buttons, or small pieces of felt. You can even glue or lightly stitch details like eyes, ears, and tails.
This hands-on activity not only enhances their cutting skills but also sets the stage for more advanced projects. Mastering these simple techniques will build their confidence and prepare them for more intricate crafts.
Easy Sewing Tips
Now that your felt animal shapes are ready, let's explore some easy sewing tips to bring them to life. Start with basic hand stitching techniques such as the running stitch or whip stitch. These are simple yet effective ways to join the pieces of felt. Make sure your stitches are even and tight to give your animal a polished look.
To enhance your felt animals, consider adding fabric embellishments. Use buttons for eyes, small pieces of fabric for clothing, or embroidery floss for added texture. Get creative with your ideas; think about using sequins for sparkle or beads for a unique touch.
Decorative techniques can elevate your project. For example, use blanket stitches around the edges to create a visually appealing border. You can also try backstitching for outlining details like paws or facial features. These methods not only secure your project but also add a layer of sophistication.
No-Sew Pillows
Creating no-sew pillows is a fun and easy project for kids.
You'll start by choosing the right fabric types and learning simple cutting techniques.
Then, you can assemble your pillow without needing any sewing skills at all.
Choosing Fabric Types
When choosing fabric types for no-sew pillows, consider soft and durable materials like fleece or flannel to guarantee comfort and longevity. These fabrics are easy to work with, don't fray, and provide a cozy touch to your projects.
To elevate your no-sew pillows and demonstrate your mastery, you can incorporate various decorative techniques.
Here are three fabric decoration techniques you can try:
- Fabric printing techniques: Experiment with stamping or block printing to add unique patterns and designs. This method requires minimal supplies and can transform plain fabric into something extraordinary.
- Fabric dyeing methods: Use tie-dye or dip-dye techniques to create vibrant, custom-colored fabrics. Dyeing is a fun way to introduce bold colors and gradients to your pillows, making each piece one-of-a-kind.
- Fabric painting ideas and fabric embellishments: Painting on fabric allows for intricate designs and personalization. Combine this with embellishments like sequins, buttons, or beads to add texture and a touch of sparkle.
Simple Cutting Techniques
Mastering simple cutting techniques is essential for crafting no-sew pillows that look polished and professionally made. Start by selecting your fabric. Choose materials with fun patterns or experiment with fabric weaving to add visual interest. Lay your fabric flat and use a measuring tape and fabric chalk to mark the dimensions of your pillow, adding an extra inch all around for tying.
To create unique shapes, consider using origami fabric techniques. Fold your fabric into desired shapes before cutting, ensuring symmetry and precision. This adds a creative twist and makes your pillows stand out.
Next, use sharp fabric scissors for clean, straight cuts. Dull scissors will fray the edges and compromise the final look. Cut along the marked lines carefully, maintaining steady pressure. If you're working with intricate designs or smaller pieces, a rotary cutter can offer more control and accuracy.
For added flair, incorporate fringes or tassels into your design. Simply cut small strips along the edges of your fabric, ensuring consistent lengths and widths. These elements will enhance the overall aesthetic and make your no-sew pillows look professionally crafted.
With these cutting techniques, you'll create beautiful, unique pillows effortlessly.
Assembling Without Sewing
To put together your no-sew cushion, start by laying the two fabric pieces on top of each other with the right sides facing out. Make sure they align perfectly, as this is essential for a polished look.
Next, choose your adhesive technique: glue bonding or tape construction. Both methods are effective, but each has its nuances.
- Glue Bonding: Use fabric glue along the edges, leaving a small gap unglued for stuffing. Press the edges firmly together and let them dry completely.
- Tape Construction: Fabric tape is another excellent option. Cut strips of the tape and place them along the edges, pressing firmly to secure. Leave a small section open for stuffing.
- Stuff and Seal: Once your edges are secure, stuff your cushion with polyfill or any soft material of your choice. After stuffing, close the remaining gap using your chosen adhesive method.
Mastering these no sew designs allows you to create beautiful, custom cushions without the need for a sewing machine. The key is precision in alignment and patience with the adhesive techniques. With practice, you'll produce professional-looking cushions that are both functional and decorative.
Fabric Scrap Bookmarks
Creating fabric scrap bookmarks is a fun and simple way to repurpose leftover materials. First, gather your fabric scraps and cut them into long, rectangular pieces. Make sure the edges are clean by trimming any frayed threads. Using a fabric glue or a hot glue gun, attach a piece of felt or sturdy fabric to the back for added strength. Decorate with buttons, ribbons, or fabric paint to add a personal touch.
Much like fabric scrap magnets and fabric strip keychains, these bookmarks are perfect for using up small fabric pieces that might otherwise go to waste. You can make a whole set of bookmarks in various colors and patterns, making reading time more exciting.
Additionally, you can expand your crafting skills by creating matching fabric scrap ornaments and fabric patch coasters. These projects not only help you utilize every bit of your fabric stash but also make great gifts.
DIY Fabric Bracelets
Just like fabric scrap bookmarks, DIY fabric bracelets offer a fantastic way to repurpose leftover fabric pieces into stylish accessories.
The beauty of these bracelets lies in their versatility and the opportunity they provide to experiment with various patterns and color choices. Whether you're aiming for a simple design or something more intricate, there's plenty of room for creativity.
To get started, you'll need some basic materials:
- Fabric Strips: Choose your favorite patterns and colors.
- Beaded Embellishments: Add a touch of sparkle or texture.
- Closure Options: Think buttons, snaps, or even Velcro.
Once you've gathered your supplies, cut the fabric into strips. You can braid them, twist them, or even knot them for different looks. Don't be afraid to mix and match colors and patterns to create something uniquely yours.
Beaded embellishments can be sewn onto the fabric for added flair, transforming a simple bracelet into a statement piece.
Stuffed Fabric Shapes
When it comes to stuffed fabric shapes, you can let your imagination run wild with endless possibilities for fun and creative designs. These shapes can be as simple or as intricate as you want, making them perfect for children who are excited to learn and master new crafting skills.
Start with basic shapes like stars, hearts, or even animals. Once you've got the basics down, you can move on to more complex projects like fabric puppets or quilted ornaments.
Creating fabric puppets is a fantastic way to engage kids in storytelling and imaginative play. You can make a variety of characters, from animals to fairytale figures, using colorful fabric scraps. Simply cut out your desired shapes, sew them together, and stuff them with cotton or polyester filling.
Quilted ornaments, on the other hand, are perfect for adding a personal touch to your home décor or as thoughtful handmade gifts. By using small pieces of fabric, you can create intricate patterns and designs. These ornaments often involve a bit more sewing skill, but the end result is a beautiful, durable piece that children will be proud to display.
Patchwork Art
Patchwork art lets kids piece together colorful fabric scraps to create vibrant, one-of-a-kind designs. This activity not only sparks creativity but also teaches important skills like color coordination and pattern recognition. By working with quilt squares, children can experiment with various creative designs and learn the basics of textile art.
Here's how you can get started with patchwork art:
- Gather Materials: Collect an assortment of fabric scraps in different colors and patterns. Make sure you have scissors, fabric glue, and a base fabric or paper to attach your patches.
- Design Layout: Have your child arrange the fabric scraps into quilt squares and experiment with different colorful patterns. Encourage them to think about how the colors and shapes work together to form a cohesive design.
- Assemble the Patchwork: Once the design is finalized, help your child glue the fabric pieces onto the base fabric or paper. This step will solidify their understanding of textile art and provide a durable piece of art they can be proud of.
Fabric Flower Pins
Creating fabric flower pins is a delightful way for kids to explore their creativity while making charming accessories. Start by selecting vibrant fabrics that catch the eye, such as cotton or felt. Cut the fabric into petal shapes, ensuring each petal is uniform for a professional finish.
Next, layer the petals, sewing or gluing them together at the center. This step brings your flower to life.
Attach a pin backing to the flower's underside. This simple yet transformative step turns your fabric flower into a wearable accessory. Kids can proudly display their creations on backpacks, jackets, or hats. For added flair, incorporate beads or buttons in the flower's center.
Beyond pins, these fabric flowers are versatile. Encourage kids to create fabric flower headbands, fabric flower hair clips, and even fabric flower crowns. Imagine the joy on their faces as they craft a fabric flower garland to decorate their room or a friend's party.
These projects not only enhance fine motor skills but also foster a sense of accomplishment. By mastering the art of fabric flower pins, kids can expand their creativity into countless other fabric flower crafts, making each project uniquely their own.
Frequently Asked Questions
What Age Group Are These Fabric Crafts Suitable For?
Think of these crafts as a creative playground. They're age-appropriate for kids aged 5-12, catering to different skill levels. You can explore creative alternatives and use different materials to keep it engaging and fun.
Where Can I Buy Kid-Friendly Fabric Materials?
You can buy kid-friendly fabric materials from online retailers like Amazon or Etsy. Craft stores such as Michaels and Joann Fabrics also offer a wide selection. Explore these options to find the best materials for your projects.
Are There Any Safety Tips for Using Fabric Glue With Kids?
When using fabric glue with kids, provide proper ventilation to avoid inhaling fumes. Supervise closely to prevent ingestion and skin contact. Consider fabric glue alternatives like sewing or adhesive tape to mitigate potential hazards.
How Can I Store Leftover Fabric Scraps for Future Projects?
For fabric scrap organization, use clear bins or jars to sort by color or size. Try creative storage ideas like hanging bags. Upcycling fabric scraps into eco-friendly projects keeps your space tidy and sustainable.
Can These Fabric Crafts Be Machine-Washed if They Get Dirty?
Imagine a resilient superhero cape made from kid-friendly materials. Just like that cape, many fabric crafts are durable and machine washable. Check labels at fabric stores or online shopping to guarantee your projects withstand the wash.
- Tetron Fabric for Marine Applications: Durability and Use Cases - June 18, 2025
- Tetron Fabric for Outdoor Furniture: Weather Resistance and Care - June 18, 2025
- Tetron Fabric for Wall Coverings: Style and Application Tips - June 18, 2025


