You’ll want essential tools like an upholstery staple gun for securing fabric, a tack hammer for precise nailing, and sturdy upholstery needles for tough stitching. Add pliers and a webbing stretcher to keep materials tight and smooth. Spray adhesive helps with bonding, while upholstery twine is perfect for finishing touches. Don’t forget work gloves for safety and a dust mask to protect your lungs. Keep these basics handy to build your skills and explore more advanced techniques ahead.
Key Takeaways
- Upholstery staple guns and tack hammers are essential for securing fabric quickly and accurately to furniture frames.
- Heavy-duty scissors and rotary cutters provide clean, precise fabric cuts and prevent fraying edges.
- Upholstery needles and strong, heavy-duty thread ensure durable sewing through thick fabrics and foam.
- Measuring tapes, straight edge rulers, and fabric markers help achieve accurate cuts and proper alignment.
- Protective gloves, safety glasses, and a first aid kit are vital for hand protection and safe upholstery work.
Upholstery Staple Gun
An upholstery staple gun is essential for securing fabric to furniture frames quickly and firmly.
When you pick up a staple gun, you’ll notice how it lets you attach materials with ease, saving you time and effort compared to hand tacking. You simply load staples, press the gun against the frame, and pull the trigger to drive staples deep into wood.
This tool offers a strong hold, keeping fabric taut and smooth, which is vital for a polished look. You’ll appreciate its precision, allowing you to place staples exactly where needed without damaging the fabric.
Whether you’re reupholstering a chair or creating cushions, a staple gun is your go-to tool for efficient, reliable fastening every time.
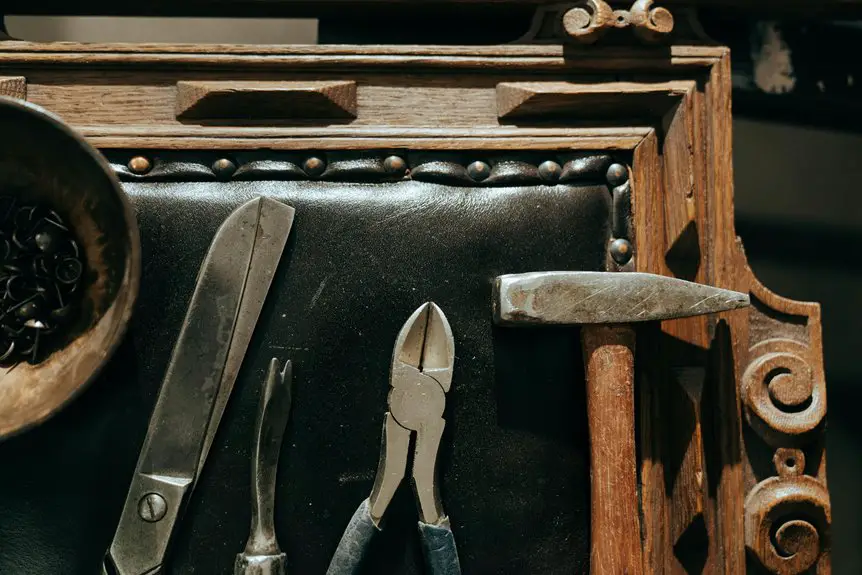
Tack Hammer
While a staple gun handles most of the heavy fastening, a tack hammer gives you control for more delicate work. This tool is essential when you need to set tacks or small nails precisely without damaging the fabric or frame.
Its lightweight design and magnetic face allow you to start tacks easily and tap them in gently.
You’ll appreciate a tack hammer for:
- Placing decorative upholstery tacks accurately
- Working in tight or detailed areas where a staple gun is too bulky
- Avoiding fabric tears by controlling the force applied
Using a tack hammer guarantees your project looks clean and professional. It’s a must-have for any beginner aiming to master fine upholstery details.
Upholstery Needles
Because upholstery needles come in various shapes and sizes, choosing the right one helps you sew through tough fabrics and foam with ease.
You’ll find that curved needles are ideal for maneuvering through thick layers and tight corners, while straight needles work well for simpler seams.
Look for needles with a sharp point and a long eye to accommodate heavy upholstery thread.
When stitching by hand, use a strong, durable needle to prevent bending or breaking.
Remember, using a dull or incorrect needle can damage your fabric or slow your progress.
Keep a few different types on hand, so you’re prepared for any project.
With the right upholstery needles, you’ll achieve neat, secure stitches that hold your work together beautifully.
Webbing Stretcher
When you’re working with webbing, a webbing stretcher helps you pull it tight and secure it firmly.
Using this tool correctly guarantees your upholstery stays sturdy and comfortable over time.
Make sure to grip the webbing properly and apply steady pressure for the best results.
Purpose and Function
Although webbing may seem sturdy on its own, you’ll need a webbing stretcher to guarantee it’s taut and secure during upholstery projects. This tool applies consistent tension, ensuring the webbing doesn’t sag or loosen over time.
Without it, your finished piece won’t have the proper support or durability.
With a webbing stretcher, you can:
- Pull the webbing tight evenly across the frame
- Maintain tension while fastening to prevent slack
- Achieve a professional, long-lasting foundation for cushions
Using this tool helps you create a stable base that supports the upholstery fabric and foam. It’s essential for making furniture comfortable and durable, so don’t skip it when working with webbing.
Usage Tips
Mastering three key usage tips will help you get the most out of your webbing stretcher. First, always secure the webbing firmly before stretching to avoid slippage. Second, apply steady, even pressure to maintain consistent tension across the entire strip. Third, double-check the alignment regularly to keep the webbing straight and prevent wrinkles.
| Tip Number | Action | Benefit |
|---|---|---|
| 1 | Secure webbing | Prevents slippage |
| 2 | Apply steady pull | Guarantees even tension |
| 3 | Check alignment | Avoids wrinkles and warping |
| 4 | Use gloves | Protects hands |
| 5 | Inspect tools | Maintains tool effectiveness |
Following these tips guarantees your upholstery is tight, smooth, and professional-looking.
Pliers
Pliers play an essential role in upholstery projects by helping you grip, twist, and pull materials with ease. Whether you’re removing old staples or bending wires, having the right pliers makes the job smoother and faster.
You’ll want to keep a few types handy:
- Needle-nose pliers for reaching tight spots and detailed work
- Slip-joint pliers for versatile gripping and twisting tasks
- Locking pliers to firmly clamp and hold materials while you work
Using pliers correctly prevents damage to fabric and frames, so always choose the appropriate type for your task. They give you better control and leverage, especially when dealing with stubborn staples or tough wires.
Keep your pliers clean and well-maintained for reliable performance every time.
Scissors
A sharp pair of scissors is a must-have for any upholstery project. You’ll use them to cut fabric, trim threads, and shape batting with accuracy.
Choose scissors designed for fabric to guarantee clean cuts without fraying edges. Keep them exclusively for upholstery to maintain their sharpness and avoid dulling on other materials.
When cutting, hold the fabric taut and use smooth, even strokes to prevent jagged edges. If you’re working with thick layers, consider heavy-duty scissors or shears to handle the extra bulk effortlessly.
Remember to regularly sharpen your scissors to keep them in top condition. With the right scissors, you’ll save time and achieve professional-looking results on your upholstery projects every time.
Measuring Tape
After choosing the right scissors to cut your fabric precisely, you’ll need a reliable measuring tape to confirm your cuts are accurate. A good measuring tape helps you measure your upholstery pieces quickly and guarantees everything fits perfectly.
Look for one that’s flexible and easy to handle, so you can measure curves and corners without hassle.
When selecting your measuring tape, keep these points in mind:
- Choose a tape with both metric and imperial units for versatility.
- Verify the tape is at least 60 inches (150 cm) long to cover larger furniture.
- Pick a tape with a locking mechanism to hold your measurement steady.
With the right measuring tape, you’ll avoid costly mistakes and make your upholstery projects smoother and more enjoyable.
Seam Ripper
You’ll rely on a seam ripper to carefully undo stitches without damaging your fabric.
Picking the right type makes the job easier and safer.
Let’s explore how to use this tool effectively for your upholstery projects.
Purpose and Functionality
Although it might seem like a simple tool, the seam ripper plays an essential role in upholstery projects by allowing you to carefully undo stitches without damaging the fabric. When you make mistakes or need to replace fabric, this tool lets you correct errors efficiently.
It features a sharp, pointed blade designed to slip under stitches and cut them precisely.
Using a seam ripper helps you:
- Remove old upholstery stitches cleanly
- Salvage fabric by avoiding tears
- Prepare materials for reupholstering
With its precise functionality, the seam ripper saves time and prevents costly fabric damage, making it indispensable for anyone starting out in upholstery.
You’ll find it’s the go-to tool whenever you need to undo seams neatly and effectively.
Choosing the Right Type
Anyone starting with upholstery will find that choosing the right seam ripper can make a big difference in ease and accuracy. You’ll want a tool that feels comfortable in your hand and suits the fabric you’re working with. Different types offer unique features, such as blade shape, handle grip, and durability. Here’s a quick guide to help you pick the perfect seam ripper:
| Type | Best For | Key Feature |
|---|---|---|
| Classic Blade | General use | Sharp, pointed blade |
| Ergonomic Grip | Extended use | Comfortable handle |
| Mini Seam Ripper | Delicate fabrics | Small, precise tip |
| Curved Blade | Thick or layered cloth | Curved cutting edge |
| Retractable | Safety and storage | Blade covers easily |
Choose based on your project needs and comfort level.
Safe and Effective Use
When handling a seam ripper, always work slowly and carefully to avoid damaging your fabric or injuring yourself. This tool’s sharp blade makes it easy to cut seams precisely, but you need to stay focused.
Keep your fingers clear of the blade and test on a scrap piece first if you’re unsure.
To use your seam ripper safely and effectively:
- Insert the blade gently under the thread to avoid slicing the fabric.
- Work in small sections to maintain control and accuracy.
- Use the handle to guide the tool steadily without forcing it.
With practice, you’ll remove stitches cleanly and speed up your upholstery projects without mishaps.
Upholstery Foam Cutter
A quality upholstery foam cutter lets you shape foam quickly and accurately, making your projects look professional. When you use one, you’ll find cutting foam cleanly becomes much easier, especially compared to regular knives or scissors.
Foam cutters often feature heated blades, which melt through foam smoothly without tearing or snagging. This helps you achieve precise edges and custom shapes essential for cushions or padding.
You’ll want a cutter that’s comfortable to hold and easy to control, so your cuts stay neat and consistent. Remember to work slowly and steadily, guiding the blade through the foam with even pressure.
Investing in a reliable upholstery foam cutter will save you time and improve your overall craftsmanship.
Button Cover Kit
Button cover kits give you the power to create perfectly matched buttons that blend seamlessly with your upholstery fabric. Using these kits, you can easily cover buttons with your chosen material, ensuring a professional, custom look on cushions, headboards, or chairs.
They come with tools and molds that simplify the process, even if you’re new to upholstery.
When you use a button cover kit, you’ll appreciate its benefits:
- Create uniform buttons tailored to your fabric
- Achieve a polished, cohesive finish on tufted projects
- Save money by covering buttons instead of buying new ones
Mastering this tool enhances your upholstery skills, making your projects look high-end without extra cost or complexity.
Upholstery Tack Strip
Upholstery tack strips help you secure fabric edges tightly and neatly, creating crisp, professional-looking finishes.
These narrow, flexible strips feature angled nails that grip the fabric firmly along frame edges, eliminating bulk and wrinkles. When you attach a tack strip to the wooden frame, you can stretch and hook the fabric’s edge onto the nails, ensuring a smooth, even surface.
Tack strips work best on straight or gently curved sections and save you from struggling with stubborn staples or tacks.
To use them effectively, position the strip carefully, nail it in place, then press the fabric onto the nails, trimming any excess afterward.
Mastering tack strips will give your upholstery projects that polished, tailored look every beginner aims for.
Spray Adhesive
When you work with spray adhesive, choosing the right type makes a big difference in your project’s success.
You’ll want to know some handy application tips and tricks to get a smooth, lasting bond.
Plus, following safety precautions and proper storage will keep you and your workspace safe.
Types of Spray Adhesive
Although spray adhesives might seem similar at first glance, they come in different types designed for specific materials and tasks. Choosing the right one helps you achieve a strong bond and a professional finish.
Here are the main types you should know:
- Contact Adhesive: Bonds instantly on contact, perfect for leather and vinyl.
- Water-Based Adhesive: Safer and easy to clean, great for fabrics and foam.
- Solvent-Based Adhesive: Offers a strong, flexible bond, ideal for heavy-duty upholstery.
Understanding these types lets you pick the right spray adhesive for your project, ensuring materials stick well without damage.
Keep these distinctions in mind as you gather your tools and prepare for your upholstery work.
Application Tips and Tricks
Since spray adhesive can be tricky to handle, mastering a few key application tips will help you get a clean, even bond every time.
First, always shake the can well before use to mix the adhesive thoroughly. Hold the can about 6-8 inches from the surface, spraying in a steady, sweeping motion to avoid drips or patches.
Apply a light, even coat on both surfaces you’re bonding and wait a few seconds for the adhesive to become tacky—this improves adhesion.
When pressing materials together, apply firm, even pressure to guarantee they bond securely without gaps. If you need to reposition, do so quickly before the adhesive sets.
These tricks will make your upholstery projects smoother and more professional-looking.
Safety Precautions and Storage
Because spray adhesive contains flammable chemicals and strong fumes, you need to handle it with care to stay safe.
Always use it in a well-ventilated area to avoid inhaling harmful vapors, and never spray near open flames or sparks. When you’re done, store the can properly to prevent accidents and prolong its shelf life.
Keep these safety and storage tips in mind:
- Store spray adhesive in a cool, dry place away from heat sources and direct sunlight.
- Always seal the nozzle after use to prevent clogging and accidental leaks.
- Dispose of empty cans according to local hazardous waste regulations to protect the environment.
Upholstery Twine
Upholstery twine plays an essential role in securing springs, webbing, and other components during your project. You’ll need strong, durable twine—usually made from cotton or polyester—to tie springs tightly and keep them in place.
When working with springs, use the twine to create a firm knot that won’t loosen over time. It’s also helpful for attaching webbing to frames, ensuring everything stays taut and stable.
Choose twine that’s thick enough to handle tension but flexible enough to work with easily. Keep a spool handy as you’ll use it frequently throughout your upholstery tasks.
Using the right twine helps maintain the structure and longevity of your piece, so don’t skimp on quality when selecting this essential tool.
Dust Mask
A dust mask protects your lungs from fine particles and fibers released when stripping old fabric or working with foam and batting. You’ll find it essential for keeping your breathing safe during these dusty tasks.
Wearing one prevents inhaling irritants that can cause coughing or allergic reactions. Choose a mask that fits snugly over your nose and mouth to guarantee maximum protection.
When selecting and using a dust mask, keep these points in mind:
- Look for masks labeled N95 or higher for effective filtration.
- Replace the mask if it becomes damp or clogged with dust.
- Always wear it in poorly ventilated areas or when sanding foam.
Using a dust mask helps you work comfortably and safely every time.
Work Gloves
When handling tools and materials, work gloves protect your hands from cuts, scrapes, and irritation. Choosing the right pair means looking for durability and comfort. Gloves made from leather or heavy-duty fabric offer solid protection without sacrificing flexibility.
You’ll want gloves that fit well—too loose, and they’ll hinder your grip; too tight, and they’ll restrict movement. Using gloves helps you grip staples, tacks, and sharp tools securely, reducing the chance of slips that cause injury. They also shield your skin from rough fabrics and potential chemical exposure from adhesives or cleaners.
Make sure to clean or replace your gloves regularly to maintain hygiene and effectiveness. Wearing work gloves is a simple step that keeps your hands safe and lets you focus on creating quality upholstery work.
Frequently Asked Questions
What Type of Fabric Is Best for Beginner Upholstery Projects?
You’ll want to pick durable, easy-to-handle fabric like cotton or linen for your beginner upholstery projects. These materials are forgiving, affordable, and simple to work with, helping you build confidence as you learn new skills.
How Do I Choose the Right Foam Density for Cushions?
Choosing foam density is like Goldilocks finding her perfect bed—you want it just right. Pick softer foam for plush cushions, firmer foam for support, and consider how often the cushions will be used to decide durability.
Can I Upholster Furniture Without Removing Old Fabric?
You can upholster furniture without removing old fabric if it’s in good condition and securely attached. Just add new fabric over it, but removing old layers usually gives a cleaner, smoother finish and lets you fix padding underneath.
What Safety Precautions Should I Take When Using Upholstery Tools?
Don’t let safety slip through your fingers! Always wear gloves and eye protection, keep your workspace tidy, handle sharp tools carefully, and unplug power tools when not in use. Stay alert and work smart to avoid accidents.
How Do I Clean and Maintain My Upholstery Tools?
You should wipe your tools after each use, remove any debris or adhesive, and oil moving parts regularly. Store them in a dry place to prevent rust and keep blades sharp to guarantee smooth, efficient work every time.