You can create a stunning twig tree by selecting sturdy, clean twigs around ¼ to ½ inch thick and wrapping them tightly with natural abaca fiber for a rustic, textured look. Secure the fiber ends with knots or glue to keep it neat and durable. Add decorative touches like tiny faux flowers or beads for charm. Place your finished piece where it catches light but stays dry. Keep it dusted and handle gently to maintain its beauty. Explore more tips to perfect your design and care.
Key Takeaways
- Select sturdy, straight twigs with consistent diameter (¼ to ½ inch) and clean, dry them for wrapping with abaca fiber.
- Wrap twigs tightly using smooth, even strokes of abaca fiber, securing ends with knots or craft glue for durability.
- Plan your twig tree design by sketching, layering branches thoughtfully, and building a strong base for balance and natural depth.
- Add decorative elements like faux flowers, beads, or colorful yarn for texture, ensuring even placement and secure attachment.
- Display the finished piece away from direct sunlight and humidity, dust regularly, and store in a dry environment for longevity.
Materials Needed for Your Twig Tree Project
To create your twig tree, you’ll need a few basic materials that are easy to find and affordable. Start with a handful of sturdy twigs—choose ones that are straight and strong enough to hold their shape.
You’ll also need abaca fiber for wrapping; this natural material adds texture and a rustic look to your tree. Grab some scissors to cut the fiber and twine or glue to secure the fiber onto the twigs. A hot glue gun works best for quick, lasting adhesion.
Don’t forget a base to hold your twig tree upright, such as a small wooden block or a pot filled with stones or plaster. With these materials on hand, you’re ready to begin assembling your unique twig tree.
Selecting and Preparing Twigs for Wrapping
When selecting twigs for your project, look for sturdy branches with interesting shapes that suit your design.
You’ll want to clean and dry them thoroughly to prevent mold or pests.
Finally, trim and shape the twigs to fit your wrapping needs perfectly.
Choosing Suitable Twig Types
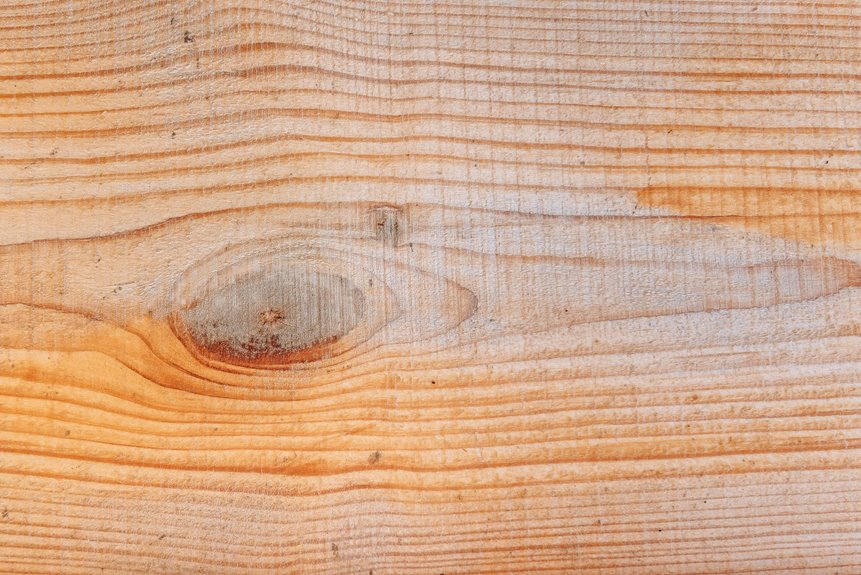
Selecting the right twigs is essential for a successful wrapping project. Choose twigs that are sturdy yet flexible enough to wrap smoothly with abaca fiber. Avoid brittle or overly dry twigs, as they may snap during the process.
Opt for branches with a consistent diameter, ideally around ¼ to ½ inch thick, which makes wrapping easier and guarantees a neat finish. Look for natural curves or interesting shapes to add character to your twig tree. You can collect twigs from hardwood trees like oak, maple, or birch for durability.
Stay away from twigs with lots of small offshoots or knots, as these can complicate wrapping. Picking well-formed, manageable twigs sets a strong foundation for your beautiful DIY abaca fiber wrapped twig tree.
Cleaning and Drying Twigs
Although you’ve chosen sturdy twigs, they still need proper cleaning and drying before wrapping. Start by brushing off any loose dirt, leaves, or bark using a stiff brush. If the twigs are especially grimy, rinse them briefly with water, but avoid soaking.
After rinsing, wipe them down with a clean cloth to remove excess moisture. Next, lay the twigs out in a well-ventilated area away from direct sunlight to dry thoroughly. This step prevents mold and guarantees the abaca fiber adheres well.
Depending on thickness, drying can take a few days. Check them regularly to confirm they’re completely dry before moving on. Proper cleaning and drying assure a smoother wrapping process and a longer-lasting finished piece.
Trimming and Shaping Branches
Start by evaluating each branch’s shape and size to guarantee it fits your project’s design. Choose twigs that complement the tree’s overall look, whether slender for delicate branches or thicker for the trunk.
Use sharp pruning shears or scissors to trim any awkward or overly long sections, ensuring clean cuts for easier wrapping. Remove smaller offshoots or leaves that might interfere with the fiber application.
When shaping, gently bend flexible twigs to create natural curves, but avoid forcing brittle ones that could snap. Keep safety in mind by wearing gloves to protect your hands from splinters.
Understanding Abaca Fiber and Its Benefits
You’ll find that abaca fiber is strong, lightweight, and naturally resistant to moisture, making it perfect for your DIY projects.
Using this eco-friendly material not only adds a unique texture to your decor but also helps reduce your environmental impact.
Let’s explore how abaca fiber can enhance your crafts while keeping sustainability in mind.
Natural Fiber Characteristics
Natural fibers like abaca offer unique qualities that enhance your DIY home decor projects. You’ll find abaca’s texture is both soft and strong, making it ideal for wrapping materials like twig trees. Its natural sheen adds subtle elegance without needing extra finishes.
Because it’s lightweight, you can easily handle and shape it around branches without hassle. Abaca fibers also have excellent flexibility, so they won’t crack or break as you work.
Plus, its breathable nature helps prevent moisture buildup, which keeps your decor looking fresh longer. When you choose abaca, you’re working with a fiber that combines durability with natural beauty, giving your handmade pieces a genuine, organic feel that stands out in any room.
Eco-Friendly Craft Advantages
Although many materials claim to be eco-friendly, abaca fiber truly stands out for its sustainability and environmental benefits.
When you choose abaca fiber for your crafts, you’re opting for a renewable resource harvested from the abaca plant, which grows quickly without needing pesticides or chemical fertilizers. This means your project has a lower environmental impact compared to synthetic alternatives.
Plus, abaca fiber is biodegradable, so it won’t contribute to landfill waste once your decor reaches the end of its life. By working with abaca, you support eco-conscious practices and reduce your carbon footprint.
Using this natural fiber not only enhances your DIY twig tree’s aesthetic but also aligns your creativity with responsible crafting choices that protect the planet.
How to Cut and Handle Abaca Fiber
Since abaca fiber is both strong and flexible, cutting and handling it requires the right tools and techniques to prevent fraying and damage. You’ll want sharp scissors or a craft knife to make clean cuts. Avoid using dull blades, as they can crush the fibers and cause uneven edges.
When cutting, hold the fiber taut but not stretched to maintain its shape. To handle abaca fiber, keep your hands dry to avoid weakening the fibers, and gently separate strands if needed without pulling harshly.
Storing the fiber rolled or loosely bundled keeps it from tangling or bending out of shape. By treating abaca fiber carefully during cutting and handling, you’ll guarantee it stays intact and ready for your creative projects.
Techniques for Wrapping Twigs With Abaca Fiber
Start by selecting twigs that are sturdy and free of bark damage, as they’ll provide a solid base for wrapping with abaca fiber.
Begin wrapping at one end, holding the fiber tightly against the twig. Use smooth, even strokes, spiraling the fiber around the twig without overlapping too much. Keep tension consistent to avoid loose spots.
When you reach a branch or fork, carefully wrap around it, maintaining the fiber’s snug fit. For a polished look, twist the fiber slightly as you wrap to create texture.
If you want to cover larger areas, wrap smaller sections individually before joining them. Finally, trim any excess fiber neatly at the ends to keep your twig tree looking clean and refined.
Securing the Fiber Wrap for Durability
To guarantee your fiber wrap holds up over time, you’ll need to secure it firmly at both ends and along the length of the twig. Start by tightly knotting or gluing the fiber at the base to prevent unraveling.
Secure fiber wrap firmly at both ends with knots or glue to prevent unraveling over time
As you wrap, apply a small amount of craft glue intermittently to lock the fiber in place without making it stiff. When you reach the top, fasten the end with another knot or dab of glue.
For added durability, consider using a clear-drying sealant spray to protect the fiber from moisture and wear.
Check your wrapped twig periodically and reinforce any loose areas with extra glue or winding. These steps guarantee your abaca fiber wrap stays intact, maintaining your twig tree’s natural charm for years to come.
Designing Your Twig Tree Shape and Structure
Crafting the perfect twig tree shape requires thoughtful planning and a clear vision. You want your tree to be both visually appealing and structurally sound.
Start by selecting twigs of varying lengths and thicknesses to create natural depth. Then, follow these steps:
- Sketch Your Design: Outline the general shape—whether tall and slender or wide and bushy—to guide twig placement.
- Build a Strong Base: Use thicker twigs or a sturdy frame to support the overall structure and prevent tipping.
- Layer Branches Thoughtfully: Attach twigs in layers, starting from the base upwards, allowing for a balanced, organic look.
Adding Decorative Elements to Enhance Your Tree
Although your twig tree already has a strong structure, adding decorative elements can truly bring it to life and reflect your personal style.
Start by wrapping small sections with colorful yarn or thin abaca fibers to create contrast and texture. You can also glue tiny faux flowers, beads, or feathers along the branches for a whimsical touch.
Wrap branches with colorful yarn or add tiny flowers and beads to create whimsical texture and contrast.
If you prefer a natural look, try attaching dried moss or miniature pinecones to enhance the organic feel. Don’t forget to contemplate balance—place decorations evenly to avoid a lopsided effect.
Finally, adding a subtle shimmer with metallic paint or glitter can make your tree pop without overpowering its rustic charm.
These simple additions will turn your twig tree into a unique statement piece for your home.
Tips for Displaying and Caring for Your Finished Piece
Once you’ve added decorative touches that bring your twig tree to life, choosing the right spot to display it will highlight its beauty.
Here are three tips to make sure your piece stands out and lasts:
- Placement: Place your twig tree where it can catch natural light but avoid direct sunlight to prevent fading or drying out the abaca fiber.
- Dusting: Regularly dust your tree with a soft brush or cloth to keep it looking fresh and vibrant without damaging the delicate fibers.
- Avoid Moisture: Keep your piece away from humid areas or direct contact with water to preserve the fiber’s texture and prevent mold growth.
Frequently Asked Questions
Can I Use Other Natural Fibers Instead of Abaca Fiber?
You can totally use other natural fibers! Imagine wrapping your twig tree in golden strands of jute, soft cotton, or even shimmering sisal. Just pick fibers that stick well and match your style—your creativity’s the limit!
How Long Does the Entire Twig Tree Project Typically Take?
You’ll typically spend about 2 to 4 hours on this project, depending on your pace and drying time for adhesives. Taking breaks helps, so don’t rush—it’s all about enjoying the creative process.
Is This Project Safe for Children to Help With?
You might think crafting’s tricky for kids, but it’s safe if you supervise closely. Just keep sharp tools and glue out of reach, and you’ll enjoy a fun, creative project together without worry.
Where Can I Recycle Leftover Abaca Fiber Scraps?
You can recycle leftover abaca fiber scraps at local textile recycling centers or compost them since abaca is biodegradable. Check community recycling programs or eco-friendly craft groups—they often accept natural fiber scraps for reuse or composting.
What Tools Are Best for Trimming the Finished Twig Tree?
You’ll want sharp pruning shears or sturdy garden scissors to tame your twig tree like a pro. For precision, grab a craft knife—these tools cut cleanly, making trimming feel like a breeze, not a battle!