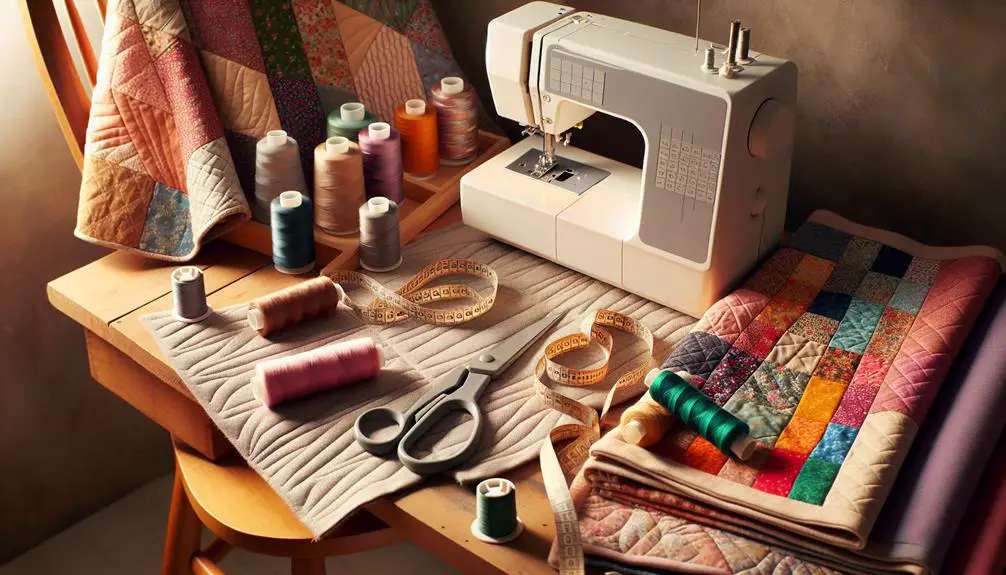
Starting your journey into DIY fabric projects can be both enjoyable and practical, especially if you're new to sewing. Begin by selecting the right fabrics and gathering essential tools like fabric scissors and a measuring tape. Simple projects, such as tote bags or pillowcases, offer a great introduction to basic techniques and customization options. You might find yourself enthusiastic to explore more creative avenues like fabric painting or embroidery. Wondering how to make your own unique fabric coasters or bookmarks? Let's look at how these straightforward projects can build your skills and spark your creativity.
Table of Contents
Key Takeaways
- Choose fabrics based on project needs, considering texture, weight, and durability.
- Equip yourself with essential sewing tools like high-quality scissors, seam ripper, and measuring tape.
- Start with simple projects such as tote bags, pillowcases, and fabric coasters.
- Personalize projects using fabric painting, embroidery, and unique embellishments.
- Practice basic sewing techniques to improve skills and create custom fabric items.
Choosing the Right Fabrics
Choosing the right fabric is essential to the success of your DIY project. Without proper fabric selection, even the most creative ideas can fall flat. Start by understanding the purpose of your project. Are you making a cozy quilt, a stylish dress, or perhaps some decorative pillow covers? The fabric you choose should align with the functionality and aesthetic of your final product.
Color coordination is another critical aspect. Select colors that not only match your vision but also complement each other. A well-coordinated color palette can elevate your project from amateur to professional. Use a color wheel to find harmonious shades or contrasting hues that stand out.
Consider the fabric's texture and weight as well. Heavier fabrics like denim and canvas are ideal for sturdy items, while lighter fabrics like cotton and silk are perfect for garments and delicate projects. Don't forget to test the fabric's stretch and durability, especially if your project requires flexibility or frequent use.
Essential Sewing Tools
After selecting the perfect fabric, having the right sewing tools on hand will make your DIY project go smoothly. First, invest in a high-quality pair of fabric scissors. They'll provide clean cuts, essential for precise sewing.
Next, a seam ripper is indispensable; even the most skilled sewists make mistakes, and this tool will help you correct them effortlessly.
A measuring tape is another must-have supply. Accurate measurements are pivotal in any sewing project, ensuring your pieces fit together perfectly.
Alongside, keep a clear ruler for marking and cutting straight lines—precision is key in beginner sewing techniques.
Don't forget pins and a pin cushion. These are basic yet essential for holding fabric pieces together before stitching. Opt for glass-head pins, as they're easier to spot and won't melt under an iron.
Speaking of irons, a good pressing iron is fundamental for setting seams and achieving a polished look.
Lastly, you'll need a sewing machine that offers basic stitches. A machine that can do straight, zigzag, and buttonhole stitches will cover most beginner projects.
With these sewing essentials, you're well-equipped to tackle any DIY fabric project with confidence and ease.
Simple Tote Bag
Creating a simple tote bag is a fantastic project for beginners to practice basic sewing techniques. You'll start by selecting your fabric, ideally a sturdy cotton or canvas, which is easy to work with and durable.
Cut two rectangles for the body and two long strips for the handles. Sew the sides and bottom of the rectangles, then attach the handles securely.
Once you've mastered the basic construction, you can explore tote bag variations. Try different fabrics, like denim or linen, for a unique look. Experiment with fabric painting to add personal designs or patterns. Use stencils or freehand painting to make each tote bag one-of-a-kind.
Tote bag customization is where you can really let your creativity shine. Add fabric embellishments such as patches, embroidery, or even sequins to make your tote bag stand out. Consider using contrasting fabrics for the handles or adding interior pockets for functionality.
With practice, you'll not only create a practical accessory but also develop your sewing skills. Each tote bag you make will be a proof of your growing expertise and creativity in the world of DIY fabric projects.
Easy Pillowcases
Creating simple pillowcases is a great way to quickly enhance your sewing skills and refresh your home decor. Start by selecting a fabric that complements your room—cotton is a reliable choice for beginners.
Mastering sewing machine basics is essential, so make sure your machine is threaded correctly and practice sewing straight lines on scrap fabric.
Once you've cut your fabric to size, you can personalize your pillowcases with fabric painting techniques. Use stencils or freehand designs to add unique patterns or images. If you're interested in adding a touch of elegance, try beginner embroidery. Simple stitches like the backstitch or chain stitch can create beautiful borders or monograms.
When it comes to assembling your pillowcase, you have options. Use your sewing machine to sew the seams quickly and efficiently. For a more personal touch, consider hand stitching tips like using a running stitch for a rustic look or a whip stitch for durability.
Fabric Coasters
Now that you've mastered pillowcases, let's move on to crafting fabric coasters, an excellent way to use up leftover fabric scraps and add a personal touch to your coffee table.
Start by selecting a few vibrant fabric coaster patterns. Opt for sturdy fabrics like cotton or linen, which will absorb moisture effectively and stand up to regular use.
First, cut your fabric into squares, typically around 4×4 inches, though you can adjust the size to suit your preferences. Pair each fabric square with a piece of matching or contrasting backing fabric.
Sew the squares together, right sides facing each other, leaving a small opening to turn the fabric right side out. After turning, press the coaster flat and topstitch around the edges to close the opening and add a finished look.
Consider creating a set of coasters with a cohesive theme, like seasonal patterns or coordinating colors. These make thoughtful, handmade fabric coaster gift ideas for friends and family. You can even personalize them with monograms or embroidery for an extra special touch.
Mastering fabric coasters not only enhances your sewing skills but also results in beautiful, functional pieces you'll be proud to display or gift.
No-Sew Fabric Banners
No-sew fabric banners offer a fun and simple way to add a splash of color and personality to any space without needing a sewing machine. Whether you're looking to create fabric garlands for party decorations or add some unique fabric wall art to your home decor, this project is perfect for beginners aiming for mastery.
Start by selecting an array of colorful fabrics that complement your theme. Cut the fabric into even triangles or rectangles using sharp scissors. Next, use fabric glue to attach the pieces to a length of sturdy string or twine. Make sure each piece is evenly spaced to achieve a balanced look. If you prefer, you can also use double-sided tape for a quick, mess-free option.
For added flair, consider embellishing your banners with sequins, buttons, or even small felt shapes. The possibilities are endless, and the process is entirely customizable to your taste.
Hang your finished fabric garlands above doorways, across mantels, or on blank walls to instantly elevate your party decorations or home decor.
DIY Fabric Bookmarks
Creating DIY fabric bookmarks is a fun and easy project you can start with minimal materials and tools.
Follow the step-by-step instructions to craft your bookmarks and explore creative design ideas to make each one unique.
Let's get started on this simple yet rewarding project!
Materials and Tools Needed
To start your DIY fabric bookmarks, you'll need a few key materials and tools to guarantee a smooth crafting process. First, let's talk about fabric selection. Choose fabrics that suit your style while keeping budget considerations in mind. Scraps from previous projects or affordable fabric swatches can be perfect for this craft.
Next, consider using a beginner-friendly sewing machine to make your work easier. If you're not familiar with how to use one, don't worry; there are numerous online tutorials available to guide you through the basics. A simple, user-friendly machine will help you achieve clean, professional-looking stitches without overwhelming you.
Here are the essential items you'll need:
- Fabric: Various pieces, ideally cotton or felt, for durability.
- Sewing Machine: A beginner-friendly model to ensure ease of use.
- Basic Sewing Kit: This includes needles, thread, scissors, and pins.
Gather these materials and tools to set yourself up for success. Having the right supplies on hand will streamline your crafting process and help you create beautiful, functional bookmarks.
With a little practice and the appropriate resources, you'll master this beginner project in no time.
Step-by-Step Instructions
With your materials and tools ready, let's start crafting your DIY fabric bookmarks step-by-step. Begin by cutting your fabric into strips, approximately 2 inches wide and 6 inches long. This size is perfect for most books and gives you ample space to showcase your creativity.
Next, use fabric painting techniques to add designs to your bookmarks. You can opt for simple patterns like polka dots or intricate designs depending on your skill level. Let the paint dry completely before proceeding to the next step.
Now, it's time to sew. Using sewing machine basics, stitch around the edges of your fabric strips. This won't only secure the fabric but also give your bookmark a finished look. Make sure to backstitch at the beginning and end to prevent unraveling.
For added durability, consider sewing a piece of interfacing between two fabric strips before stitching them together. This extra layer will make your bookmark sturdier and more professional-looking.
Creative Design Ideas
Although the basic bookmark is functional, you can elevate its design with a few creative touches that reflect your personal style. Here are three innovative ideas to transform your fabric bookmarks into unique pieces of art:
- Fabric Painting:
Use fabric paint to create intricate designs or motivational quotes on your bookmark. This not only adds a personal touch but also makes your bookmark a mini canvas of creativity. Experiment with different colors and patterns to match your favorite books or moods.
- Embroidery:
Adding embroidery to your bookmarks can infuse them with elegance and texture. You can stitch simple patterns, initials, or even detailed scenes. This technique requires a bit of practice but yields beautiful, tactile results that you'll be proud to show off.
- Upcycling Old Clothes:
Don't let old clothes go to waste. Cut out interesting sections of fabric from shirts, dresses, or other garments and repurpose them as bookmarks. This not only gives the fabric a second life but also provides a sustainable option for your DIY projects.
Handy Fabric Keychains
Creating handy fabric keychains is a fun and simple way to personalize your accessories while practicing basic sewing skills. These charming little items can serve as both functional key holders and stylish additions to your daily gear.
Think of them as fabric jewelry that can showcase your flair for creative accessories. You can use colorful patterns, quirky shapes, and various textures to make each keychain a small piece of art.
Start by choosing your fabric. Opt for durable materials like cotton or canvas that can withstand everyday wear and tear. Cut your fabric into the desired shape, such as hearts, stars, or even initials, and leave a small margin for sewing.
Adding fabric embellishments like buttons, beads, or embroidery can create unique designs and make your keychains stand out. Sew the pieces together, leaving a small opening to insert stuffing for a plush effect.
Beginner's Fabric Scrunchies
Ready to make your own fabric scrunchies?
You'll need just a few basic materials and tools to get started.
Follow these step-by-step instructions, and you'll have stylish scrunchies in no time.
Materials and Tools Needed
Gathering the right materials and tools is vital for creating beginner's fabric scrunchies. Without the proper supplies, your project may not turn out as planned. Here's a streamlined list of what you'll need to get started:
- Fabric: Opt for a soft, breathable material. Consider using vintage fabric finds or remnants from previous upcycling projects. This adds a unique touch and supports sustainable crafting.
- Elastic: A 1/4 inch wide elastic band works best. Make sure it's durable yet flexible enough for everyday use.
- Sewing Tools: Basic sewing tools are necessary, including a needle, thread, fabric scissors, and pins.
Choosing the right fabric can elevate your scrunchie from simple to stunning. If you're interested in adding personal flair, explore various fabric painting techniques to customize your material. For those who love staying organized, DIY storage solutions for your sewing tools and fabrics will make your crafting process smoother and more enjoyable.
Step-by-Step Instructions
With your materials and tools ready, let's start making your first fabric scrunchie. Begin by cutting a strip of fabric measuring approximately 4 inches by 18 inches. If you're feeling adventurous, try using fabric painting techniques or fabric dyeing methods to add a personal touch to your fabric strip.
Fold the fabric strip lengthwise with the right sides facing each other. Sew along the long edge using a ¼ inch seam allowance. Turn the sewn fabric tube right side out. An easy trick is to attach a safety pin to one end and gently pull it through.
Next, cut a piece of elastic about 8 inches long. Use a safety pin to thread the elastic through the fabric tube. Overlap the elastic ends by ½ inch and sew them together securely.
Finally, tuck one raw end of the fabric into the other and sew them together. For added flair, consider fabric embellishment ideas like adding beads or sequins. Or, explore fabric weaving tutorials to create intricate designs for future scrunchies.
| Step | Action |
|---|---|
| 1 | Cut fabric strip |
| 2 | Sew fabric tube |
| 3 | Insert elastic |
Now, enjoy your custom-made scrunchie!
Personalized Fabric Pouches
Creating personalized fabric pouches is a fun and simple project that lets you showcase your creativity. Whether you're new to sewing or looking to refine your skills, this project is perfect for combining beginner-friendly sewing techniques with custom designs.
Start by selecting your fabric; cotton or linen work great for this. Next, consider how you want to personalize your pouch.
- Fabric Painting Techniques: Use fabric paints to add unique designs or patterns. Stencils can help you achieve more intricate designs with ease.
- Personalized Embroidery: Stitch your initials, a favorite quote, or a small image. This adds a personal touch that stands out and demonstrates your skill.
- Beginner-Friendly Sewing Techniques: Use simple stitches like the running stitch or backstitch to construct your pouch. These basic techniques guarantee that even novices can achieve professional-looking results.
Once your design is complete, cut two pieces of fabric in your desired pouch size. Sew three sides together, leaving the top open. Add a zipper or drawstring for closure. Finally, turn the pouch right side out and admire your customized fabric pouch. It's a practical and stylish way to store your essentials.
Frequently Asked Questions
How Do I Properly Wash and Care for Different Types of Fabrics?
You've got a delicate task at hand, my friend. For stain removal, act swiftly. Store fabrics in cool, dry places. Use gentle drying techniques, and when ironing, use low heat and a pressing cloth to avoid damage.
What Are Some Tips for Cutting Fabric Accurately?
To guarantee accurate cuts, use sharp scissors or a rotary cutter and always measure twice. Employ fabric cutting techniques like using a ruler or cutting mat. These precision cutting tips will help you achieve professional results.
How Can I Prevent My Fabric Edges From Fraying?
To prevent your fabric edges from fraying, consider fraying prevention techniques like using pinking shears, applying fray check, or employing fabric edge finishes such as zigzag stitching. Regular sewing machine maintenance guarantees consistent application of these fraying solutions.
What Are the Best Fabric Types for Beginner Projects?
For fabric selection, choose beginner-friendly fabrics like cotton and felt. They're easy to cut and sew. Project ideas include pillowcases and tote bags. These project examples help you gain confidence and master basic sewing skills.
How Do I Fix Common Sewing Machine Problems?
To fix common sewing machine problems, start by troubleshooting thread tension issues. Make sure you're cleaning and maintaining your machine regularly. Check for lint buildup and oil necessary parts to keep your machine running smoothly and efficiently.
- What Is Pochampally Ikat? a Journey to India’s Silk City - June 27, 2025
- What Is Pochampally Ikat? a Journey to India’s Silk City - June 27, 2025
- What Is Pochampally Ikat? a Journey to India’s Silk City - June 27, 2025


