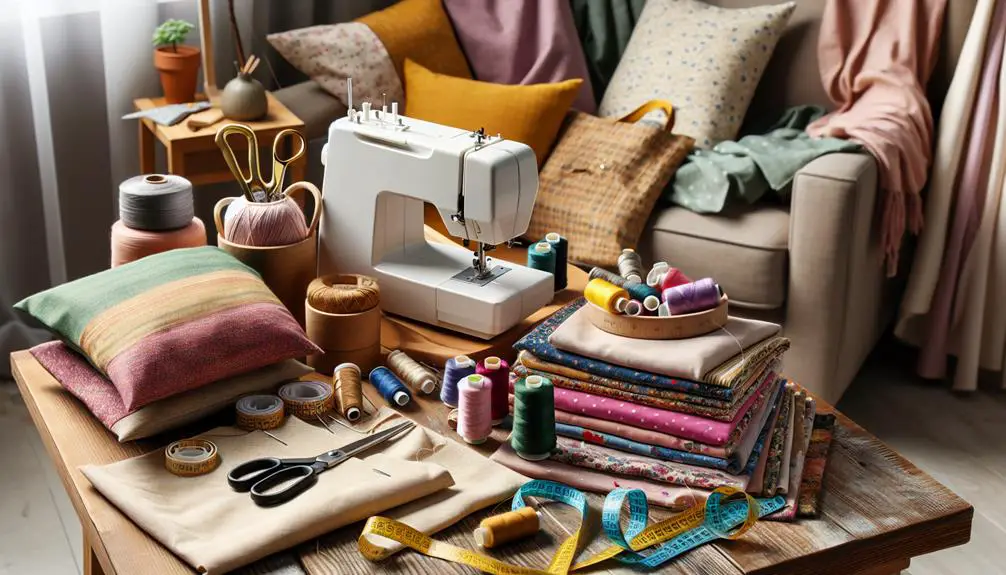
Imagine the feel of a soft cotton fabric slipping through your fingers as you prepare to craft a unique creation. DIY fabric projects can be an engaging way to express your creativity, even if you're just starting out. With the right fabrics, essential tools, and basic sewing techniques, you can transform simple materials into personalized items like coasters, tote bags, or pillow covers. Curious about how to choose the best fabrics or which tools you'll need? Let's explore some straightforward steps to help you get started on your fabric crafting journey.
Key Takeaways
- Start with simple projects like coasters, tote bags, and pillow covers to practice basic sewing techniques.
- Invest in essential tools: rotary cutter, cutting mat, sharp fabric scissors, and a seam ripper for clean stitch removal.
- Learn and master sewing basics: threading a machine, correct bobbin usage, and essential hand stitches like running stitch and backstitch.
- Experiment with fabric types, patterns, and textures to create depth and visual interest in your projects.
- Personalize projects with monograms, themed motifs, and embellishments like buttons, beads, or fabric paint for unique designs.
Choosing the Right Fabrics
Choosing the right fabrics is essential for the success of your DIY projects. By mastering fabric types, patterns, color coordination, and texture choices, you'll elevate your creations from amateur to professional.
Start by familiarizing yourself with different fabric types. Cotton is versatile and easy to work with, while linen offers a rustic charm. Silk, though luxurious, requires more skill. Each fabric type brings its own strengths and challenges, so choose one that aligns with your project's demands and your skill level.
Next, consider patterns. Bold prints can make a statement, but they require careful cutting and alignment. Smaller patterns are more forgiving and can add subtle charm. Make sure the pattern complements the intended use of your project.
Color coordination is another key factor. Choose complementary colors to create a balanced look or go bold with contrasting hues. Don't underestimate the power of texture choices. Mixing textures like pairing a smooth silk with a rough linen can add depth and interest to your work.
Must-Have Tools
Equipping yourself with the right tools will make your DIY fabric projects smoother and more enjoyable. When you have the right gear at your fingertips, tasks like fabric cutting and seam finishing become much easier.
Here's a list of must-have tools to set you up for success:
- Rotary Cutter and Cutting Mat: For precise fabric cutting, a rotary cutter paired with a self-healing cutting mat is indispensable. This duo guarantees clean cuts and minimizes fabric fraying, saving you from frustration down the line.
- Sharp Fabric Scissors: Invest in a good pair of fabric scissors and reserve them exclusively for cutting fabric. Using them on other materials can dull the blades, leading to jagged cuts and uneven edges. This tool is essential for detail work that the rotary cutter mightn't handle as effectively.
- Seam Ripper: Mistakes happen, even to the best of us. A seam ripper allows you to undo stitches cleanly without damaging the fabric. It's a small but powerful tool for perfecting seam finishing and ensuring your projects look polished and professional.
Basic Sewing Techniques
Let's start with threading a sewing machine, a fundamental skill for any sewing project.
Next, you'll learn hand stitching basics, which are essential for finishing touches and small repairs.
Mastering these techniques will set a strong foundation for your DIY fabric projects.
Threading a Sewing Machine
Mastering the art of threading a sewing machine is the first step to tackling any sewing project with confidence. To get started, follow this streamlined process and make sure your machine is always ready for action.
- Preparation: Before threading, confirm your sewing machine maintenance is up-to-date. Address any troubleshooting issues like tangled threads or strange noises. Clean out dust and lint to keep it running smoothly.
- Threading the Upper Thread: Raise the presser foot to release thread tension. Place your thread spool on the spool pin and pull the thread through the thread guide. Follow the threading path, usually indicated by numbers on your machine. Make sure the thread passes through the tension disc and take-up lever.
- Threading the Bobbin: Insert a wound bobbin into its case, verifying it unwinds in the correct direction. Pull the thread through the bobbin tension slot and leave a tail. Insert the bobbin case into the machine and close the compartment.
For an added boost, consider investing in sewing machine accessories and upgrades. An automatic needle threader can save time and reduce frustration.
Keep practicing, and soon, threading your machine will become second nature, freeing you to focus on your creative projects.
Hand Stitching Basics
Whether you're mending a tear or creating a new piece from scratch, mastering hand stitching basics is essential for any DIY fabric project. Start with the fundamental sewing stitches: running stitch, backstitch, and whipstitch. These will serve as the foundation for more advanced embroidery techniques and decorative options.
To perfect your skills, consider working on practice projects. Start with simple tasks like hemming a handkerchief or sewing a button. As you gain confidence, you can advance to more intricate embroidery techniques, adding a personal touch to your creations.
Here's a table to guide you through some basic and decorative stitches:
| Stitch Type | Description |
|---|---|
| Running Stitch | A basic stitch for seams and gathering. Simple and quick. |
| Backstitch | Provides a strong, secure stitch for seams. Ideal for mending tears. |
| Whipstitch | Great for joining two pieces of fabric or finishing edges. |
| Blanket Stitch | Decorative edge stitch, often used on blankets and felt projects. |
Easy Fabric Projects
When you're looking for quick and satisfying crafting activities, easy fabric projects offer the perfect solution. They allow you to experiment with different techniques and materials without a huge time investment. Plus, they're a fantastic way to use up fabric scraps and upcycle old clothes.
Here are three simple yet effective projects to get you started:
- Fabric Scrap Coasters:
Gather your leftover fabric scraps and cut them into small squares or circles. Sew them together with a simple running stitch or use fabric glue for a no-sew option. These coasters aren't only functional but also make delightful gifts.
- Upcycled T-shirt Tote Bag:
Take an old T-shirt and transform it into a reusable tote bag. Cut off the sleeves and neckline, then sew the bottom hem shut. Add some reinforcements to the handles, and you'll have a stylish and eco-friendly bag for groceries or books.
- Patchwork Pillow Covers:
Use various fabric scraps to create a patchwork design. Sew the pieces together to form a square that fits your pillow insert. Finish by sewing a backing fabric and adding a zipper or envelope closure. This project is perfect for adding a personalized touch to your home decor.
These projects are ideal for honing your skills and creating practical items you'll love.
Personalizing Your Creations
Adding personal touches to your fabric projects transforms them into unique, one-of-a-kind creations. By customizing designs, you can guarantee that each piece reflects your individual style and creativity.
Start by selecting patterns or shapes that resonate with you. You might want to incorporate monograms, themed motifs, or even hand-drawn sketches. These unique touches will make your project stand out.
Next, consider adding embellishments to elevate your work further. Think about using buttons, beads, sequins, or even patches to add texture and interest. These elements don't just add a creative flair; they also give your pieces a more professional and polished look.
Don't be afraid to mix and match materials—experimenting is part of the fun.
Another excellent way to personalize your creations is through fabric paint or embroidery. These techniques allow you to add intricate designs and patterns that are entirely your own. Whether you opt for simple stitches or elaborate embroidery, your handwork will infuse your projects with character and artistry.
Tips and Troubleshooting
While personalizing your fabric projects is exciting, having some handy tips and troubleshooting strategies GUARANTEES your creations turn out just right. Understanding common mistakes and quick fixes can save you time and frustration.
Here are three essential tips to elevate your DIY fabric projects:
- Avoiding Common Mistakes: One frequent issue is uneven seams. To fix this, always use a seam guide on your sewing machine. It ASSURES straight stitching and a professional finish. If you notice puckering, check your thread tension and adjust as needed.
- Quick Fixes for Errors: If you accidentally cut fabric too short, don't panic. Creative solutions like adding a contrasting fabric patch can't only salvage your project but also add a unique touch. Another quick fix is using fabric glue for small tears or frays; it's a LIFESAVER in a pinch.
- Finding Inspiration: Sometimes, a project stalls because you're out of ideas. Browse online platforms like Pinterest or Instagram for fresh inspiration. Look at how others have tackled similar projects and adapt those ideas to suit your style. This helps you develop creative solutions and keeps your projects innovative and exciting.
Master these tips to GUARANTEE your fabric projects are both fun and flawless!
Frequently Asked Questions
How Do I Properly Store Leftover Fabric Scraps?
To master fabric scrap organization, use creative storage solutions like clear bins or hanging organizers. Upcycling fabric scraps in DIY projects guarantees they're accessible. Label containers for easy sorting by size or color. Keep your workspace efficient!
Can I Use Recycled Materials for DIY Fabric Projects?
You can definitely use upcycled materials for your projects. Embrace creative ideas and prioritize sustainability in your fabric choices. Repurposing old garments or linens not only saves money but also helps the environment.
What Are Some Eco-Friendly Fabric Options for Beginners?
Imagine transforming an old sail into a chic tote bag. For beginners, sustainable textiles like organic cotton, hemp, and bamboo are excellent choices. Upcycling materials, such as repurposing denim, also provides eco-friendly and creative solutions.
How Do I Calculate the Amount of Fabric Needed for a Project?
To calculate fabric needed for a project, measure dimensions and add seam allowances. Use fabric estimation techniques in your project planning. Accurate calculations of yardage and material quantities guarantee you won't run short during your project.
Are There Any Online Communities for Sharing DIY Fabric Project Ideas?
Imagine a vibrant tapestry of creativity. You'll find inspiration exchange and fabric swap opportunities in virtual sewing circles. Join crafty challenges to refine your skills and share ideas with a community passionate about mastery in fabric projects.