When cutting velvet, always identify and mark the nap direction by feeling the fabric’s soft pile or observing light reflection. Lay pieces consistently with the nap aligned to avoid uneven shading. Use sharp shears or a rotary cutter and weight patterns instead of pinning to prevent crushing fibers. Cut slowly on a flat surface, handling the fabric gently to preserve its texture. These steps set a solid foundation, and with a few more tips, you’ll master flawless velvet cutting.
Key Takeaways
- Identify velvet’s nap by feeling the fabric and observing light reflection; mark nap direction clearly on all pattern pieces before cutting.
- Align all pattern pieces uniformly with the nap to ensure consistent color and texture across the garment.
- Lay velvet flat on a smooth surface and use fabric weights instead of pins to prevent fabric shifting and crushing.
- Cut velvet slowly with sharp fabric scissors or a rotary cutter, working one layer at a time to maintain accuracy and prevent pile damage.
- Handle velvet gently throughout cutting to preserve its soft pile and avoid crushing or marking the fabric.
Understanding Velvet Fabric Characteristics
Velvet’s unique texture and pile direction can make it tricky to work with, but understanding these characteristics will help you cut it more accurately.
Velvet consists of a dense pile of evenly cut fibers, creating a soft, luxurious feel. This pile creates a nap, which affects how light reflects off the fabric, meaning it can look different depending on the angle.
You’ll notice that velvet has a distinct front side with the pile and a back side that’s smoother. Because of its pile, velvet doesn’t behave like flat fabrics—it’s more prone to slipping as you cut.
Also, the fabric can easily crush or mark if handled roughly, so you need to be gentle and precise in your approach to maintain its look.
Identifying the Nap Direction on Velvet
When cutting velvet, you need to identify the nap direction to guarantee your pieces match perfectly and the fabric looks consistent.
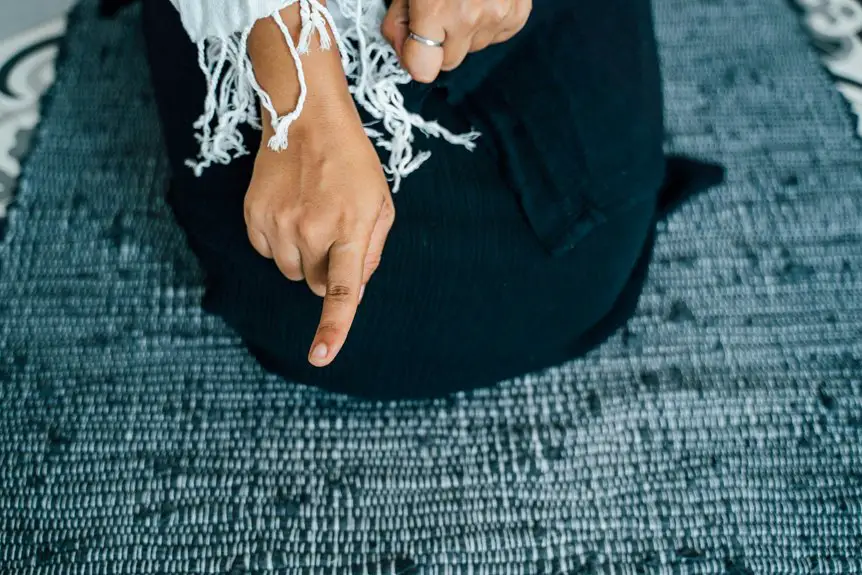
To find the nap, run your hand gently across the fabric surface. Velvet’s pile will feel smooth and softer in one direction, while the opposite way feels rougher or duller. This softer direction is the nap.
Gently stroke velvet to feel its smooth, soft nap—the key to perfect fabric alignment.
Another method is to tilt the fabric under light; the nap reflects light differently, appearing lighter or darker depending on the angle.
Mark this direction clearly on your pattern pieces before cutting. Remember, the nap runs the same way on all your pieces, so aligning them uniformly assures your garment or project has a professional, cohesive finish without color or texture variation.
Importance of Nap Direction in Cutting Velvet
Because nap direction affects how velvet reflects light and feels to the touch, cutting your fabric with attention to this detail guarantees your finished project looks seamless and professional.
When you align all pattern pieces with the nap running the same way, your garment or item exhibits consistent color and texture. Ignoring nap direction can result in patches that look different under lighting or feel uneven, breaking the visual harmony.
Also, matching nap direction helps avoid unwanted shading or sheen variations that stand out after sewing. By respecting the nap, you ascertain your velvet’s rich, soft appearance stays uniform across the entire piece.
This careful approach not only elevates your project’s aesthetic but also enhances its tactile quality, making your work truly stand out.
Tools Needed for Cutting Velvet
To cut velvet accurately, you’ll need the right tools on hand.
Sharp scissors or a rotary cutter will give you clean edges, while fabric weights and pins help keep the material steady.
Preparing your velvet properly with these items makes a big difference in your final results.
Essential Cutting Tools
Although cutting velvet requires extra care, having the right tools makes the process much smoother. You’ll need sharp scissors or a rotary cutter to achieve clean cuts without crushing the pile. A heavy-duty ruler helps keep your cuts straight, and fabric weights prevent shifting during cutting. Additionally, a tailor’s chalk or fabric marker is essential for marking patterns without damaging the fabric.
| Tool | Purpose |
|---|---|
| Sharp Fabric Scissors | Clean, precise cutting |
| Rotary Cutter | Smooth, continuous cuts |
| Heavy-Duty Ruler | Accurate measurement and straight edges |
| Fabric Weights | Keeps velvet stable while cutting |
Using these tools properly guarantees your velvet pieces maintain their texture and shape throughout your project.
Fabric Preparation Items
When preparing velvet fabric for cutting, you’ll want to gather specific tools that guarantee accuracy and protect the fabric’s delicate pile.
Start with a sharp rotary cutter or fine, sharp fabric scissors—dull blades can crush velvet fibers. Use a self-healing cutting mat to keep your blades sharp and protect your workspace. A clear acrylic ruler helps you measure and align patterns precisely along the nap direction.
For marking, choose tailor’s chalk or a water-soluble pen to avoid permanent stains. Weights are essential for holding the fabric and pattern pieces steady without pinning, which can leave marks or distort the pile.
Finally, have a soft brush handy to gently lift the nap and remove loose fibers after cutting. These tools help guarantee clean, accurate cuts while preserving velvet’s luxurious texture.
Preparing Velvet Fabric for Cutting
Before you cut velvet fabric, you’ll want to prepare it carefully to secure clean, accurate cuts. Start by gently steaming the fabric to remove wrinkles without crushing the pile—hold the steamer just above the surface and avoid pressing down.
Next, lay the velvet flat on a clean, smooth surface, smoothing out any folds or distortions. Pin the fabric edges lightly to prevent shifting, but avoid heavy pins that can leave marks.
Lay velvet flat on a smooth surface, smooth folds, and pin edges lightly to avoid marks.
If the fabric is new, pre-wash it according to care instructions to prevent future shrinkage. Finally, let the velvet rest flat for a while after steaming or washing, so it settles evenly.
These steps guarantee your velvet stays pristine and stable, making cutting precise and hassle-free.
Techniques for Laying Out Patterns on Velvet
Three key techniques help you lay out patterns on velvet to guarantee accuracy and maintain the fabric’s luxurious texture. First, always align your pattern pieces with the nap direction to keep the pile consistent. Second, use pattern weights instead of pins to avoid crushing the fabric. Third, lay your fabric on a flat, smooth surface to prevent shifting.
| Technique | Reason |
|---|---|
| Align with nap | Maintains consistent texture |
| Use pattern weights | Prevents fabric damage |
| Flat surface layout | Avoids fabric movement |
Tips for Cutting Velvet With Precision
Cutting velvet with precision requires sharp tools and a steady hand to prevent crushing the pile or causing uneven edges. Use a rotary cutter or very sharp fabric scissors for clean cuts, and avoid dull blades that can snag fibers.
Lay your fabric flat on a smooth surface, securing it with weights rather than pins to avoid marks. Cut slowly and confidently, following your pattern lines exactly to maintain accuracy. If possible, cut velvet with the pile facing away from you to see your cutting line clearly.
Keep your fabric supported as you cut to prevent shifting or stretching. Finally, avoid lifting the fabric too much; cutting it while it’s lying flat helps maintain the pile’s uniformity and your garment’s polished look.
Handling Pattern Pieces With Nap Consideration
When handling velvet pattern pieces, you need to align them carefully to keep the nap consistent.
Pay close attention to the nap direction to guarantee all pieces run the same way. This step helps maintain the fabric’s texture and appearance once sewn.
Aligning Pattern Pieces
Before you lay out your pattern pieces on velvet, pay close attention to the fabric’s nap direction. Align each piece so the nap runs consistently in the same direction across your project. This guarantees the finished garment or item reflects light uniformly, avoiding visible color or texture differences.
Lay your pattern pieces carefully, smoothing them flat without stretching the fabric. Use weights or pins to hold them steady, preventing shifting during cutting. If your pattern includes pieces that are cut on the fold, double-check that the fold aligns with the nap correctly.
Managing Nap Direction
Paying close attention to the nap direction as you lay out your pattern pieces sets the stage for managing them effectively throughout the cutting process.
You’ll want to guarantee all pieces are aligned so that the nap runs uniformly, preventing color shifts or texture mismatches in the finished garment.
When handling pieces, keep the fabric’s pile orientation consistent—usually running from top to bottom—so seams blend seamlessly.
Pin or weigh down your patterns firmly to avoid shifting, as velvet can be slippery.
If your design includes symmetrical pieces, cut them all facing the same way to maintain a cohesive look.
Avoiding Common Mistakes When Cutting Velvet
Since velvet has a unique texture and nap, cutting it demands extra care to prevent mistakes like shifting fabric or uneven edges.
First, always lay your velvet flat on a smooth surface and secure it with weights or pins to avoid movement. Don’t use sharp scissors that can crush the pile; instead, choose a rotary cutter or fabric shears designed for delicate fabrics.
Avoid cutting multiple layers at once unless you’re absolutely sure the layers won’t shift. Also, mark your pattern pieces carefully with tailor’s chalk or a fabric-safe pen to avoid damaging the velvet.
Finally, cut slowly and steadily, following the nap direction, to guarantee clean, precise edges. Taking these steps helps you avoid common pitfalls and achieve professional results.
Maintaining Fabric Integrity During Cutting
Although cutting velvet can be challenging, you can maintain its fabric integrity by handling it gently and using the right tools.
Always lay your velvet on a flat, smooth surface to prevent stretching or distortion. Use sharp scissors or a rotary cutter to guarantee clean cuts without crushing the pile.
Avoid pinning the fabric directly; instead, use pattern weights to keep pieces in place without damaging the fibers. When cutting, follow the nap direction carefully to preserve the fabric’s appearance.
Handle velvet minimally, as excessive touching can crush or mark the pile. Finally, avoid pulling or tugging during cutting—let your tools do the work.
These steps help you keep your velvet looking lush and flawless throughout your project.
Frequently Asked Questions
Can Velvet Fabric Be Washed Before Cutting to Reduce Nap Issues?
Since about 90% of velvet fabrics can shrink, you should wash it before cutting to reduce nap issues. You’ll avoid distortion and get accurate cuts, ensuring your final project looks polished and fits perfectly.
What Is the Best Method to Store Velvet Fabric to Avoid Damage?
You should store velvet fabric rolled on a tube or hung on padded hangers to avoid creases and pressure marks. Keep it in a cool, dry place away from direct sunlight to prevent fading and damage.
How Does Velvet Nap Direction Affect Sewing and Finishing Techniques?
When you sew a velvet dress, matching nap direction guarantees consistent color and texture. If you ignore nap, seams look mismatched and fabric feels uneven, so always align pattern pieces to keep the finish smooth and professional.
Are There Differences in Cutting Velvet for Upholstery Versus Apparel?
Yes, you’ll notice differences when cutting velvet for upholstery versus apparel. Upholstery requires larger, sturdier cuts and may ignore nap direction, while apparel needs precise nap alignment for appearance and drape, demanding careful pattern placement.
Can Pattern Alterations Be Made After Cutting Velvet Pieces?
You can make pattern alterations after cutting velvet, but it’s tricky. Velvet’s nap and pile make adjustments harder, so try to finalize your pattern beforehand to avoid uneven texture or visible seams when altering cut pieces.