Did you know that over 30% of DIY enthusiasts have tried fabric printing at home? If you're thinking about joining this creative group, there are a few important steps you'll need to master. First, selecting the appropriate fabric is essential; it can make or break your project. Next, having the necessary tools on hand, like fabric scissors and a specialized printer, will guarantee your designs come out as envisioned. But before diving into printing methods like screen or heat transfer, let's explore how to plan your design and set up an efficient workspace.
Key Takeaways
- Choose appropriate fabric weight and texture to enhance the custom print design.
- Utilize high-quality fabric-friendly inkjet printers and heat press machines for professional results.
- Experiment with fabric printing methods like screen printing, heat transfer, and stenciling.
- Plan pattern placement and scale carefully to complement the fabric without overwhelming it.
- Set up a well-organized, well-lit workspace with all essential tools within easy reach.
Choosing Your Fabric
When selecting your fabric, think about the type of material that will best showcase your custom print design. Choosing the right fabric involves more than just picking a pretty color; you need to consider fabric weight, pattern scale, and texture.
For example, a lightweight cotton can be ideal for detailed patterns, while heavier fabrics like canvas might work better for bold, larger designs.
Pay special attention to the color of your fabric. A light-colored fabric often serves as a better canvas for vibrant prints, allowing your design to stand out. Darker fabrics might require specialized printing techniques to make sure your design stands out.
Next, consider the pattern scale. If your design includes intricate details, a smaller pattern scale may be more appropriate. Conversely, larger, more abstract designs often shine on bigger scales.
The texture of the fabric also plays an important role. Smooth fabrics like silk or satin can deliver crisp, clear prints, while textured fabrics like linen or burlap might add a unique, tactile dimension to your design.
Essential Tools and Materials
To get started with custom fabric prints, you'll need to choose the appropriate fabric and gather necessary printing equipment.
Make sure you have a clear guide for fabric selection to guarantee the best results.
Additionally, having the right tools like a printer, ink, and transfer paper is vital for a successful project.
Fabric Selection Guide
Choosing the right fabric is vital for successful custom prints, and having the necessary tools and materials will make the process smooth.
When selecting fabric, consider fabric weight and print quality. Lightweight fabrics like cotton or silk are ideal for intricate prints, while heavier fabrics like canvas or denim are better for bold, sturdy designs. The weight influences how well the fabric holds ink and impacts the final appearance of your print.
Durability and colorfastness are important factors to keep in mind. Resilient fabrics withstand repeated use and washing, guaranteeing your design lasts. Cotton blends, for example, offer both resilience and comfort. Colorfastness ensures that the colors in your print remain vibrant over time. Pre-washing your fabric and using high-quality dyes can enhance color retention.
In addition to fabric, you'll need necessary tools such as fabric scissors, rotary cutters, and measuring tapes to accurately cut your material. A cutting mat can protect your workspace and help maintain straight lines. Don't forget fabric pens for marking and pins for securing your fabric.
Choosing the right materials and tools sets the foundation for your custom fabric prints, guaranteeing professional results.
Printing Equipment Essentials
A high-quality printer specifically designed for fabric is the cornerstone of successful custom fabric printing. To achieve professional results, you'll need to invest in equipment that suits your specific needs. There are a variety of fabric printing equipment options available, including inkjet printers with fabric-friendly inks and screen-printing kits.
For a seamless DIY fabric print setup, start with an inkjet printer that can handle textile inks. These inks are designed to bond with fabric fibers, guaranteeing vibrant and long-lasting prints. Epson and Canon offer reliable models that cater to fabric printing. Make sure your printer can accommodate the thickness and texture of your chosen fabric to avoid jams and misprints.
Next, consider a heat press machine, essential for setting ink and ensuring durability. A heat press offers consistent pressure and temperature, important for professional-grade results. Alternatively, a high-quality iron can suffice for smaller projects.
Don't overlook other essentials like transfer paper, cutting tools, and protective gloves. Transfer paper allows you to precisely place your design on the fabric, while sharp cutting tools ensure clean edges. Protective gloves keep your hands ink-free and prevent smudges.
Designing Your Pattern
Creating your own pattern begins with brainstorming ideas that reflect your personal style and project needs. Think about what inspires you—whether it's nature, geometric shapes, or a favorite piece of art. This initial stage is pivotal for your design inspiration.
Consider color coordination; select hues that complement each other and align with your vision. You might even create a mood board to visualize how different colors and elements work together.
Next, think about the texture of the fabric you'll be using. Different fabrics absorb ink and display patterns uniquely, so choose a material that enhances your design. For instance, a smooth cotton might be perfect for detailed, intricate patterns, while a textured linen could add depth and interest to simpler designs.
Now, let's discuss pattern placement. Will your design be a repeating motif, a large central image, or something entirely different? Sketching out your ideas on paper can help you visualize how the pattern will look on the fabric.
Pay attention to the scale of your pattern to guarantee it doesn't overwhelm the fabric or become lost in its texture. Through careful planning and thoughtful design choices, you'll create a stunning custom fabric print.
Preparing Your Workspace
Organizing your workspace efficiently guarantees a smooth and enjoyable fabric printing experience. Start by setting up a dedicated area where you can focus solely on your project. This space should be well-lit and spacious enough to spread out your materials without feeling cramped.
Begin by organizing your space with essential tools like rulers, scissors, and fabric paints within easy reach. Use containers and shelves to keep everything tidy. A clutter-free environment not only boosts productivity but also minimizes the risk of mistakes.
Next, think about creating inspiration in your workspace. Surround yourself with mood boards, color swatches, and samples of fabric prints you admire. This visual stimulation can spark creativity and keep your design goals in sight.
Consider the ergonomics of your setup. An adjustable chair and a table at the correct height can make a world of difference when you're working for extended periods. Guarantee your fabric is securely positioned, using weights or clips if necessary, to maintain precision.
Methods of Fabric Printing
Immerse yourself in the world of fabric printing by exploring various methods that can bring your custom designs to life. With a bit of creativity and the right techniques, you can transform plain fabric into stunning, personalized pieces.
One popular method is screen printing, where you use a mesh screen to transfer ink onto the fabric. This technique allows for precise control over your pattern design, making it perfect for intricate details and bold color choices.
Another effective method is heat transfer printing. This involves printing your design onto a special transfer paper and then using heat to transfer the ink onto your fabric. It's ideal for DIY projects because it's relatively simple and doesn't require specialized equipment. You can experiment with different color choices to see what works best for your pattern design.
For a more hands-on approach, try stenciling. By cutting out shapes from a stencil sheet and applying fabric paint, you can create unique, repeating patterns. This method gives you the freedom to play with various printing techniques and customize your designs to your heart's content.
Whether you're a novice or an experienced crafter, mastering these methods will elevate your fabric printing skills.
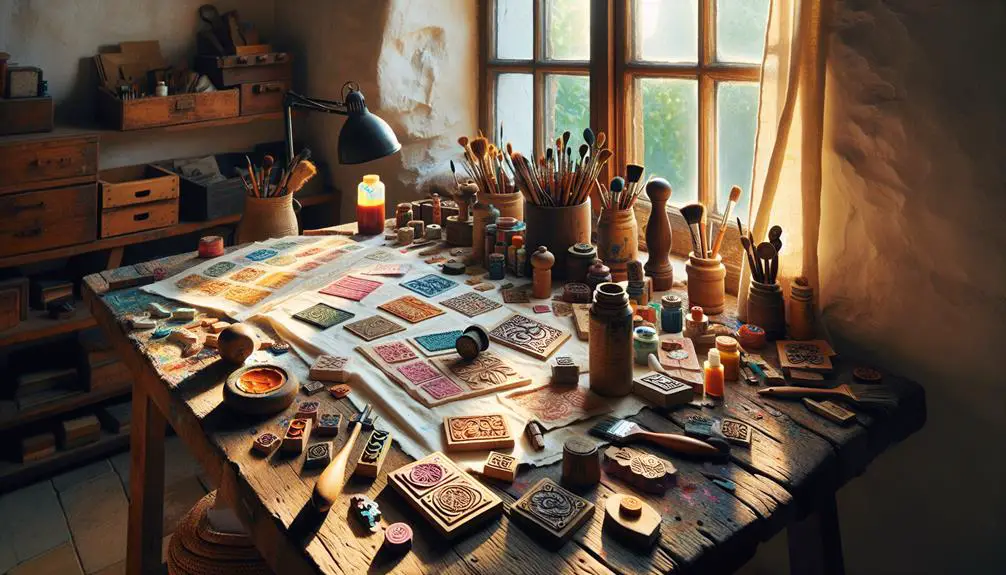
Block Printing Techniques
Adding another layer of creativity to your fabric printing repertoire, block printing offers a hands-on and traditional method that lets you stamp custom designs directly onto fabric.
Start by selecting a carving block, usually made from linoleum or rubber, to create your design. Block carving requires precision, so use sharp carving tools to guarantee clean, crisp lines.
Once your block is ready, focus on color mixing. Customizing your inks allows you to achieve the exact hue you want. Mix primary colors to create a spectrum of shades, and don't hesitate to experiment with different opacities.
When you're satisfied with your colors, evenly apply the ink to the carved block using a brayer.
Next, place your fabric on a flat surface and press the inked block firmly onto it. Apply consistent pressure to ensure the design transfers completely. Lift the block carefully to reveal your print.
Repeat the process to create patterns or unique compositions. Remember, the beauty of block printing lies in its imperfections, giving each piece a distinct, handcrafted feel.
Mastering these techniques will elevate your fabric printing skills, letting you produce professional-quality custom prints right at home.
Screen Printing Basics
Screen printing is a versatile technique that lets you create detailed and repeatable designs on fabric with ease. To start, you'll need to prepare your fabric properly. Make sure it's clean and free from any residues; a quick wash and iron can do wonders. This fabric prep step is essential for making sure the ink adheres well and your design looks professional.
Next, let's talk about setting up your screen. You'll need a screen, a stencil of your design, and some emulsion to transfer the stencil onto the screen. Once your screen is ready, it's time to focus on color mixing. The beauty of screen printing lies in your ability to mix your own inks to get the perfect hue. Use a palette knife to blend different pigments until you achieve your desired shade.
Now, position your screen on your fabric, making sure everything is aligned. Pour a small amount of ink onto the screen and use a squeegee to spread it evenly across the stencil. Lift the screen carefully to reveal your design. If you're doing multiple prints, repeat the process, making sure consistent pressure and ink application for each print.
With practice, your screen printing skills will become second nature.
Heat Transfer Methods
Ever wondered how to get vibrant, photo-quality designs onto fabric without the mess of inks and screens? Heat transfer methods are your answer.
One of the most popular techniques is using a heat press. This device evenly applies both heat and pressure to transfer your design from paper to fabric. If you don't have a heat press, iron on transfers can be an excellent alternative. Just make sure to apply consistent pressure and heat with your household iron.
Dye sublimation is another advanced method ideal for polyester fabrics. It involves printing your design onto special sublimation paper, then using heat to transfer the dye directly into the fabric fibers. The result is a permanent, washable print that won't fade.
Vinyl decals offer another versatile option. You cut your design from heat transfer vinyl (HTV), weed out the unwanted parts, and then use a heat press or iron to transfer the vinyl to your fabric. This method is perfect for bold, solid-color designs.
Mastering these heat transfer methods will elevate your fabric printing projects, allowing you to create professional-quality results right at home.
Engage and start experimenting with these techniques to bring your creative visions to life.
Setting the Ink and Care
Once you've applied your custom print, it's important to set the ink properly to make sure it lasts.
You'll need to use specific heat setting techniques and follow proper washing and drying guidelines.
With the right care, your fabric prints will stay vibrant and durable for a long time.
Heat Setting Techniques
To maintain your custom fabric prints stay vibrant and durable, you'll need to properly heat set the ink using effective techniques and care practices.
Start by making sure you apply proper heat settings. This is essential for ink durability and achieving a professional finish. Set your iron or heat press to the manufacturer's recommended temperature, typically between 300-350°F (148-176°C). Always use a pressing cloth to avoid direct contact between the heat source and the fabric, which can prevent scorching and secure even heat distribution.
Next, master the heat transfer process. Place your fabric on a stable surface and press firmly for the suggested amount of time, usually 3-5 minutes for an iron or 30 seconds for a heat press. Move the iron in small, consistent circles if you're using one. This helps the ink penetrate the fabric fibers, enhancing fabric longevity.
After heat setting, let the fabric cool down completely before handling. This cooling period allows the ink to fully bond with the fabric, making sure that your custom prints withstand wear and tear.
Washing and Drying
How can you keep your custom fabric prints looking fresh and vibrant after washing and drying them? Begin by setting the ink properly. After heat-setting your design, wait 24 hours to make sure the ink fully adheres to the fabric fibers. This step is essential for both color preservation and fabric durability.
When it's time to wash, turn your printed fabric inside out. Use cold water and a gentle detergent to reduce fabric shrinkage. Avoid bleach and harsh chemicals, as they can fade the colors and weaken the fabric over time. Opt for a delicate wash cycle, or better yet, hand wash your items to preserve their quality.
Drying your fabric correctly is just as significant. Air drying is the best method for maintaining fabric care, but if you must use a dryer, select the lowest heat setting. High heat can compromise fabric durability and cause colors to bleed or fade. When air drying, lay the fabric flat to prevent stretching and distortion.
Long-term Fabric Care
Proper long-term fabric care is essential for keeping your custom prints vibrant and intact. After you've invested time and effort in creating your unique designs, you want them to last.
The first step to ensuring longevity is setting the ink correctly. Follow the ink manufacturer's instructions, usually involving heat setting with an iron or a heat press. This process locks in the ink, making it more resistant to washing and fading.
To master fabric preservation, you should store your fabrics properly. Keep them in a cool, dry place away from direct sunlight to prevent fading and deterioration.
When it comes to stain removal, act quickly. Blot, don't rub, to avoid spreading the stain. Use gentle, fabric-safe cleaners to secure restoration without harming the print.
Here are some key practices to maintain your custom fabric prints:
- Store fabrics in breathable garment bags to prevent moisture buildup.
- Avoid harsh substances like bleach that can weaken the fibers and fade the colors.
- Hand wash delicate prints to preserve intricate designs and textures.
- Rotate stored fabrics periodically to prevent creases and wear in folded areas.
Frequently Asked Questions
How Can I Fix Mistakes Made During the Printing Process?
To fix mistakes during the printing process, employ error correction techniques and creative problem solving. Troubleshoot mistakes by examining your setup, adjusting settings, and practicing. These steps will improve printing results and enhance your skills.
What Are Some Eco-Friendly Ink Options for Fabric Printing?
Perchance, you seek eco-friendly ink options? Opt for sustainable materials and non-toxic dyes. Water-based inks are splendid; they're gentle on the fabric and the environment, ensuring your prints are both vibrant and conscientious.
Are There Any Tips for Printing on Stretch Fabrics?
For printing on stretch fabrics, start with proper stretch fabric preparation. Pre-wash the fabric and use stabilizers. Enhance ink adhesion techniques by using stretchable inks and applying heat setting to guarantee durability and flexibility.
How Do I Avoid Fabric Shrinking During the Printing Process?
To avoid fabric shrinking during the printing process, you should pre-treat the fabric by washing and drying it first. This important step helps in preventing warping and guarantees your custom prints stay true to size.
Can I Mix Different Printing Techniques on the Same Fabric?
Think of your fabric as a canvas where different artists collaborate. Yes, you can mix techniques, but guarantee ink compatibility. Design experimentation is key; it's like blending styles to create a masterpiece.