When you encounter frayed edges in your fabric projects, it's crucial to know how to address them effectively. You might find that choosing quality materials and employing specific stitching techniques can make a significant difference. From using zigzag stitches to applying fabric sealants, there are several strategies to consider. But, what if you could also enhance the aesthetic appeal of your work while fixing those imperfections? Understanding the right combination of techniques could be the key to achieving a polished finish. Let's explore the options available to you.
Key Takeaways
- Choose high-quality fabrics and threads to enhance durability and reduce fraying likelihood.
- Apply zigzag stitching or bias tape to secure raw edges and prevent unraveling.
- Use fabric sealants to bond fibers and prevent fraying effectively without sewing.
- Incorporate creative embellishments like patches or decorative stitching to disguise frayed edges.
Understanding Frayed Edges
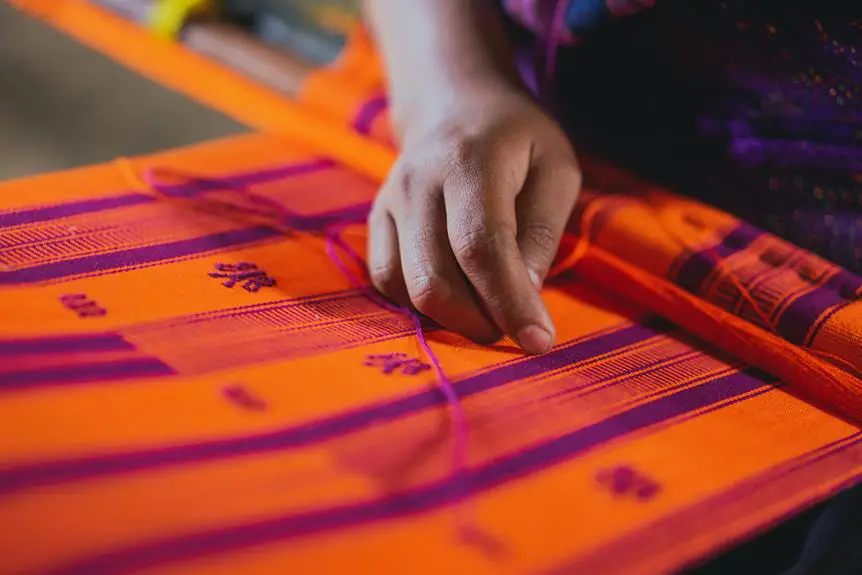
Frayed edges can be a frustrating issue, often signaling wear and tear on your fabric that needs immediate attention. When you notice these frays, it's essential to understand what's causing them. Fabrics can fray due to various factors, including the type of material, the frequency of use, and how you wash or care for them.
Natural fibers like cotton or linen are more prone to fraying compared to synthetic materials like polyester. This happens because natural fibers tend to unravel more easily when they experience stress or friction. If you're using your fabric frequently—like in a well-loved pair of jeans or a favorite tablecloth—you might see frays develop faster.
Additionally, how you treat your fabric plays a significant role. Washing it in hot water or using harsh detergents can weaken the fibers, leading to fraying. Even the way you cut the fabric during sewing can affect its durability. If your edges aren't finished properly, they're more susceptible to fraying over time.
Recognizing these causes helps you take appropriate action and prolong the life of your fabric items.
Preventive Techniques
To keep frayed edges at bay, you should start by choosing quality materials that withstand wear and tear.
Proper stitching techniques also play a crucial role in maintaining the integrity of your fabric.
Choose Quality Materials
How can selecting high-quality materials significantly reduce the chances of frayed edges in your projects? Using top-notch fabrics and threads can make a world of difference. When you invest in durable materials, you're not just enhancing the look of your project; you're also ensuring longevity and resilience against wear and tear.
Here's a quick comparison of materials to help you understand the impact:
| Material Type | Quality Impact | Long-Term Value |
|---|---|---|
| Cotton | Prone to fraying | Moderate lifespan |
| Polyester | Resistant to frays | High durability |
| Silk | Luxurious but fragile | Short lifespan |
| Denim | Strong and sturdy | Very long lifespan |
| Linen | Breathable, fray-resistant | High durability |
Choosing quality materials isn't just about aesthetics; it's about preventing frustration down the line. Imagine completing a beautiful project only to see those ugly frayed edges emerge! By prioritizing quality, you're ensuring that your work stands the test of time, giving you peace of mind and a sense of pride in your creations.
Use Proper Stitching
Using proper stitching techniques can significantly minimize the risk of frayed edges in your projects. Start by selecting the right stitch type for your fabric. For woven materials, a straight stitch usually works well, while knits benefit from a zigzag stitch that allows for stretch without unraveling.
Make sure your thread tension is correctly adjusted. Too tight, and you may cause puckering; too loose, and stitches may not hold. Also, use a shorter stitch length for more stability, particularly along edges.
When you sew, always backstitch at the beginning and end of your seams. This locks the stitches in place, preventing them from unraveling over time. If you're working with fabrics prone to fraying, consider using a double-stitched seam for added security.
Lastly, ensure your sewing machine needle is appropriate for the fabric type. Using the wrong needle can lead to skipped stitches and increased fraying.
Apply Edge Finishes
Applying edge finishes is essential for preventing frayed edges and ensuring your fabric projects maintain a polished look. You have several options to achieve this, depending on the type of fabric and the finished look you desire.
One popular method is to use a zigzag stitch along the raw edges. This stitch prevents the fabric from unraveling, offering a neat and durable finish.
Another effective technique is to apply bias tape. By folding the bias tape over the edge and sewing it in place, you create a clean and professional look while also securing the fabric's edges.
For a truly seamless finish, consider using a serger. A serger trims the fabric while overlocking the edges, making it perfect for knit and stretchy materials.
If you're working with lightweight fabrics, you might also try pinking shears. These special scissors cut the fabric into a zigzag pattern, which helps reduce fraying.
Lastly, don't forget about fabric sealants, which can be applied to the edges to prevent fraying without sewing.
Sewing Techniques
When it comes to tackling frayed edges, sewing techniques can be a game-changer.
You can use the zigzag stitch method to create a secure finish, or apply bias tape for a polished look.
Both options are effective ways to keep your fabric looking neat and tidy.
Zigzag Stitch Method
The zigzag stitch method effectively prevents frayed edges by securing the fabric's raw seams with a flexible, decorative stitch. This technique is simple yet highly effective, making it a go-to for many sewing enthusiasts.
To get started, set your sewing machine to the zigzag stitch option. Adjust the stitch width and length according to your fabric type; a wider stitch works well for thicker materials.
Begin by placing the fabric under the presser foot, ensuring the raw edge aligns with the center of the foot. As you sew, guide the fabric steadily and keep an eye on the zigzag pattern. This stitch wraps around the edge, preventing threads from unraveling while allowing some stretch, which is great for knit fabrics.
If you're working with lightweight materials, you might want to use a narrower stitch to avoid puckering. Once you finish, inspect your seams to ensure they're secure.
The zigzag stitch not only protects your fabric but also adds a decorative touch, enhancing your project's overall look. So, grab your machine and give this method a try—it's a valuable skill to master in your sewing journey!
Bias Tape Application
Using bias tape is an excellent way to finish raw edges, as it provides both a clean look and added durability.
To start, choose a bias tape that complements your fabric. You'll want to cut your fabric edges cleanly before applying the tape. Open the bias tape and align it with the raw edge of your fabric. Pin it in place to prevent slipping.
Next, sew along the inner edge of the bias tape, making sure to catch both the tape and the fabric underneath. You can use a straight stitch or a zigzag stitch, depending on your preference. Once you've stitched all the way around, fold the bias tape over the raw edge, encasing it completely. Pin it again for a more secure hold.
Now, sew along the outer edge of the bias tape, ensuring you're stitching close to the fold. This will give your project a polished finish.
Using Fabric Sealants
Fabric sealants effectively prevent frayed edges by bonding the fibers together, creating a durable finish that withstands wear and tear. When you apply a fabric sealant, you're not just stopping fraying; you're also enhancing the longevity of your fabric. Start by choosing a sealant suitable for your material, whether it's cotton, denim, or synthetic fibers.
Before application, ensure the fabric is clean and dry. Use a small brush or applicator to apply the sealant precisely along the edges. Be generous but avoid saturating the fabric, as too much can cause stiffness. Allow the sealant to dry completely according to the manufacturer's instructions, usually for several hours.
Once dry, you can handle the fabric without worrying about fraying edges. This technique is especially useful for items that undergo frequent washing or heavy use, like tablecloths or clothing.
Creative Embellishments
Incorporating creative embellishments can't only hide frayed edges but also transform your fabric projects into unique art pieces. You'll find various ways to creatively enhance your work, making those imperfections work for you instead of against you.
Start by adding decorative stitching. Use contrasting thread colors to create eye-catching patterns that draw attention away from any fraying. If you're into hand sewing, consider techniques like embroidery or sashiko, which can add texture and visual interest.
You might also explore the use of fabric patches. Choose fun or thematic patches that resonate with your style. Sew them over frayed edges to create a bold statement. Alternatively, fabric paint can help you cover up those pesky edges while adding a splash of color.
Don't overlook the power of ribbon or lace trim. Sewing a beautiful border along the edges can add elegance and distract from fraying. Finally, buttons or beads can serve as delightful accents, allowing you to personalize your projects further.
Repair Methods
Repairing frayed edges can be a simple yet effective way to extend the life of your fabric projects and maintain their beauty. Start by trimming any loose threads to create a clean edge. You can then apply a fabric glue or fray check solution along the edge to prevent further unraveling. Just a small amount will do—too much might create a stiff area.
If you prefer a more durable option, consider sewing the frayed edge. Use a zigzag stitch or a straight stitch along the edge to secure the fabric. This method not only prevents fraying but also gives a professional finish. For thicker fabrics, a serger can be a great investment, as it trims and finishes the edge in one step.
For delicate materials, you might want to try a bias tape or a ribbon to cover the frayed edge. Simply sew it over the damaged area for added strength and style.
Lastly, if the fraying is extensive, patching the area with a coordinating fabric can add a unique touch while reinforcing the frayed section. By using these repair methods, you'll keep your projects looking their best for years to come.
Frequently Asked Questions
What Types of Fabrics Fray the Most Easily?
You'll find fabrics like cotton, silk, and chiffon fray the most easily. Their loose weaves and delicate fibers tend to unravel quickly, especially when cut or handled frequently. Understanding this helps in choosing the right materials.
Can Frayed Edges Be Prevented in Knitted Items?
Yes, you can prevent frayed edges in knitted items by using techniques like a tight cast-off, adding a border, or using a yarn that's less prone to fraying. It keeps your projects looking neat and polished.
How Can I Identify Low-Quality Fabric That Frays?
To identify low-quality fabric that frays, check for loose threads, uneven weaves, and rough textures. If it feels flimsy or shows signs of wear easily, it's likely not durable enough for long-term use.
Are There Specialized Tools for Dealing With Frayed Edges?
Yes, there are specialized tools for dealing with frayed edges. You can use pinking shears, seam sealers, or fabric adhesives to prevent further fraying. These tools help maintain your fabric's integrity and enhance its appearance.
Is It Possible to Recycle Fabric With Frayed Edges?
Yes, you can recycle fabric with frayed edges! Many textile recycling centers accept damaged fabrics. Just check local guidelines to ensure they'll take your items, and you'll contribute to sustainable practices while decluttering your space.