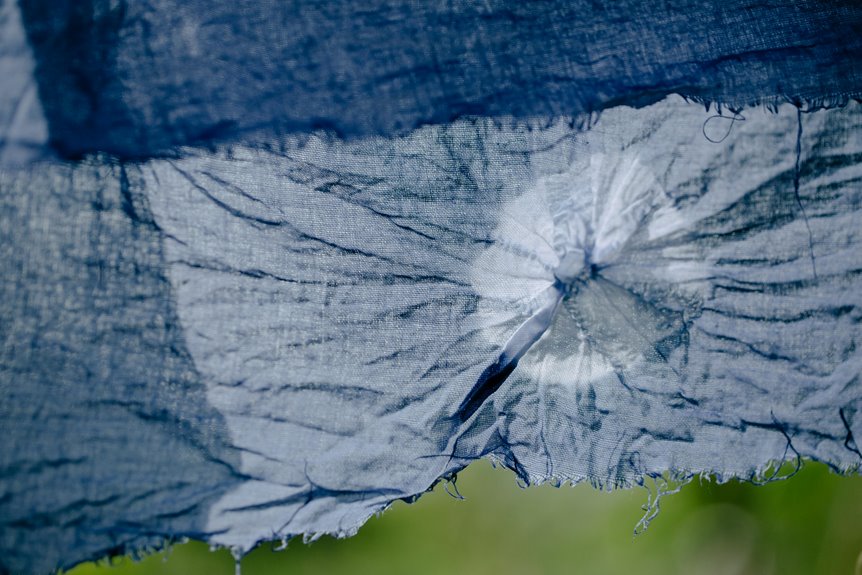
To create vibrant, symmetrical tie-dye, focus on precise folding techniques like the accordion fold for sharp lines, the spiral fold for classic swirls, the mandala fold for balanced circles, and the triangle fold for bold shapes. Secure your fabric snugly with rubber bands to prevent color bleed, and apply dye carefully to keep colors vivid and controlled. Mastering these methods sets you up for stunning designs, and exploring more will ease your journey toward flawless tie-dye artistry.
Key Takeaways
- Use the Accordion Fold Method for crisp, even folds that create balanced, symmetrical line patterns.
- Employ the Spiral Fold Technique by twisting fabric into a disk for classic, circular swirl designs.
- Apply the Mandala Fold Technique to form wedge-shaped sections for evenly distributed, radial dye patterns.
- Utilize the Triangle Fold Technique to achieve layered, triangular symmetry with precise corner alignment.
- Secure folds tightly with rubber bands to maintain shape and prevent color bleeding for sharp, clean designs.
Understanding the Importance of Folding in Tie-Dye
Although many focus on color choices, folding plays an essential role in tie-dye designs because it determines the pattern’s structure and symmetry.
When you fold your fabric, you create the blueprint for how the dye will interact with the material. Proper folding controls the areas that absorb more dye and those that resist it, shaping the final design.
If you want your patterns to be balanced and visually pleasing, you must pay close attention to how you fold. Uneven or random folds can lead to unpredictable results, while precise folds create harmony and repetition.
Accordion Fold Method for Crisp Lines
You’ll start the accordion fold by making precise, even folds back and forth like a paper fan.
Following a clear step-by-step process helps guarantee your lines stay crisp and well-defined.
Step-by-Step Folding Process
Several clear steps will guide you through the accordion fold method, which produces sharp, crisp lines in your tie-dye design. Start by laying your fabric flat, then fold it lengthwise into a long strip. Next, fold the strip back and forth in equal sections, like an accordion. Press firmly along each fold to create sharp creases. Finally, secure the folded piece with rubber bands before applying dye.
| Step | Action |
|---|---|
| 1 | Lay fabric flat |
| 2 | Fold lengthwise into strip |
| 3 | Accordion fold in equal parts |
| 4 | Press folds & secure with bands |
Following these steps will help you achieve the crisp, symmetrical lines characteristic of this technique.
Tips for Even Creases
Three simple habits can make a big difference when creating even creases in the accordion fold method.
First, always start with a flat, clean surface to lay your fabric. This prevents unwanted wrinkles that can distort your folds.
Second, measure or visually estimate equal widths before folding to keep the creases uniform. Using a ruler or straight edge helps if you want precise lines.
Third, press firmly along each fold with your fingers or a bone folder to sharpen the creases. Don’t rush—taking your time guarantees crisp, consistent lines.
Remember, even creases are the backbone of symmetrical tie-dye patterns, so practicing these habits will elevate your designs.
With care and attention, your accordion folds will set the stage for stunning, balanced tie-dye results.
Spiral Fold Technique for Classic Swirls
Although it may seem complex at first, mastering the spiral fold technique lets you create those iconic, vibrant swirls that define classic tie-dye designs.
Start by laying your fabric flat and pinching the center point where you want the swirl to begin. Twist that point tightly in a circular motion, spiraling the fabric around itself until it forms a compact, flat disk.
Secure the folded disk with rubber bands, dividing it into wedge-shaped sections like pie slices. These segments help you apply different dye colors precisely, enhancing the swirl effect.
When you dye and unfold the fabric, the colors blend beautifully, creating that classic spiral pattern. With practice, this technique becomes quick and intuitive, giving your tie-dye projects a timeless, eye-catching look.
Mandala Fold for Circular Symmetry
Once you’ve mastered the spiral fold, you can explore the mandala fold to create striking circular symmetry in your designs.
Start by folding your fabric in half, then in half again to form a square. Next, fold it into a triangle repeatedly until you have a small wedge shape.
Begin by folding your fabric twice to form a square, then keep folding into a triangle until you reach a small wedge.
Pinch the pointed end and secure it with rubber bands at intervals, creating distinct sections for dye application. This fold results in a beautifully balanced, circular pattern reminiscent of mandalas.
Apply dye carefully on each segment to highlight the symmetry. When you unfold, you’ll reveal a vibrant, evenly spaced design that radiates from the center.
The mandala fold is perfect when you want a detailed, harmonious pattern with precise repetition around a central point.
Triangle Fold for Bold Geometric Shapes
Before you start folding, make sure your fabric is smooth and damp for the best results.
Follow each step carefully to create sharp triangle folds that form bold geometric shapes.
To get crisp lines, press firmly and keep your folds tight throughout the process.
Preparing Fabric for Folding
To create bold geometric shapes with your tie-dye, start by preparing your fabric using the triangle fold technique. First, verify your fabric is clean and damp; this helps the dye penetrate evenly.
Lay the fabric flat on a smooth surface, smoothing out wrinkles to maintain sharp fold lines. Next, align the edges carefully to form precise triangles when folding.
Keep these tips in mind as you prepare:
- Use a fabric that’s lightweight but sturdy enough to hold crisp folds.
- Avoid overly thick or heavy materials that might resist sharp creases.
- Pre-wash your fabric to remove sizing or chemicals that could interfere with dye absorption.
These steps set the foundation for striking, symmetrical patterns in your tie-dye project.
Step-by-Step Triangle Fold
Although folding a perfect triangle might seem tricky at first, you’ll find it becomes second nature with practice.
Start by laying your fabric flat and folding it diagonally to form a large triangle. Smooth out any wrinkles to keep the edges sharp.
Next, fold this triangle in half, aligning the corners precisely. Then, continue folding the triangle into smaller triangles by bringing the pointed ends toward the base, depending on how bold and intricate you want your design.
Secure the folds tightly with rubber bands to hold the shape during dyeing. This method creates bold, geometric patterns, perfect for symmetrical tie-dye.
Tips for Crisp Lines
Mastering the triangle fold sets a strong foundation, but achieving crisp lines takes careful attention to detail. To make your bold geometric shapes stand out, focus on precision during folding and dye application.
First, guarantee each fold is sharply creased to prevent dye from bleeding across edges. Then, tightly bind the fabric with rubber bands or strings to keep it secure throughout the dyeing process. Finally, apply dye carefully along the fold lines, avoiding oversaturation that can blur boundaries.
- Use a bone folder or similar tool to press sharp creases.
- Double-check symmetry before binding to keep shapes uniform.
- Apply dye with a squeeze bottle for controlled, precise coverage.
These tips will help your triangle folds create striking, clean designs every time.
Heart-Shaped Fold for Unique Patterns
Creating a heart-shaped fold gives your tie-dye project a charming and distinctive look. Start by folding your fabric in half diagonally to form a triangle. Then, fold the triangle in half again. Next, use your fingers to shape the top edges into a rounded heart form before securing it with rubber bands. This folding technique guarantees symmetrical heart patterns when you apply dye.
| Step | Description |
|---|---|
| Fold Diagonally | Fold fabric corner to corner |
| Fold Again | Create a smaller triangle |
| Shape & Secure | Round edges into a heart shape and tie |
Tips for Securing Fabric and Dye Application
When you secure your fabric tightly with rubber bands, you control how the dye spreads and create crisp, defined patterns. Proper tension prevents colors from bleeding into each other and guarantees your symmetrical design stays sharp. You want the bands snug but not so tight that the fabric tears.
Also, consider wrapping your fabric in plastic wrap to keep the dye moist and vibrant during the setting process.
Here are some tips to improve your securing and dye application:
- Use multiple rubber bands to section your fabric precisely and maintain symmetry.
- Apply dye with squeeze bottles for controlled, targeted coloring.
- Rotate your piece while dyeing to distribute colors evenly and avoid pooling.
These steps help you achieve professional-looking tie-dye results every time.
Frequently Asked Questions
What Types of Fabric Work Best for Symmetrical Tie-Dye?
You’ll want to choose natural fabrics like cotton, rayon, or silk for symmetrical tie-dye. These fibers absorb dye well, giving vibrant, even colors. Avoid synthetics since they don’t hold dye as effectively.
How Long Should Dyed Fabric Dry Before Unfolding?
You’ll feel like waiting an eternity, but let your dyed fabric dry for at least 6 to 8 hours before unfolding. This guarantees vibrant colors set properly without smudging, giving you that perfect, eye-popping design.
Can I Use Natural Dyes for These Folding Techniques?
Yes, you can use natural dyes with these folding techniques. They react well with fabric folds, creating unique patterns. Just remember, natural dyes might require longer setting and drying times to achieve vibrant colors.
What Are the Best Tools for Applying Dye Evenly?
When Jamie used squeeze bottles, their colors stayed vibrant and even. You’ll want squeeze bottles or spray bottles for precise control, ensuring your dye spreads smoothly without oversaturating, giving you consistent, professional-looking tie-dye results every time.
How to Fix Mistakes or Uneven Dye Patterns?
If you spot uneven dye, you can reapply dye to the lighter areas or use a spray bottle for better coverage. For mistakes, try rinsing immediately or use bleach carefully to lighten unwanted spots before fixing colors.