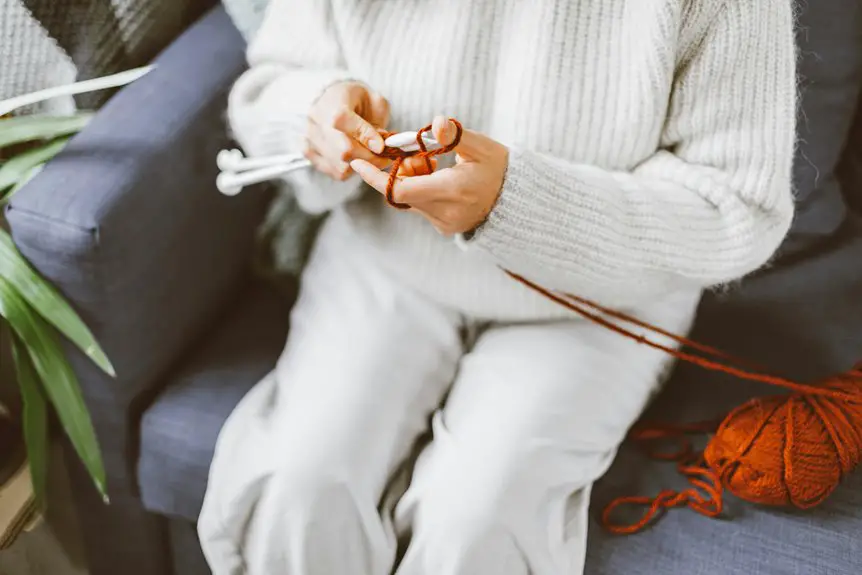
To create the perfect selvedge stitch, slip the first stitch purlwise each row and knit the last stitch for a clean edge that prevents curling and unraveling. Keep your tension consistent and avoid knitting edges too tight to maintain neatness and ease seaming. Choose from types like slip-stitch or garter edge to suit your project’s needs. Mastering these basics will improve your knitwear’s durability and finish, with more tips and advanced techniques waiting for you.
Key Takeaways
- Slip the first stitch purlwise and knit the last stitch of every row to create a neat, firm selvedge edge.
- Maintain consistent tension on edge stitches to prevent curling or tight, uneven edges.
- Choose an edge stitch pattern like slip-stitch or garter stitch to suit your project’s desired look and function.
- Practice a relaxed but steady grip on yarn and needles to ensure uniformity in selvedge stitches.
- Regularly inspect edges during knitting to catch and correct tension or stitch issues early.
Understanding the Purpose of Selvedge Stitches
Selvedge stitches create clean, sturdy edges that make your knitting easier to handle and finish. When you work these edge stitches consistently, they prevent your fabric from curling or unraveling, giving your project a polished look.
You’ll find it simpler to seam pieces together because the edges stay neat and stable. Plus, selvedge stitches act as a guide, helping you maintain even tension throughout your rows. Without them, your edges might become uneven or loose, which can affect the overall shape and durability of your work.
Common Types of Selvedge Stitches
Mastering the purpose of edge stitches lays the groundwork for choosing the right style for your project. You’ll find several common selvedge stitches to fit different needs.
The slip-stitch edge, where you slip the first stitch of every row, creates a neat, firm edge that’s easy to pick up later. The garter stitch edge involves knitting the first and last few stitches, offering a stretchy, stable border.
The chain edge forms a decorative, flexible border by slipping stitches and knitting into the slipped stitches on the return row. Finally, the seed stitch edge alternates knit and purl stitches to produce a textured, non-curling edge.
Step-by-Step Guide to the Basic Selvedge Stitch
To create a clean, professional edge, you’ll start by slipping the first stitch of every row purlwise without knitting it. This simple technique forms the foundation of the basic selvedge stitch, giving your project neat edges.
Follow these steps for success:
- Slip the first stitch purlwise at the beginning of each row.
- Knit all remaining stitches until one stitch remains.
- Knit the last stitch on every row.
- Keep consistent tension throughout the edge stitches.
- Repeat these steps for every row in your project.
Techniques for a Tighter and Neater Edge
To create a tighter and neater edge, you’ll want to choose the right edge stitch patterns that suit your project.
It’s also important to keep your tension consistent throughout each row.
Mastering these techniques will give your selvedge a clean, professional finish.
Choosing Edge Stitch Patterns
Although selvedge stitches may seem like a minor detail, choosing the right edge stitch pattern can greatly improve the overall look and durability of your knitting.
You want an edge that’s neat, stable, and easy to work with when seaming or picking up stitches. Different patterns offer varying levels of firmness and flexibility, so selecting one that fits your project is key.
Consider these popular edge stitch patterns:
- Slip stitch edge for a clean, firm border
- Garter stitch edge for extra elasticity
- Seed stitch edge to prevent curling
- Ribbed edge for a stretchy finish
- Twisted stitch edge for a polished look
Try out these options to find the perfect balance between function and style in your selvedge.
Managing Tension Consistency
When you maintain consistent tension throughout your selvedge stitches, your edges will look tighter and more polished.
To achieve this, focus on how you hold your yarn and needles; keep your grip relaxed but steady. Avoid pulling the yarn too tightly or letting it sag, as uneven tension creates wavy or loose edges.
Practice knitting your edge stitches deliberately—whether slipping the first stitch or knitting the last—while monitoring your yarn’s tension. If you notice your edges are too tight, loosen your grip slightly. Conversely, if they’re too loose, gently tighten it.
Consistent wrist and hand movements also help maintain even tension. With patience and practice, managing tension will become second nature, giving your selvedge stitches that flawless, professional finish.
How Selvedge Stitches Improve Seaming and Finishing
When you use selvedge stitches, your seams become stronger and last longer.
They make it easier to line up edges perfectly, so your pieces fit together without gaps or puckers.
Plus, selvedge stitches give your project a clean, professional finish every time.
Enhancing Seam Durability
Because selvedge stitches create a firm, stable edge, they greatly enhance the durability of your seams. When you use selvedge stitches, your edges resist stretching and fraying, making your seams last longer.
This stability helps your finished item hold its shape through wear and washing. You’ll find sewing pieces together becomes easier and tidier, which directly improves the seam’s strength. Plus, selvedge edges reduce the chance of puckering or gaps along seams, giving your project a professional finish.
Here’s what selvedge stitches do for seam durability:
- Provide a strong foundation for stitching seams
- Prevent edge curling and fraying
- Maintain fabric shape under tension
- Improve stitch evenness along seams
- Enhance resistance to wear over time
Simplifying Edge Alignment
Although aligning edges can be tricky, selvedge stitches make the process much easier by providing a clear, stable border to work with.
When you seam pieces together, these defined edges help you match stitches precisely, reducing frustration and guesswork. You’ll notice your pieces fit together more smoothly, which speeds up sewing and gives your project a polished look.
Selvedge stitches also prevent edges from stretching or curling, so you maintain consistent dimensions while working. This stability means your seams stay neat and even, making your finishing touch a breeze.
Creating Neat Finishes
Selvedge stitches don’t just help you align edges; they also play a key role in giving your project a clean, professional finish. When you use selvedge stitches, your seams become easier to join, and the edges stay sturdy without curling or stretching. This means your final piece looks polished and holds its shape longer.
Plus, neat selvedge edges simplify blocking and weaving in ends, making your finishing touches quicker and more satisfying.
Here’s how selvedge stitches improve your finishing process:
- Provide consistent edge tension for smooth seams
- Prevent fabric distortion during seaming
- Make it easier to pick up stitches along edges
- Enhance durability by reinforcing edges
- Create a visually appealing border that frames your work
Using selvedge stitches, you guarantee every detail shines in your finished knit.
Troubleshooting Common Selvedge Stitch Issues
When you notice uneven edges or loose stitches along your knitting project, it’s often due to common mistakes in creating the selvedge stitch.
First, check your tension; inconsistent tension can cause wavy or tight edges. Try to keep your yarn flow steady, especially when slipping the first stitch of each row.
If your edges look too loose, consider slipping the first stitch knitwise instead of purlwise to create a firmer edge. Dropped stitches at the edge can also distort your border—always double-check you’re catching these correctly.
Finally, avoid knitting the last stitch too tightly, which can pull the edge unevenly. By adjusting these small details, you’ll fix most selvedge stitch issues and achieve clean, polished edges every time.
Advanced Selvedge Stitch Variations for Experienced Knitters
If you’re ready to elevate your knitting, exploring advanced selvedge stitch variations can add both style and functionality to your edges.
These techniques not only enhance appearance but also improve edge durability and ease of seaming. As an experienced knitter, you can experiment with stitches that create unique textures and shapes.
Try incorporating these advanced selvedge options into your projects:
- Tubular Selvedge: Creates a rounded, elastic edge ideal for garments.
- Slip-Stitch Selvedge: Produces a neat, firm edge with minimal bulk.
- I-Cord Selvedge: Adds a decorative, rope-like finish.
- Garter Stitch Selvedge: Offers a stretchy and stable edge.
- Double Selvedge Stitch: Strengthens edges for heavy-use items.
Mastering these will give your knitting a professional touch.
Tips for Maintaining Consistency in Selvedge Stitches Throughout Your Project
Maintaining even tension and stitch technique throughout your project guarantees your selvedge edges stay consistent and neat. To do this, focus on how tightly you hold your yarn—keep it steady but not too tight.
Practice the selvedge stitch separately before starting your main work to develop muscle memory. Always use the same method for your edge stitches, whether slipping or knitting, to avoid unevenness.
Check your work regularly; spotting inconsistencies early lets you adjust quickly. If you notice your edges curling or tightening, relax your grip slightly.
Frequently Asked Questions
Can Selvedge Stitches Affect the Overall Gauge of My Knitting?
Yes, selvedge stitches can affect your knitting gauge slightly since they add edge tension. You’ll want to keep them consistent to maintain even gauge, ensuring your project’s size and shape turn out just right.
What Yarn Types Work Best for Selvedge Stitches?
Soft, sturdy stitches shine! You’ll want yarns like wool, alpaca, or cotton that handle handling well and hold their shape. Avoid slippery synthetics; they can make your selvedge sloppy and less secure at edges.
How Do Selvedge Stitches Behave in Circular Knitting?
In circular knitting, selvedge stitches don’t form traditional edges since you knit continuously in rounds. You’ll need to adapt techniques to create neat borders, often by incorporating stitch patterns or slip stitches at round beginnings.
Can I Use Selvedge Stitches in Lace Patterns?
You can use selvedge stitches in lace patterns to maintain neat edges, but you’ll need to adapt the stitch count and pattern repeats carefully so the lace design flows smoothly without disrupting the selvedge structure.
Are Selvedge Stitches Suitable for Machine Knitting?
Imagine crisp edges framing your fabric like a picture frame. You can use selvedge stitches in machine knitting, but you’ll need to adjust tension and technique to keep those edges neat and prevent curling or distortion.